


43
2.2 List Box
This box appears only in the opening screen. The box displays an initial list of configurable items in the menu you
selected.
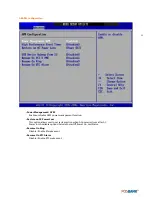
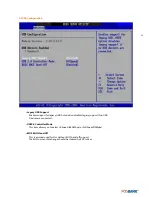
2.3 Sub-menu
Note that a right pointer symbol () appears to the left of certain fields. This pointer indicates that you can display a
sub-menu from this field. A sub-menu contains additional options for a field parameter. To display a sub-menu,
move the highlight to the field and press <Enter>. The sub-menu appears. Use the legend keys to enter valuesand
move from field to field within a sub-menu as you would within a menu. Use the <Esc> key to return to the main
menu.
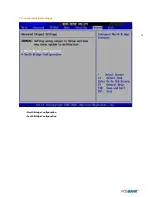
Take some time to familiarize yourself with the legend keys and their corresponding functions. Practicenavigating
through the various menus and submenus. If you accidentally make unwanted changes to any of the fields, press
<F6> to load the fail-safe default values. While moving around through the Setup program, note that
explanations appear in the Item Specific Help window located to the right of each menu. This window displays
the help text for the currently highlighted field.
Summary of Contents for AnyShop Eco
Page 1: ...Point of sale system AnyShop Eco User s manual PBUM 017E Rev004 130530...
Page 16: ...16 Rear view 1 USB port 2 I O port 3 Customer display CDP optional 4 HDD 5 Stand 3 4 1 1 2 5...
Page 17: ...17 Standard I O port 1 2...
Page 34: ...34 3 Side USB Board Side USB Board Connector Description A To Motherboard USB A...
Page 35: ...35 4 Power Switch Board Power Switch Board Connector Description A Power switch A...
Page 58: ...58 3 13Advanced Chipset Settings North Bridge Configuration South Bridge Configuration...
Page 67: ...67 Main Unit Step 3 Detach main unit from stand Step 4 Main unit is now detached...


