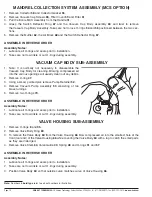
MANDREL COLLECTION SYSTEM ASSEMBLY (MCS OPTION)
1. Remove Collector
58
and Collector Gasket
55
.
2. Remove Vacuum Cap Screws
65
, Filter Cover
59
and Filter
61
.
3. Pull the Entire MCS Assembly from the Handle
31
.
4. Grasp the Switch Deflector Ring
67
and the Vacuum Cap Body Assembly
63
and twist to remove
the Vacuum Cap Body Assembly. Take care not to lose O-rings
54
and
56
positioned between the two sec-
tions.
5. Remove the Muffler
62
, the Air Block
68
and the Switch Deflector Ring
67
.
ASSEMBLE IN REVERSE ORDER
Assembly Notes:
1. Lubricate all O-rings and seals prior to installation.
2. Take care not to wrinkle or cut O-rings during assembly.
VACUUM CAP BODY SUB-ASSEMBLY
1. Note: It is normally not necessary to disassemble the
Vacuum Cap Body for cleaning. Blowing compressed air
into the various openings will usually clean out any debris.
2. Remove O-ring
47
.
3. Using a small, pointed pick remove Pump Retainer
52
.
4. Remove Vacuum Pump Assembly
53
consisting of two
brass turnings.
5. Remove two O-rings
70
.
ASSEMBLE IN REVERSE ORDER
Assembly Notes:
1. Lubricate all O-rings and seals prior to installation.
2. Take care not to wrinkle or cut O-rings during assembly.
VALVE HOUSING SUB-ASSEMBLY
1. Remove O-rings
8
and
35
.
2. Remove Valve Body Ring
69
.
3. To remove the Valve Body
60
from the Valve Housing
66
blow compressed air into the smallest hole at the
front (tool end) of the Valve Housing
66
while covering the Valve Body
60
with a rag to catch the small parts
as they are dislodged.
4. Remove Valve Stem
64
, Valve Guide
49
, Spring
48
and O-rings
51
and
57
.
ASSEMBLE IN REVERSE ORDER
Assembly Notes:
1. Lubricate all O-rings and seals prior to installation.
2. Take care not to wrinkle or cut O-rings during assembly.
3. Position Valve Body
60
so that outside curve matches curve of Valve Housing
66
.
Page 14
EMHART TEKNOLOGIES
• 50 Shelton Technology Center, Shelton, CT 06484 • Tel. (877) EMHART1 • Fax: (800) 225-5614 •
www.emhart.com
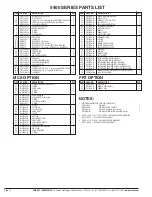
Note:
Numbers in
bold type
refer to call out numbers in illustration.


