background image


Logging in to the eDoc Manager as administrator 

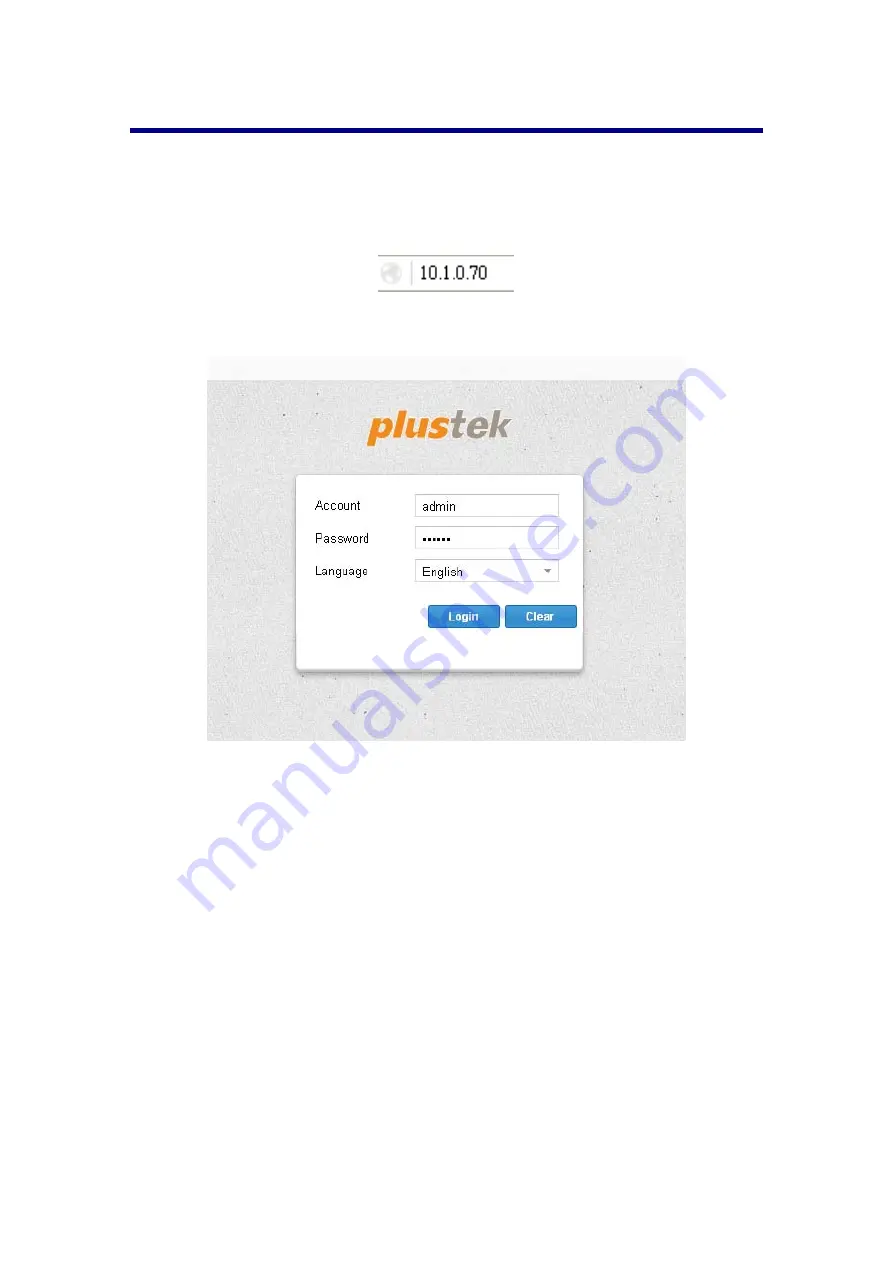
You need to log in as administrator in order to configure all of eDoc Manager’s 

features. 

1.  Open the web browser of your choice and enter the eDoc Manager’s IP address in 

the address bar. 


2.  The eDoc Manager’s login page will open. Enter 

admin

 as 

Account 

and 

123456


as 

Password

 and select your desired user interface 

Language


3.  Click on the 

Login

 button to log in to the eDoc Manager. 

4.  After logging in, the 

Network

 section > 

IP settings

 tab will be shown. You can 

now click on any other tab or section to navigate and configure the eDoc Manager. 


19

Summary of Contents for eDoc N600

Page 1: ...Setup Configuration Technical Guides ...

Page 2: ...al are subject to change without notice Environmental Information The product is designed and produced to achieve sustainable environmental improvement We strive to produce products in compliance with global environmental standards Please consult your local authorities for proper disposal The product packaging can be recycled Attention to recycling For EU countries only Protect your environment Th...

Page 3: ... user 16 Logging out of the eDoc Manager 17 Chapter III Advanced eDoc Manager Configuration 18 Logging in to the eDoc Manager as administrator 19 Network settings 20 IP settings 20 Dynamic domain service settings 22 External mail settings 25 Information Management 26 Account management 28 Users 28 Groups 32 Space allocation 33 Device Management 34 System management 34 System management 34 Log mana...

Page 4: ...g for files 71 Chapter V Using the eDoc Cabinet 72 eDoc Cabinet installation requirements 72 Installing the eDoc Cabinet 73 Logging in to the eDoc Manager with eDoc Cabinet 73 Viewing folder links 75 Creating and editing folder links 76 Name 76 Status 76 Color 76 Synchronization mode 76 Manual or Automatic 77 Schedule 77 Local folder 77 Server folder 78 Using your local folders 78 Uploading and do...

Page 5: ...ntroduction section of this manual provides an outline of this manual and describes the minimum system requirements the main features and box contents Chapter I describes how to set up the eDoc Manager in your network environment Chapter II describes how to log in to the eDoc Manager interface Chapter III provides you with plenty of illustrations and information about advanced configuration of the...

Page 6: ...r during emergencies 3 Keep the eDoc Manager protected from liquids 4 Do not install the device near any heat sources such as radiators or other devices Install the device only in environments that meet the factory specifications 5 Ensure that the eDoc Manager is properly secured to a stable surface Major shocks jolts and or excessive vibration may damage the sensitive electronics inside the eDoc ...

Page 7: ...icates the requirement NOT to dispose the equipment as unsorted municipal waste but use the return and collection systems according to local law If the batteries accumulators and button cells included with this equipment display the chemical symbol Hg Cd or Pb then it means that the battery has a heavy metal content of more than 0 0005 Mercury or more than 0 002 Cadmium or more than 0 004 Lead Min...

Page 8: ...amaged or missing please contact the vendor where you purchased your eDoc Manager or our customer service directly 1 eDoc Manager 2 Power Cord 3 AC Adapter 4 Installation CD 5 Quick Guide 6 Hard Disk Screws x4 3 Save the box and packing materials in case you need to transport this NVR in the future The product packaging can be recycled 4 ...

Page 9: ...tem LED green indicates system operating normally 4 Network LED green indicates working network connection 5 SATA HDD enclosure supports 3 5 drives RAID 1 configuration 6 Reset button hole 7 RJ 45 Ethernet port 8 Ventilation openings 9 DC Jack 5 ...

Page 10: ...efore you power on the eDoc Manager The eDoc Manager supports SATA interface 3 5 inch hard disk and you can choose to install one or two hard disks Before you install the hard disk drive please backup the data stored in the hard disk drive if there is any After the installation is completed the eDoc Manager will automatically format the hard disk drive It takes time to format the hard disk drive F...

Page 11: ...Doc Manager Plug the other end of the power cable into a standard AC power outlet After the eDoc Manager has booted it will beep two times and the System and Network LEDs will turn on green to indicate that the eDoc Manager has successfully booted and established a network connection 3 Connect a PC or Laptop to the Switch s LAN port 7 ...

Page 12: ...eDoc Manager After setting up the eDoc Manager in your network there are a few settings you need to take care of as administrator This chapter will guide you through connecting to the eDoc Manager and configuring the most basic settings 8 ...

Page 13: ...drive program Launch the eDoc Quick Link program from the shortcut from your desktop 1 Click on the Search eDoc button to search the connected eDoc Manager in the same network segment The display information includes Server name IP status IP address Status eDoc version firmware version Mac address and UDID The Status column indicates the status of the eDoc Manager no install means it is the first ...

Page 14: ...on you have to enter the IP address Subnet mask Gateway and DNS server for the eDoc Manager to use 4 The Status column will show no install when you install the eDoc Manager for the first time Click on the Connect to eDoc button to install the eDoc Manager Enter admin as your user name 123456 as your password and click Login 10 ...

Page 15: ...5 Click on the Install button to start the installation process 6 Click on the Next button 11 ...

Page 16: ...elect Upload from your computer option and load the eDoc_image_1 x x tar file from the installation DVD for the installation Click on the Next button 8 The Confirm dialog pop ups click on the Yes button 12 ...

Page 17: ...ring the eDoc Manager for the first time Before the eDoc Manager can be used in your network environment there are some settings on the administrator side of things to take care of in addition to creating the necessary user accounts and groups The following section describes the minimum actions you should perform as administrator to get the eDoc Manager up and running and ready for your users Logg...

Page 18: ...the eDoc Manager s default connection method of obtaining an IP address from a DHCP server If you do wish to use DHCP as connection method skip this part 1 Open the IP settings page by clicking on Network settings on the left panel then clicking on the IP settings tab 2a If you select static from the Connection method drop down list enter the IP address Subnet mask Default gateway and Preferred DN...

Page 19: ...sers you need to create user accounts for them The eDoc Manager provides some pre defined settings so you only need to fill in the most basic information when creating user accounts The users can then modify the pre defined settings by themselves after they log in to their accounts 1 Open the Users page by clicking on Account management on the left panel then clicking on the Users tab 2 Click on t...

Page 20: ...ount Logging in to the eDoc Manager as user Now that you know your eDoc Manager s IP address and have created a couple of user accounts the core functions are ready to be used by your users The following steps describe how to log on to the eDoc Manager as a user and change the password 1 Open the web browser of your choice and enter the eDoc Manager s IP address in the address bar 2 The eDoc Manag...

Page 21: ...ome button in the upper right corner of the eDoc Manager interface to return to the main interface Logging out of the eDoc Manager To log out of the eDoc Manager click on the Log out button at the top right corner of the eDoc Manager interface Attention Please do NOT click on the Close button of your browser to exit the eDoc Manager Clicking on the Close button will not log you out 17 ...

Page 22: ...to the eDoc Manager as administrator and configure the features according to your requirements The eDoc Manager has 2 predefined administrator accounts one with full access to all features admin and one with only access to the Account management features admin2 This chapter will guide you through all available settings as administrator with full access 18 ...

Page 23: ... Manager s IP address in the address bar 2 The eDoc Manager s login page will open Enter admin as Account and 123456 as Password and select your desired user interface Language 3 Click on the Login button to log in to the eDoc Manager 4 After logging in the Network section IP settings tab will be shown You can now click on any other tab or section to navigate and configure the eDoc Manager 19 ...

Page 24: ... eDoc Manager can be accessed by your users IP settings On this tab you can configure how the eDoc Manager connects to your network environment and in turn how it can be accessed by your users Click on the Apply button in the bottom right part of the tab to save any changes Attention If you do not know the correct connection information please consult your network administrator Entering the wrong ...

Page 25: ... IP address the eDoc Manager should use You can then use this IP address to connect to the eDoc Manager when inside the same network environment Subnet mask Enter the subnet mask the eDoc Manager should use Default gateway Enter the default gateway the eDoc Manager should use to access the Internet Preferred DNS server Enter the preferred DNS server the eDoc Manager should use 21 ...

Page 26: ...if you do not know the new IP address Plustek therefore provides a free dynamic DNS service you can use to overcome this issue You can also use this service so that your users can use an easy to remember address instead of a nondescript IP address to connect to the eDoc Manager Click on the Apply button in the bottom right part of the tab to save any changes Attention Before you can use our free P...

Page 27: ...PlusNet password you used to register your host name with Update time seconds Enter the desired interval between 30 and 1200 to update the host information to the DNS name server Status The status of the dynamic DNS DDNS service will be shown here It will be updated when you click on the Apply button 23 ...

Page 28: ...to the eDoc Manager The Share by link function will also use the FQDN to generate links The domain name should be simple but sufficiently unique so that it is easy to remember but not in conflict with any existing domain You may have to configure port forwarding on your router firewall first before the eDoc Manager can be accessed from outside 24 ...

Page 29: ...he address of the SMTP server the eDoc Manager should use SMTP port Enter the port of the SMTP server the eDoc Manager should use SMTP security and verification Select none ssl or tls from the drop down list SMTP account Enter the account of the SMTP server the eDoc Manager should use SMTP password Enter the password of the SMTP server the eDoc Manager should use Test SMTP connection status Click ...

Page 30: ... button in the upper left to reboot the system Click on the Reset to factory settings button in the upper left to reset the eDoc Manager to its factory settings Host identification Host name Enter the desired name you wish to assign to the eDoc Manager Plustek UDID The eDoc Manager s Plustek UDID can be found here This Plustek UDID is unique to your device and can be used to connect to your eDoc M...

Page 31: ... firewall first before the eDoc Manager can be accessed from outside CPU The processor type used by the eDoc Manager If the processor has multiple cores the computation speed in BogoMIPS will also be shown for each core RAM The total amount of physical system memory available to the eDoc Manager HardDisk The mount path and total size of the hard disks installed in the eDoc Manager HardDiskUsage Th...

Page 32: ...sed by your users you need to create user accounts for them Import Account Click on the Import Account button to import the user accounts from the excel file Export Account Click on the Export Account button to export the user accounts to the excel file Searching user accounts You can search for user accounts by entering a keyword in the Search field and clicking on the Magnifying glass or Search ...

Page 33: ...e Password Employee Number and Quota fields empty to use the default values The default password is 123456 and you should advise your users to change it after they log in The preset Quota is 10000 MB 10 GB and can be adjusted at any time by opening the Space allocation page You can assign the user to a Group once you have created one 3 Click on the Create button to create the new user account 29 ...

Page 34: ... deleted 3a If you click on the Yes button the Inherit dialog will open Select the Inheritor from the drop down list and enter a Folder name under which to store the data Click on the OK button to continue A prompt will inform you of the status of the action 3b If you click on the No button you will be prompted to confirm deleting the user account Click on the Yes button to confirm and delete the ...

Page 35: ...t button in the Edit column of the respective user account to open the Edit user account dialog 2 Modify the desired details You can leave the Password field empty to keep the current password 3 Click on the Edit button to save the changes 31 ...

Page 36: ...nifying glass or Search button A prompt will inform you if the search came up empty To return showing all groups do a search without any keywords Creating groups 1 Click on the New group button to open the New group dialog 2 Enter the Group name and select the Members of this group using the drop down list 3 Click on the Create button to create the new group Deleting groups 1 Select the desired gr...

Page 37: ...t s data usage and quota edit the quota and delete all of a user account s files You can change the sorting order by clicking on the column headers User accounts whose data usage has reached the quota will have their data usage bars displayed in red You should inform the user of the situation or increase their quota Editing quotas 1 Click on the Edit quota button in the Edit quota column of the re...

Page 38: ...login devices System management This section contains the System management Log management Daily System Backup and RAID pages where you can configure some basic system settings manage the activity log perform system backup and restoration and arrange your hard disks in a RAID Redundant Array of Independent Disks System management On this tab you can modify some optional settings that are not cruci...

Page 39: ...are allowed on the eDoc Manager at the same time Default password Enter the default password your user accounts will be assigned when creating user accounts and leaving the Password field empty Preset quota MB Enter the preset quota your user accounts will be allocated when creating user accounts and leaving the Quota field empty Default validity period days Enter the default validity period for l...

Page 40: ... or turn off the verify function Logo image file You can choose a custom image e g your company s logo to appear in the upper left corner on the eDoc Manager s user interface Click on the Browse files button use the dialog to select a supported image file then click on the Upload logo button to upload the image file Your image file should appear the next time you reload the eDoc Manager s user int...

Page 41: ...ons at the bottom to move to another log page Searching the log You can search for specific log entries by entering a keyword in the Keyword field and clicking on the Search button You can narrow down your search results by selecting a specific Account name or Action from the drop down lists and by specifying a Date range using the calendar context menu To return showing the entire log do a search...

Page 42: ...g Attention This action cannot be undone You can keep a local copy of the log by exporting the log first then deleting the log from the eDoc Manager Daily System Backup On this tab you can configure the eDoc Manager to perform backups of all the user accounts data and settings and restore those backups back to the eDoc Manager in case of data loss Test FTP Connection Click on this button to test t...

Page 43: ... made before a FTP server has been configured will not retroactively be uploaded to the FTP server Manual backup 1 Please verify that the Backup status is Idle and that the system is ready to perform backups 2 Click on the Manual backup button to open the Manual backup dialog 3 Click on the Yes button to perform the backup A prompt will inform you if the backup cannot be made for any reason You wi...

Page 44: ...een downloaded it will automatically be used to restore the eDoc Manager A prompt will inform you when the restoration has been completed Select restoration file 1 Click on the Select restoration file to open the Restoration file dialog 2 Select the restoration file you wish to use to restore the eDoc Manager 3 Click on the Restore button to begin the restoration process Please wait while the eDoc...

Page 45: ...hey can be arranged in a RAID configuration Click on the Format button in the Format column of the respective hard disk to format it for use in a RAID configuration You will be prompted to confirm formatting the hard disk Turning on hard disks Click on the Turn on button in the Turn On column of the respective hard disk to mount the hard disk Turning off hard disks Click on the Turn off button in ...

Page 46: ...r system s current version When contacting technical support be sure to give staff your eDoc Manager s exact version information Version update Click on the System Maintenance Mode button to undate the eDoc Manager When you activate the maintenance mode the system will be rebooting but you cannot connect to the eDoc Manager When the eDoc Manager is in the maintenance mode the Status column will sh...

Page 47: ...the eDoc Manager Backup Backup the user data to the external USB hard disk or FTP Restore Restore the eDoc Manager from the USB hard disk or FTP Start eDocManager Re start the eDoc Manager The Status column will show Ready when the eDoc Manager is re started Click on the Connect to eDoc button to open the eDoc Manager login page After upgrading backup and restoring the system please re start the e...

Page 48: ...The Status column will show Ready when the eDoc Manager is re started 44 ...

Page 49: ...he specific file for the specific purpose Upgrade eDocManager upgrade the software you can only upload the zmk file for the upgrade Upgrade firmware upgrade the firmware you can only upload the umk file for the upgrade Select the desired item and upload the specific file click on the Next button to upgrade 45 ...

Page 50: ...o USB drive option and click on the Next button to backup 2 eDoc Manager will format and encrypt the USB hard disk the default password is iloveeDoc All the data on the USB hard disk will be removed If you want to backup to the USB hard disk the following dialog will pop up for you to confirm 46 ...

Page 51: ...Select the backup to the FTP option and click on the Next button to backup 2 Enter the IP address port username and the password for the FTP server IP address could be in the format of host xxxx com or 10 2 x xxx 47 ...

Page 52: ... USB hard disk 1 Select the restore from the USB drive option and insert the USB hard disk to the eDoc Manager click on the Next button to restore 2 Click on the Yes button to restore all the data on the eDoc Manager will be removed 48 ...

Page 53: ...FTP server 1 Select the restore from the FTP server option and click on the Next button to restore 2 Click on the Yes button to restore Enter the original information for the backup FTP server to perform the restore 49 ...

Page 54: ...the eDoc Manager 2 Push the RESET button with the pin for at least 5 seconds The eDoc Manager will beep long once to indicate the reset 3 The eDoc Manager will automatically restart once it has been reset Attention This action cannot be undone Once the eDoc Manager restarts you may not be able to access it anymore since its IP address may have changed Please refer to the Connecting to the eDoc Man...

Page 55: ...hers or collaborate on files and folders Logging in to the eDoc Manager as user The following steps describe how to log in to the eDoc Manager as a user 1 Open the web browser of your choice and enter the eDoc Manager s IP address in the address bar 2 The eDoc Manager s login page will open Enter your Account and Password and select your desired user interface Language 3 Click on the Login button ...

Page 56: ...ou can narrow down your search to just files that are in the currently viewed folder Settings and Log out Located at the top right of the interface you can access your personal user account s settings and activity log by clicking on the cogwheel button You can view all the notification information by clicking on the button When you are finished using the eDoc Manager make sure to log out by clicki...

Page 57: ...d you to collaborate on are accessed from here as well as special views for your own files and folders File browser Located in the middle of the screen below the Search box and Toolbar and to the right of the Side panel the File browser is your main means of viewing and navigating through the files and folders you have stored on the eDoc Manager 53 ...

Page 58: ...n as possible Edit profile On this tab you can configure some settings that will only affect your own user account Click the OK button in the bottom left part of the tab to save any changes Account Your account name as set by the administrator You cannot change it Password You can enter a new password here if you want to change it The password must be at least 6 characters long Leave the field bla...

Page 59: ...w search and export your personal activity log The eDoc Manager keeps a record of all actions performed from logging in and out to sharing files and folders You can change the sorting order by clicking on the column headers Use the navigation buttons at the bottom to move to another log page Searching the log You can search for specific log entries by entering a keyword in the Keyword field and cl...

Page 60: ...ou can use the Side panel to quickly jump between your folders and also view only those files and folders that you have shared with others or others have shared with you Another view is available to help you find the files you most recently interacted with Creating new folders You can use folders to help you organize your files When you need to share many files or folders it is also easier to move...

Page 61: ...ick on the Upload button to upload the selected files While the uploads are in progress you can delete files from the upload list by clicking on the checkboxes and then clicking on the Delete button 6 Click on the Leave button to close the dialog and return to the main interface once the uploads are finished If you click on the Leave button while files are still being uploaded you will be prompted...

Page 62: ...ts in the File browser You can hide and unhide this panel by clicking on the panel header Attention If you perform any actions on files and folders you have shared with others it will be reflected in the accounts of those users Sharing Center My shared files Only folders you have shared with others will be listed here You can click on the folders to quickly open that folder s contents in the File ...

Page 63: ...al view will only show the most recent 30 files or folders you have copied moved downloaded tagged or renamed You can hide and unhide this panel by clicking on the panel header Search Results Display the search results Share Management You can edit and delete the shared file links modify the expiration date access times and the extraction code File request management You can edit and delete the fi...

Page 64: ...ing on the column headers Use the navigation buttons at the bottom to move to another page Navigating folders To open a folder simply click on it To return to a previous folder level click on the folder level in the Path line You can also use the Side panel to navigate your folders Smart file icons The eDoc Manager has unique file icons for all supported file types so you can quickly identify each...

Page 65: ...nd can be previewed will have their file names displayed in blue You can use this quick preview to quickly identify your files The magnification of the quick preview can be adjusted and the feature can also be turned off entirely if desired Selecting files Files are selected by clicking on the small box at the very front of each file Clicking on the file name will instead open the file in the eDoc...

Page 66: ... how to view and navigate them it s time to learn about using the eDoc Manager s organizational features Apart from the expected delete copy move and rename commands the eDoc Manager offers additional commands to download share and collaborate since it is a network based system Delete 1 Select at least one file or folder and click on the Delete button 2 You will be prompted to confirm deleting the...

Page 67: ...t the front of the folder 3 Click on the Copy button to copy the selected data to the target folder Move This action requires that you have created at least one folder 1 Select at least one file or folder and click on the Move button 2 Use the Move to dialog to select the target folder where you wish to move the selected data Select the target folder by clicking on the small box at the front of th...

Page 68: ... description in the pop up File request dialog If it is necessary you may set the password for uploading files Enter the receiver email address and click on the OK button The receiver can now upload the necessary files to the specific folder as you requested Share Being a network based system you can use the eDoc Manager to share your files and folders with other people There are 3 methods to shar...

Page 69: ...rite the old one Sharing by link 1 Select one file or folder and click on the Share button 2 Select by link from the context menu to open the Share by link dialog 3 If desired adjust the Expiration date Access times and Extraction code of the link 4 Press Ctrl C on your keyboard to copy the link to your system s clipboard 5 Click on the OK button to close the dialog Open a program of your choice a...

Page 70: ...QR code image to your computer and insert it into your documents and presentations The QR code can then be scanned by anyone with the document i e flyer poster etc or viewing the presentation i e meetings speeches 5 Click on the OK button to close the dialog Sharing by e mail 1 Select one file or folder and click on the Share button 2 Select by e mail from the context menu to open the Share by e m...

Page 71: ...d folders with other people Collaborating means that you invite other people to work on your files and folders and any changes made by you or the others will be reflected across all collaborators Everyone will be working on the same copy of a file or folder Information Since you can only collaborate on 1 file or folder per action we recommend putting all files and folders you wish to share into a ...

Page 72: ...les shared with me panels Collaborating with users 1 Select one file or folder and click on the Collaborate button 2 Select a user you wish to invite from the Invite user drop down list 3 Select which permissions to give the user by clicking on the respective options If you added multiple users you can click on the option in the column header to give all users the respective permission To remove a...

Page 73: ... but allows the eDoc Manager to quickly search through them You can view those words and manually add additional tags This action cannot be performed on folders Select one file and click on the Full Text button to open the Inhalt dialog You can view all words that eDoc Manager identified from the document You may manually add additional tags then click on the Edit button to save the settings 69 ...

Page 74: ...desired tag s then click on the Delete button to delete the tag s 2 When selecting multiple files only the tags that all selected files have in common will be shown in the Edit tag dialog Each file will retain their individual tags Enter any number of tag you wish to add to the file or files 3 Click on the Edit button to save the changes and close the dialog You can now search for the file or file...

Page 75: ...a keyword in the Search field and clicking on the magnifying glass or Search button The common search operators or and and can be used as well You can further narrow down your search to just files that are in the currently viewed folder Searching with operators Searching for multiple keywords separated by a blank or or will return results that match any of the words Searching for multiple keywords...

Page 76: ...equirements Before installing the eDoc Cabinet program you may need to install the following support files If your operating system is Windows 7 32 bit http www microsoft com en US download details aspx id 17718 http www microsoft com en US download details aspx id 5555 If your operating system is Windows 7 64 bit http www microsoft com en US download details aspx id 17718 http www microsoft com e...

Page 77: ...it using the shortcut from the Start Menu All Programs Plustek eDoc Cabinet folder Logging in to the eDoc Manager with eDoc Cabinet You need to log in to the eDoc Manager with the eDoc Cabinet program before you can configure folders to sync The same credentials are used as if you were directly logging in to the eDoc Manager You can set the program to automatically run on Windows startup and log y...

Page 78: ...our desired user interface language then click on the Log on button to log on to the eDoc Manager Information If you are using the UDID to connect to the eDoc Manager you may be prompted to allow the program through the Windows Firewall Please click on the Allow access button to allow it 74 ...

Page 79: ...folder links depending on your desired results by clicking on the big tile When right clicking on a folder link tile you have the option to Edit or Delete the folder link To quickly open the folder link s local folder on your hard disk double click on its tile You can log out of the program by clicking on the Log out button 75 ...

Page 80: ...c Cabinet program Status You can use this to toggle the folder link ON and OFF This way you can keep a particular link setting around without having to delete it Color Select a desired color from the drop down list This color is only for cosmetic purposes and can help you with more quickly distinguishing your folder links Synchronization mode Arguably the most important setting when creating or ed...

Page 81: ...ion to your original file You can select to perform OCR Optical Character Recognition when using this mode Attention You must install the OCR software ABBYY FineReader bundled with Plustek scanner on your computer before you can use the OCR function Manual or Automatic Select to manually or automatically synchronize the folder If you select to manually synchronize the folder the folder can be sync...

Page 82: ...link with the Synchronization mode to Two way Sync and you can upload simply by putting files into the local folder on your computer Any file you put into the eDoc Manager folder will automatically be downloaded to your computer After a file is uploaded or downloaded you can move it to another folder The original file will automatically be deleted from your local folder when uploading or your eDoc...

Page 83: ...utomatic system startup after power outage Dimensions 100 W x 216 D x 151 H mm Weight 1 9 kgs 4 19 lbs net weight excluding HDD Certification CE FCC RoHs Network Protocol TCP IP UDP IP HTTP DHCP Client Fixed IP DDNS Client SMTP DNS UPnP Security Password Protection User Access Privilege Language Support English German French Japanese Traditional Chinese Simplified Chinese Turkish Russian Italian S...

Page 84: ...ent of Limited Warranty This Statement of Limited Warranty applies only to the options you originally purchase for your use and not for resale from an authorized reseller The manufacturer warranty includes all parts and labor and is not valid without the receipt of original purchase To obtain warranty service you may contact the authorized dealer or distributor or visit our website to check out th...

Page 85: ... the following 1 Third party claims against you for losses or damages 2 Loss of or damage to your records or data or 3 Economic consequential damages including lost profits or savings or incidental damages even if we are informed of their possibility Some jurisdictions do not allow the exclusion or limitations of incidental or consequential damages so the above limitation or exclusion may not appl...

Page 86: ...nsult the dealer or an experienced radio TV technician for help if the conditions persist Changes or modifications not expressly approved by the manufacturer or authorized service center could void the user s authority to operate this equipment This device complies with Part 15 of the FCC Rules Operation is subject to the following two conditions 1 this device may not cause harmful interference an...

Reviews: