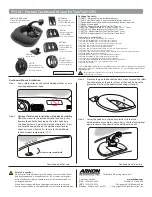
1. Hold the PipeGuard in its desired location along
the conduit.
2. Squeeze the bottom of the PipeGuard, to open its
clamp and accept the conduit. Press clamp portion
onto conduit.
3. Rotate the PipeGuard into position under the
conduit.
4. Let the PipeGuard rest on the roof surface.
Spacing Placement:
•
Every 10 ft. (3.05m) for 2” (50mm) pipes or larger.
•
Every 8 ft. (2.44m) for 1.5” (40mm) pipes.
•
Every 6 ft. (1.83m) for 1” (25mm) pipes or smaller.
Place at every union, junction and source.
For more on PipeGuard see:
omgroofing.com
Attach the Mounting Bracket under the Front Bracket
using the existing Flange Nut.
Torque to 15 ft.-lbs.
Using the hardware provided in the Mounting Bracket
Kit, attach the Microinverter/Optimizer to the underside
of the Mounting Bracket. Tighten securely.
POWER MAX™ Accessories Installation Guide, Tilted (5°, 10°), Dual Tilt and Flush Arrays
Installing PipeGuard - Conduit Support
Installing a Microinverter/Optimizer - Tilted (5° & 10°) Array only
The use of a
compatible
separator sheet is
required between
PipeGuard and
PVC roofing
membranes.
Consult roof
membrane
manufacturer
for specific
requirements.
NOTE
POWER MAX
TM
Accessories Installation Guide, Tilted (5°, 10°), Dual Tilt and Flush Arrays
5
Summary of Contents for POWER MAX Dual Tilt Array
Page 1: ...POWER MAXTM Accessories Tilted 5 10 Dual Tilt Flush Arrays Installation Guide SP3470 1 ...
Page 13: ...11 ...
Page 14: ...12 ...
Page 15: ...13 ...


