


54
Mini100/Mini2
53
Mini100/Mini2
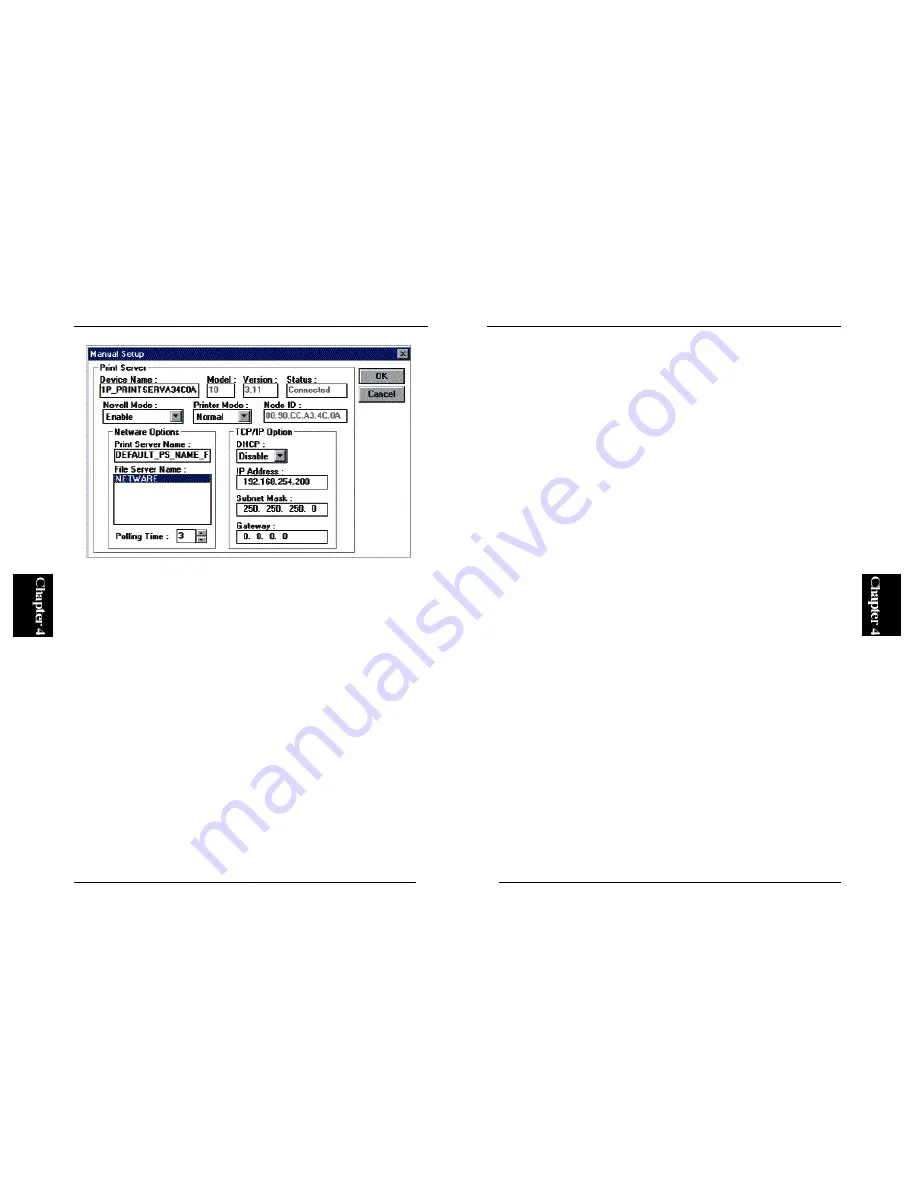
TCP/IP: Allows the user to modify parameters related to TCP/IP protocol.
DHCP: Set to “Enable” if you are using a DHCP server to assign an IP
address to the print server.
IP Address, Subnet Mask, Default GateWay: Specifies these TCP/IP
parameters.
After you have made all the necessary changes to the parameters, click on
the OK button. The system asks you whether you wish to save the new
parameters. Select “YES” to save the new settings.
●
4-3-b Using a Web browser to Configure the Print Server
The print server can be configured from an ordinary Web browser including
Internet Explorer and Netscape Navigator/ Communicator. Using one of
these browsers, you can easily configure the print server from a PC with
Windows95/98, WindowsNT or UNIX/ Linux.
To configure the print server via a Web browser, first you need to assign an
IP address to the product. Refer to Appendix C and check whether a
TCP/IP network has been configured for the print server.
■
No IP address has been assigned to the print server
Follow the steps below to assign an IP address to the print server via your
Web browser.
1. From Start, select Program and then MS-DOS Prompt. A small window
titled “MS-DOS Prompt” will be displayed.
2. Use the “arp” command to assign a temporary IP address to the print
server. First, see the rear side of the print server and check its Node ID.
In the example below, a temporary IP address “192.168.1.220” is
assigned to a print server with Node ID “0090CC40EF37”:
Example: arp -s 192.168.1.220 00-90-CC-40-EF-37
3. Use the “ping” command to check whether the IP address has been
properly assigned to the print server.
Example: ping 192.168.1.220
A message that starts with “Reply from 192.168.1.220...” will be displayed
if the IP address has been properly assigned.
Summary of Contents for Mini100
Page 2: ......


