


Selecting the Source
m40L/m46L Installation Guide
19
Selecting the Source
Selecting the source means choosing the input connector from where the picture is
coming. Selecting the source (picture) manually is usually quicker than using the
SOURCE
button.
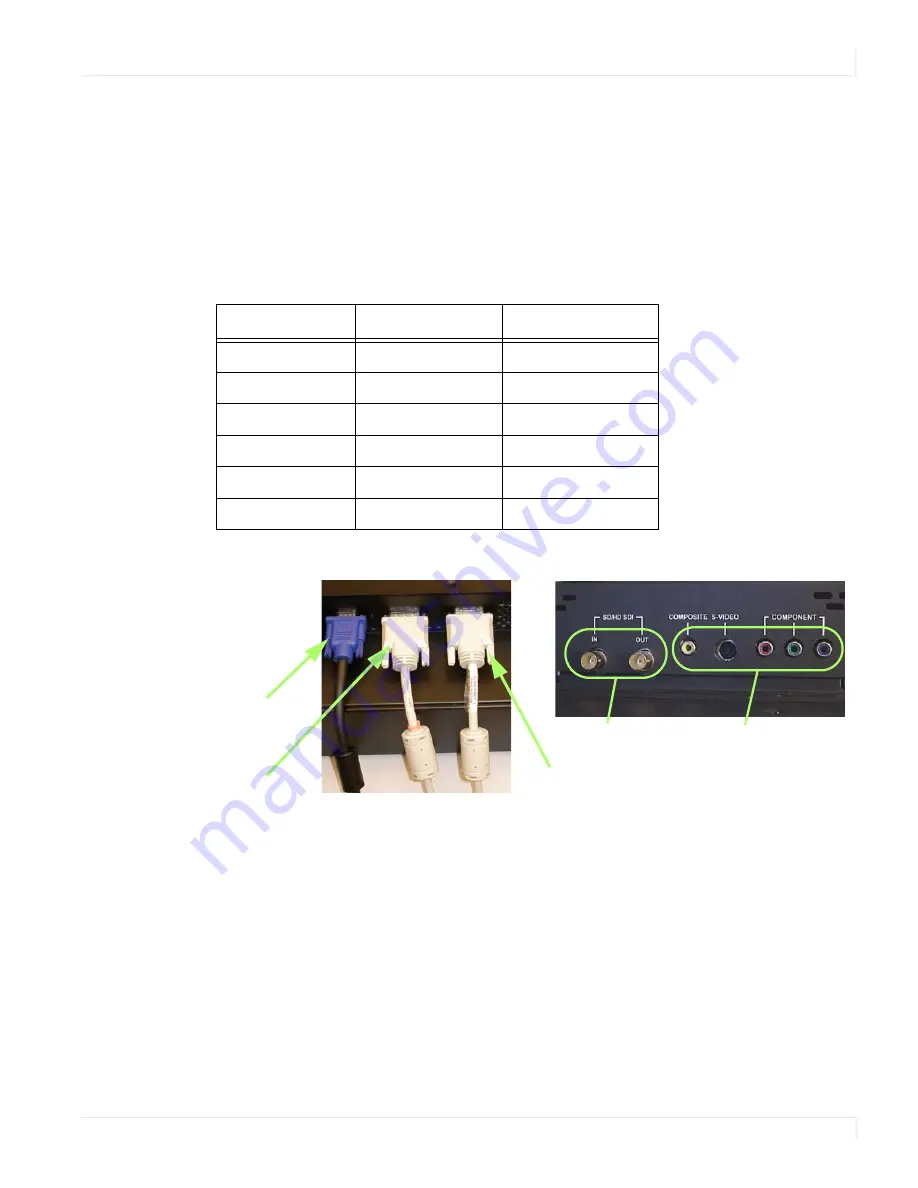
You’ll choose from the connectors shown in the table below, depending on whether
your display has the optional VIM installed.
Connect the power cord and turn on the power switch. If the power was already on,
and the backlights are off, press the
ON
button on the remote.
Source Connectors
Without VIM
With VIM
With SDI VIM
Analog
Analog
Analog
Digital
Digital
Digital
Component
Component
S-Video
S-Video
Composite
Composite
SD/HD SDI
Digital
input
Analog
input
Digital
loop-
through
These appear only
if you have SDI VIM
These appear if you
have a VIM or SDI VIM
Summary of Contents for M40L
Page 1: ...m40L m46L Installation Guide...
Page 2: ......
Page 4: ...m40L m46L Installation Guide...
Page 10: ...Table of Contents vi m40L m46L Installation Guide...
Page 24: ...About UPS Supplies 14 m40L m46L Installation Guide...
Page 50: ...Sharpness Settings 40 m40L m46L Installation Guide...
Page 52: ...Picture Position 42 m40L m46L Installation Guide...
Page 60: ...Viewport Adjustment 50 m40L m46L Installation Guide...
Page 84: ...Controlling With RS232 Commands 74 m40L m46L Installation Guide...
Page 94: ...Deleting a Configuration 84 m40L m46L Installation Guide...
Page 108: ...98 m40L m46L Installation Guide...