40
Operating
Press any button to select an input port on the remote control or press the
INPUT
button on the control panel. A dialog box to select the input signal for
the main area will be displayed. Choose a signal using the
▲
/
▼
buttons. To
change the signal in the sub area, switch temporarily across to the main area
with the
◄
/
►
buttons.
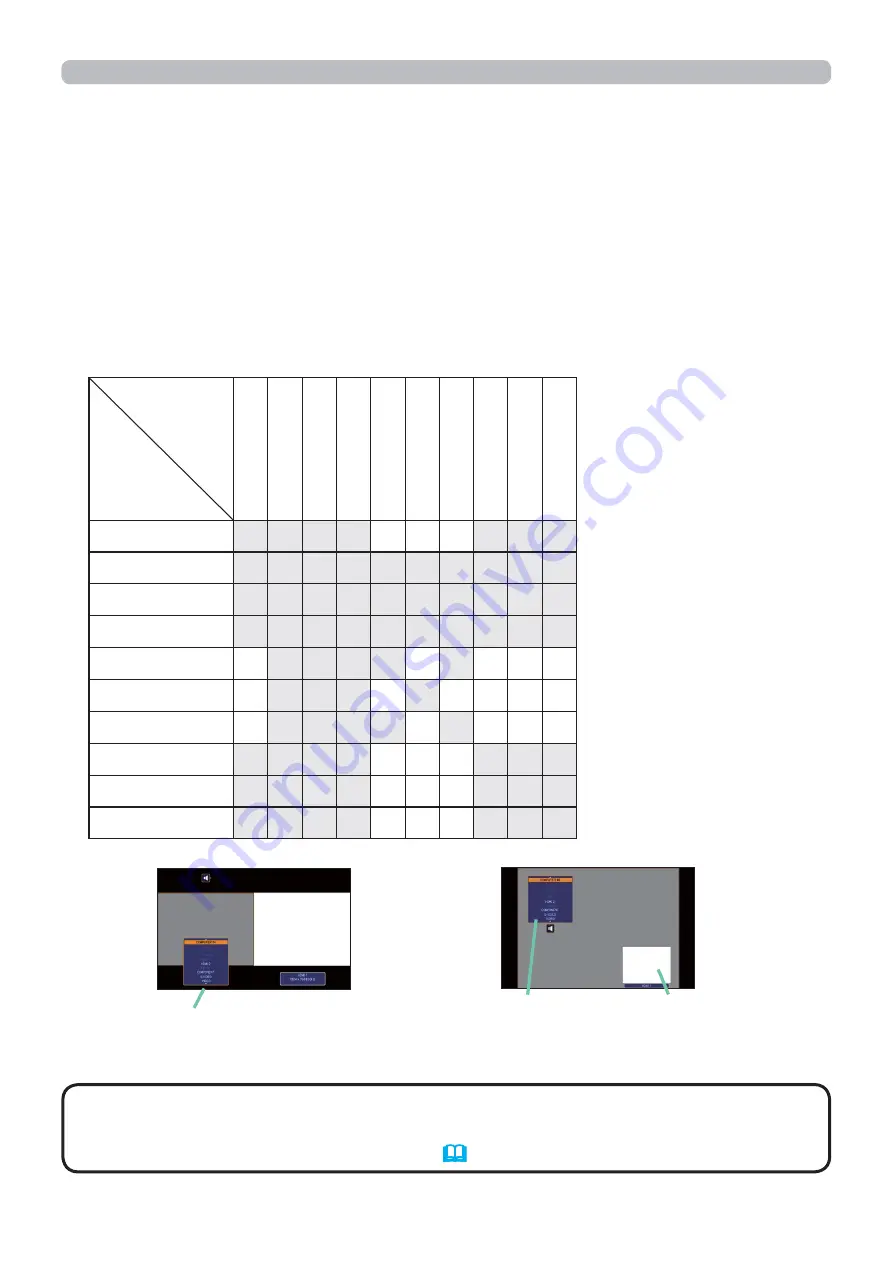
Displaying the same signal on the both areas is not allowed. Refer to the table
for details on available input signal combinations. Any combinations marked
with "X" can not be selected.
Changing the picture input signal
Sub area
Main area
COMPUTER IN
LAN
USB TYPE
A
USB TYPE
B
HDMI 1
HDMI 2
HDBaseT
COMPONENT
S-VIDEO
VIDEO
COMPUTER IN
X
X
X
X O O O X
X
X
LAN
X
X
X
X
X
X
X
X
X
X
USB TYPE A
X
X
X
X
X
X
X
X
X
X
USB TYPE B
X
X
X
X
X
X
X
X
X
X
HDMI 1
O X
X
X
X O X O O O
HDMI 2
O X
X
X O X O O O O
HDBaseT
O X
X
X
X O X O O O
COMPONENT
X
X
X
X O O O X
X
X
S-VIDEO
X
X
X
X O O O X
X
X
VIDEO
X
X
X
X O O O X
X
X
main area sub area
• The combined input signals marked with an "O" can be selected and
displayed in the PbyP / PinP mode even when the port is set to SKIP with the
SOURCE SKIP on the OPTION menu
(
69
)
.
NOTE
Input signal
PbyP (Picture by Picture) / PinP (Picture in Picture) (continued)
PbyP mode
(continued on next page)
main area
sub area
Input signal
PinP mode


