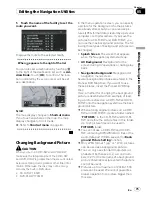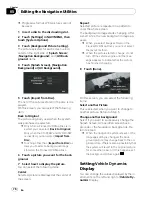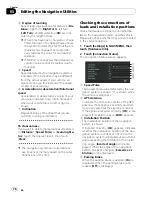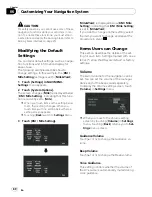
background image

Tracking Display

The tracking display setting has the following
options.

Always

:

Display tracking for all journeys.

This Trip

:

Display tracking dots but erase them when the
navigation system is turned off (when turning
off the engine of your vehicle).

Off

*:

Do not display tracking dots.

AV Guide Mode

Set whether to automatically switch to the na-
vigation screen from the AV operation screen
when your vehicle approaches a guidance
point such as an intersection while displaying
a screen other than navigation.

On

*:

Switches from AV operation screen to naviga-
tion screen.

Off

:

Does not switch the screen.

Day/Night Display

To improve the visibility of the map during the
evening, you can change the combination of
the colors of the map.

Nighttime

*:

You can change the combination of the colors
of a map according to whether the vehicle
lights are On or Off.

Daytime

:

The map is always displayed with bright col-
ors.

Close-up of Junction

This setting enables switching to an enlarged
map around the point where your vehicle is
approaching an intersection, entrance/exit of
freeway or a junction.

On

*:

Switches to an enlarged map.

Off

:

Does not switch to an enlarged map.

Arrow in AV

Set whether to display the guidance informa-
tion with arrows on the AV operation screen.

On

*:

Displays guidance information with arrows on
the AV operation screen.

Off

:

Does not display guidance information with
arrows on the AV operation screen.

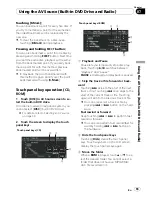
Defined Locations

Touch [

Defined Locations

] in

Settings

menu

to display.

Set

Home

=

For details concerning operations, refer to

Registering your home and your favorite lo-
cation

on page 62.

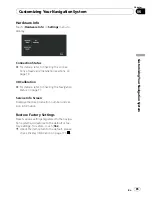
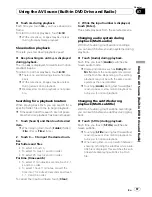
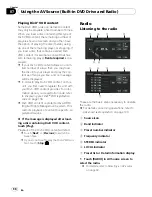
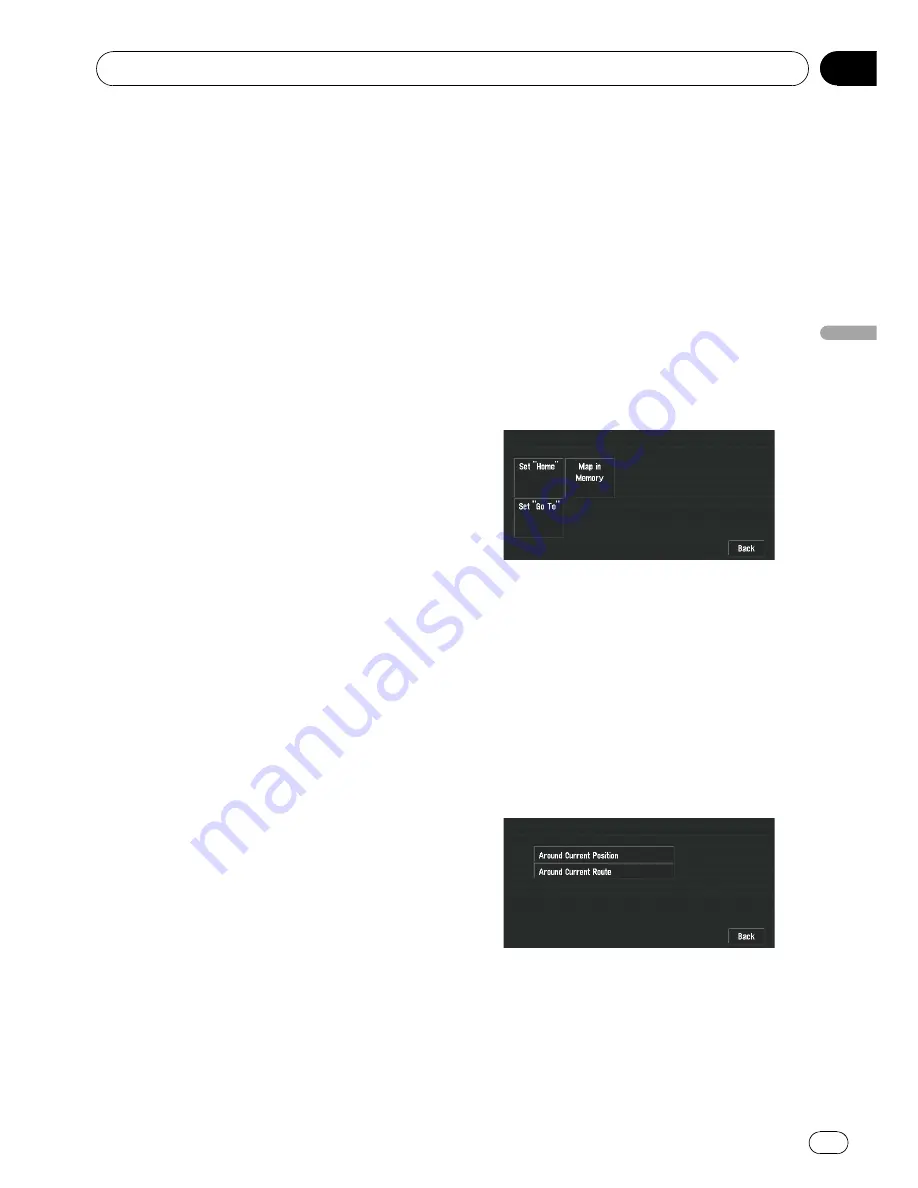
Map in Memory

The memory area is the area in the map,
which is being read in advance for the mem-
ory navi mode. There are two ways of setting
the memory area.

Around Current Position

:

A square that has sides of approximately 10.6
miles (17 km) with the selected location at the
center is read into the memory.
Indicate the map you want to store in the
memory by touching

c

,

d

,

a

or

b

. Then, ad-

just the map scale to the one you desire, and
touch [

OK

].

Customizing Your Navigation System

En

83

Chapter

06

Customizing

Y

our

Navigation

System

Summary of Contents for Super Tuner IIID AVIC-N5

Page 1: ...s software requires that the navigation system is properly connected to your vehicle s parking brake and depending on your vehicle additional installation may be required For more information please contact your Authorized Pioneer Electronics retailer or call us at 800 421 1404 English ...

Page 2: ...2 Variety of view modes 22 Wide variety of facility information for Points of Interest POI Search 22 Auto Reroute Function 22 Assign an Original Image as a Background Image 22 DVD Video playback 23 CD playback 23 MP3 file playback 23 WMA file playback 23 AAC file playback 23 DivX video file playback 23 NTSC compatibility 23 Auto CD title and MP3 WMA AAC file listing 23 iPod compatibility 23 Hands ...

Page 3: ...vigation Menu and Map Display How to Use Menu Screens 42 NAVI MENU 42 Shortcut menu 43 How to Use the Map 44 Switching the current position screen display mode 44 How to view the map of the current location 44 Changing the scale of the map 47 Moving the map to the location you want to see 48 Setting a Route to Your Destination Finding Your Destination by Selecting the Type of Facility 50 Searching...

Page 4: ...formation 66 Viewing traffic list 66 Confirming traffic information on the map 67 Information on avoiding traffic congestion on route ahead 67 When checking traffic congestion information manually 68 Traffic flow information 69 Selecting traffic information to display 69 Using the XM Tuner to View Stock Sports and Other Information 70 Displaying stock prices 70 Storing browsable information 71 Dis...

Page 5: ... memory 102 Displaying text information 102 Switching between the detail information display and the list display 103 Viewing contents of upper folder 103 Advanced USB operation 103 XM Tuner 104 Listening to XM Satellite Radio 104 Switching the XM channel select mode 105 Switching between the detailed information display and the preset list display 105 Switching the XM display 105 Storing and reca...

Page 6: ...diting the phone book 122 Clearing memory 122 Setting the automatic answering 123 Setting the automatic rejecting 123 Setting a ring tone 123 Setting the automatic connection 123 Echo canceling and noise reduction 124 iPod 124 Operating the iPod 124 Touch panel key operation MUSIC 125 Browsing for a song 125 Performing random play with one touch 125 Touch panel key operation VIDEO 126 Advanced iPo...

Page 7: ...s 139 Setting the video input 139 Setting for rear view camera 140 Switching the auto antenna setting 140 Setting the illumination color 140 Setting the screen color 141 Changing the Wide Screen Mode 141 Operating the Picture Adjustment 142 Switching the backlight On Off 142 Language Code Chart for DVD 143 Appendix Troubleshooting 144 Messages and how to react to them 149 Error Messages 154 Anti t...

Page 8: ...AAC files 170 DivX video files 171 DivX subtitle files 172 Ambient conditions for playing a disc 172 Using the Navigation System Correctly 173 Handling the LCD screen 173 Liquid crystal display LCD screen 173 Keeping the LCD screen in good condition 174 Small fluorescent tube 174 Route Setting Information 174 Route search specifications 174 Tracking 176 Types of the Road Stored in the Disc 176 Roa...

Page 9: ...sassembly decompilation or any other means You shall not use the Software to operate a service bureau or for any other use involving the processing of data for other per sons or entities Pioneer and its licensor s shall retain all copy right trade secret patent and other proprie tary ownership rights in the Software The Software is copyrighted and may not be cop ied even if modified or merged with...

Page 10: ...nited States except as authorized and as permitted by the laws and regulations of the United States If the Soft ware has been rightfully obtained by you out side of the United States you agree that you will not re export the Software nor any other technical data received from Pioneer nor the direct product thereof except as permitted by the laws and regulations of the United States and the laws an...

Page 11: ...mbly decompilation or any other means You shall not use the Software to operate a service bureau or for any other use involving the processing of data for other per sons or entities Pioneer and its licensor s shall retain all copy right trade secret patent and other proprie tary ownership rights in the Software The Software is copyrighted and may not be cop ied even if modified or merged with othe...

Page 12: ...disclaimer or limitation cannot be waived or preempted 4 EXPORT LAW ASSURANCES You agree and certify that neither the Software nor any other technical data received from Pioneer nor the direct product thereof will be exported outside Canada except as authorized and as permitted by the laws and regulations of Canada If the Software has been rightfully obtained by you outside of Canada you agree tha...

Page 13: ...ove oblit erate or obscure any copyright notice or pro prietary legend contained in or on the Data 3 Warranty Disclaimer THE DATA IS PROVIDED ON AN AS IS AND WITH ALL FAULTS BASIS AND TELE ATLAS AND ITS SUPPLIERS EXPRESSLY DISCLAIM ALL WARRANTIES EXPRESS OR IMPLIED IN CLUDING BUT NOT LIMITED TO THE IMPLIED WARRANTIES OF NON INFRINGEMENT MER CHANTABILITY SATISFACTORY QUALITY AC CURACY TITLE AND FIT...

Page 14: ... 643 0330 The Data is 1984 2008 by Tele Atlas ALL RIGHTS RE SERVED For purpose of any public disclosure provision under any federal state or local law it is agreed that the Data is a trade secret and a proprietary commercial product and not sub ject to disclosure If you are an agency department or other en tity of any State government the United States Government or any other public entity or fund...

Page 15: ... part of this Agreement without Tele Atlas prior written consent You acknowledge and under stand that the Data may be subject to restric tions on exportation and agree to comply with any applicable export laws In the event that any provision or part of a provision of this Agreement is determined to be invalid illegal or unenforceable such provision or part there of shall be stricken from this Agre...

Page 16: ...A Inc is 2008 INCREMENT P CORP ALL RIGHTS RE SERVED Manual Overview This manual provides the important informa tion you need to make full use of your new na vigation system Please note that when you have decided what you want to do you can find the page you need from the Contents If you want to check the meaning of each item displayed on the screen you will find the ne cessary page from the Displa...

Page 17: ... the following information about the conven tions used in this manual Familiarity with these conventions will help you greatly as you learn how to use your new equipment Buttons on your navigation system are de scribed in ALL CAPITAL BOLD lettering e g MENU button MAP button Items in the different menus or touch panel keys available on the screen are described in brackets and bold e g Destination ...

Page 18: ...ontrary advice p Failure to input correct information about the local time may result in the navigation system providing improper routing and gui dance instructions p Never set the volume of your navigation system so high that you cannot hear out side traffic and emergency vehicles p To promote safety certain functions are dis abled unless the vehicle is stopped and or the parking brake is applied...

Page 19: ...ase contact the companies listed below Please do not ship your product to the compa nies at the addresses listed below for repair without making advance contact U S A Pioneer Electronics USA Inc CUSTOMER SUPPORT DIVISION P O Box 1760 Long Beach CA 90801 1760 800 421 1404 CANADA Pioneer Electronics of Canada Inc CUSTOMER SATISFACTION DEPARTMENT 300 Allstate Parkway Markham Ontario L3R 0P2 1 877 283...

Page 20: ... considerations according to Local State or Federal Laws For disposal or recycling infor mation please contact your local authorities or the Electronics Indus tries Alliance www eiae org CAUTION Do not allow this product to come into contact with liquids Electrical shock could result Also damage to the product smoke and overheating could result from contact with liquids Additional Safety Informati...

Page 21: ...rce while driving is strictly prohibited will appear on the screen To watch Video image on this display stop the vehicle in a safe place and apply the parking brake Please keep the brake pedal pushed down before releasing the parking brake Color difference of the map display between day and night Night display The examples in this manual are illustrated using the daytime display When driving at ni...

Page 22: ...re provided with the hardware For details refer to Memory navi mode on page 38 Variety of view modes Various types of screen display can be se lected for navigation guidance Wide variety of facility information for Points of Interest POI Search You can search your destination from all areas Approximately 12 3 million POIs are in cluded in the database Some POI information may not be accurate or ma...

Page 23: ...r more information refer to Playable Discs on page 25 For more information refer to Handling and Care of the Disc on page 168 WMA file playback You can play back WMA files recorded on CD R RW ROM and DVD R RW ROM AAC file playback You can play back AAC files recorded on CD R RW ROM and DVD R RW ROM DivX video file playback You can play back DivX video files recorded on CD R RW ROM and DVD R RW ROM...

Page 24: ...tal Out are registered trademarks and the DTS logos and Symbol are trademarks of DTS Inc 1996 2007 DTS Inc All Rights Reserved Multi aspect Switching between wide screen letter box and panscan display is possible Multi audio Multi subtitle and Multi angle You can switch between multiple audio sys tems subtitle languages and multiple viewing angles of a scene recorded on a DVD as de sired p This pr...

Page 25: ...bstructed e g by buildings mountains trees bridges bad weather etc XM NavTraffic data also may be una vailable or not current if the original data source is not providing data e g sched uled or unscheduled downtime or has not been updated or if there is a time lag be tween the time when the original data source is updated and when you receive the updated XM NavTraffic data p Depending on the amoun...

Page 26: ...n the disc and the functions you can use Mark Meaning 2 Indicates the number of audio sys tems 2 Indicates the number of subtitle lan guages 3 Indicates the number of viewing an gles 16 9 LB Indicates the picture size aspect ratio screen width to height ratio type 1 ALL Indicates the number of the region where playback is possible If marks other than those listed are found on DVD disc labels and p...

Page 27: ...e SAT RADIO READY Logo The SAT RADIO READY logo printed below the CD loading slot indicates that the Satellite Radio Tuner for Pioneer i e XM tuner and Sirius satellite tuner which are sold separately can be controlled by this navigation system Please inquire with your dealer or nearest authorized Pioneer service station regarding the satellite radio tuner that can be connected to this navigation ...

Page 28: ...nce with the viewing angle vertical and hor izontal to adjust for clear viewing Dimmer can also be used to adjust the brightness of the LCD screen itself to suit your personal pre ference Resetting the Microprocessor CAUTION Pressing RESET button deletes the contents of the system s memory About the data being deleted The information is erased by pressing RESET button or disconnecting the yellow l...

Page 29: ...destination or current location The areas recorded on each disc are as fol lows West area disc East area disc p Removing the disc and inserting other disc causes the navigation system to automati cally restart and reload the new route This automatic Reroute operation cannot be canceled Initial Use If the initial learning is not complete following screen appears If a message appears touch OK When t...

Page 30: ... from the dis play unit For details concerning operations refer to Removing the front panel on page 33 9 OPEN CLOSE button Press to open or close the LCD panel Press and hold to display Flap Setup screen For more details about Flap Setup refer to Adjusting the LCD panel angle on page 32 a o p button Press to perform manual seek tuning fast forward reverse and track search controls b EJECT button c...

Page 31: ...d off p This product also can be switched off by turning the ACC ignition OFF Inserting Ejecting a Disc Inserting a disc Insert a disc into the disc loading slot p The DVD drive plays one standard 12 cm or 8 cm single disc at a time Do not use an adapter when playing 8 cm discs p Do not insert anything other than a disc into the disc loading slot Ejecting a disc Press EJECT button The disc is ejec...

Page 32: ...or p button to adjust the LCD panel to an easily viewable angle The LCD panel angle continues changing as long as you keep pressing and holding o or p button 3 Touch ESC When Flap Setup screen is displayed during the navigation screen the map screen is dis played When Flap Setup screen is displayed during the AV screen the current AV operation screen is displayed p If you can hear the LCD panel kn...

Page 33: ...it to discourage theft as described below CAUTION Never grip the display and the buttons tightly or use force when removing or attaching Avoid subjecting the front panel to excessive shocks Keep the front panel out of direct sunlight and high temperatures After detaching the front panel keep it in a safe place so it is not scratched or damaged Removing the front panel 1 Press DETACH button to remo...

Page 34: ...button or VOLUME knob Press AV button or VOLUME knob Basic Navigation The most basic search function is Address Search in which the address is specified and the destination searched This section de scribes how to use Address Search and the basics of using the navigation system CAUTION For safety reasons you cannot use some of these basic navigation functions while your vehicle is in motion To enab...

Page 35: ... your destination and then shows the route on the map j 9 After releasing the parking brake drive in accordance with the navigation guidance subject to the important safety instructions noted on page 19 to page 22 How to set your destination by address 1 Press MAP button to display the map screen 2 Press MENU button to display NAVI MENU 3 Touch Destination to display Destina tion menu 4 Touch Addr...

Page 36: ...uch if you wish to first specify the destina tion city or area The input text is deleted letter by letter from the end of the text Continuing to this will de lete all of the text Sym You can input symbols such as and 0 9 You can input numbers Back Returns you to the previous screen p For example for Early California Ct you can just enter part of the name such as California p When entering the char...

Page 37: ...ber input screen comes up after the Street and City are determined You should now input the house number per form Step 7 p If there is more than one place for the house number input or if there is no such house number in that place a range of house numbers are displayed To start the route calculation touch the range within the list you wish to specify as the destina tion p You can also see the des...

Page 38: ...de While the DVD Map Disc is inserted you can store the map data into the internal memory of the navigation system If the DVD Map Disc is removed from the navigation system after storing is completed navigation is performed using the data in the memory memory navi mode When disappears memory navi mode is ready You can now remove the DVD Map Disc In the memory navi mode you can play a music CD or D...

Page 39: ... page 107 page 112 p Sources that are not connected to the navi gation system sources that are busy read ing a disc or magazine and sources with incomplete settings cannot be used p The term external unit refers to a Pioneer product such as one available in the fu ture that although incompatible as a source enables control of basic functions by the navigation system Two external units can be contr...

Page 40: ...n page 38 For details refer to page 158 1 Press EJECT button to remove the DVD Map Disc 2 Insert the CD to the disc loading slot The audio CD set in the navigation system is played 3 Press VOLUME knob or AV button to switch DISC operation screen Current track information 4 Rotate VOLUME knob to adjust the vo lume 5 Touch o or p to select a track you want to listen to Information of the track being...

Page 41: ...ity is indicated by its color Depending on the status of your vehicle some buttons will be available while others will not be e g Address Search Black touch panel key The button is operable Gray touch panel key with white letters The function is not available during memory navi mode Or the function is not available for areas not stored on the disc Touching this button activates a message indi cati...

Page 42: ...ad dress on page 35 About Searching places to register refer to page 50 to 52 Info Traffic menu Use this menu to check traffic information mainly using the GEX P10XMT p Traffic On Route Traffic Events Traf fic Flow Stock Info Set My Favorites and My Favorites can be used only when the GEX P10XMT is connected to the navi gation system GEX P10XMT XM Digital Satellite Data Audio Receiver sold separat...

Page 43: ... 49 Change Route Displayed when the map is not scrolled This item can be selected only during route gui dance You can add changes to your route and check it Refer to Recalculating the route on page 55 Refer to Recalculating a specified distance in the route ahead of your current position on page 55 Refer to Checking the Set Route on page 53 Refer to Canceling the Route Guidance on page 53 Refer to...

Page 44: ...turn to the route the screen returns to the original view and resumes route gui dance 1 Press MAP button to display a map of the area around your current position 2 Press MAP button again 3 Touch the mode name or press MAP button to select the mode you want to dis play p If the mode is selected by pressing MAP button the screen automatically switches to the selected map display mode after 4 second...

Page 45: ...ly the screen changes Map View with Shortcut menu If you close Shortcut menu the screen re turns to Rear View p If Camera is set to Off the rear view image is not displayed Please set it to On For details concerning operations refer to Setting for rear view camera on page 140 p When using a camera set to turn ON OFF in conjunction with the reverse signal no camera images will be displayed in rear ...

Page 46: ...Distance to the guidance point Touch to access the next information 3 Current location The current location of your vehicle The tip of the triangular mark indicates your head ing and the display moves automatically as you drive 4 Distance to the destination or distance to way point If way points are set the display changes with each touch When two or more way points are set the distance to the des...

Page 47: ...as your vehicle approaches a turning point f Next direction of travel When you approach a guidance point it ap pears green g Direction line The direction towards your destination or scroll cursor is indicated with a straight line h Memory navi indicator Refer to About the icon for the memory navi mode on page 160 i Lane information Lane information is displayed the first time there is a voice guid...

Page 48: ... to scroll slowly Touch near the sides of the screen to scroll quickly 3 2 5 4 1 1 Scroll location The position of the scroll cursor shows the location selected on the current map p When the scale is 0 25 mi 200 m or lower the road appears light blue in the vicinity of the scroll cursor 2 Direction line The direction towards the scroll cursor is in dicated with a straight line 3 Distance from the ...

Page 49: ...rtcut menu to specify your destination on the map 1 Press MAP button to access the map screen 2 Touch the map for at least 2 seconds The map display changes to Scroll mode 3 Scroll the map and move the scroll cur sor to the place you want to make your destination For details refer to Moving the map to the location you want to see on the previous page 4 Touch When appears to the right of the list Y...

Page 50: ...as gas stations amuse ment parks or restaurants is available By se lecting the category or entering the POI Name you can search for a POI Searching for Points of Interest POI 1 Touch Destination in NAVI MENU and then touch POI Search 2 Touch the zone code key of the destina tion and touch OK Refer to How to set your destination by ad dress on page 35 3 Touch Category Category Name Touch if you wis...

Page 51: ...tegory for up to 100 items 3 Touch OK Names of POIs and their distance from your current location appear They are listed in order from nearest to farthest Distance to the facility p When you touch the POIs around the specified location are shown on a map For details concerning operations refer to When appears to the right of the list on page 49 p Searching range is approximately 10 miles 16 km squ...

Page 52: ...the NAVI MENU and then touch Telephone Search 2 Input a telephone number p If there is more than one place for the num ber input a list of those places is displayed Touch the item you want in the list 3 If the displayed place is satisfactory touch OK Touching Scroll changes the destination Refer to Finding a destination on the map on page 49 Route Calculation to Your Home Location or to Your Favor...

Page 53: ...ming whether to cancel the current route appears 2 Touch Yes all The current route is deleted and a map of your surroundings reappears Yes one Route is recalculated by canceling the se lected way point No Returns to the previous display without delet ing the route p You can also cancel the route using Change Route in Shortcut menu Checking the Set Route You can check information about the route be...

Page 54: ... For details concerning operations refer to When appears to the right of the list on page 49 5 Touch Back You can return to the previous display Checking the set route by text This function is not available if your vehicle has deviated from the set route p When Profile is selected during the mem ory navi mode information is displayed up to the location where the route is stored in memory 1 Touch R...

Page 55: ... the previous page About Route Scroll refer to Checking the set route with the map on the previous page 4 Touch Back You can return to the previous display Recalculating the Route to Your Destination You can set the length of the area avoid just a certain area or you can even search a new route from the current location to your desti nation Recalculating the route Touch Route Options in NAVI MENU ...

Page 56: ...eft of the list allows you to sort the way points manually Automatic You can sort the destination and way points automatically The system will show the near est way point distance in a straight line from the current location as way point 1 and sort the other points including your destination in order of distance from your current location Original Returns to the original order Select from manual o...

Page 57: ... enclosed in a red frame You can also change the map scale though the maximum map scale for registering Areas to Avoid is 0 1 mile 100 m 6 Scroll the map adjust the position of the red frame and touch OK If you want to stop registration touch Back p Depending on the setting of route search conditions you may not be able to avoid the specified areas A confirmation mes sage is displayed on the scree...

Page 58: ... category on the POI short cut 3 Press MAP button POI s in the selected category appear on the map p You can also display POI by using Shortcut menu if Overlay POI is selected on Short Cut Selection Registering deleting POI Shortcuts You can register up to six shortcuts to your fa vorite POI You can also change or delete the registered shortcuts Registering a POI shortcut 1 Touch Destination in NA...

Page 59: ...t or factory settings Edit Current Route This displays a screen for adding or deleting way points The method is the same as de scribed in Editing Way Points to the Current Route p Edit Current Route is displayed only when the route is set Refer to Editing Way Points to the Current Route on page 56 View Current Route For details refer to Checking the set route with the map on page 54 For details re...

Page 60: ...s selected Designate Areas to Avoid Refer to Setting Areas to Avoid on page 57 Perform the route calculation for several route options and select one You can get route calculations for several route options After route options are calcu lated select the one you want 1 Set Number of Routes to Multiple For details refer to Modifying the Route Cal culation Conditions on the previous page 2 Search you...

Page 61: ...age 54 About Route Profile refer to Checking the set route by text on page 54 p After the route is calculated it may take some time until the detailed route informa tion Route Profile is displayed 5 Touch OK The route you selected is accepted and the map of your surroundings appears When you start driving the route guidance begins p If the above operations are not performed within 30 seconds after...

Page 62: ...rite location icon 1 Touch Settings in NAVI MENU then touch Defined Locations 2 Touch Set Go To When registering your home location touch Set Home p The items already registered under Return Home or Go to can be modified 3 Search for a location to register You can select a method of location search on the display For more details about Address Search refer to Basic Navigation on page 34 About Sear...

Page 63: ...s concerning operations refer to When appears to the right of the list on page 49 Add The screen for selecting the method for regis tering the location in Address Book appears For more details about Address Search refer to Basic Navigation on page 34 About Searching places to register refer to page 50 to 52 p If you select Map Search move the scroll cursor to the place you want to set and touch OK...

Page 64: ...t Sound 2 Select the sound The Address Information menu appears p If you want to hear the operating sound touch Modify the location For details refer to Changing the position of locations registered in Address Book on the next page Deleting Address Book or Destination History information Items registered in Address Book or Destina tion History can be deleted All entries of the data in Address Book...

Page 65: ...moving Address Book data from a Pioneer navigation system with a PC card slot e g AVIC 900DVD to a Pioneer navigation system without a PC card slot p When moving data copy the folder named POINT from the PC card to a personal computer Then use the personal computer to store POINT folder in the first level of a CD R RW and DVD R RW 1 Insert a disc to the disc loading slot 2 Touch Settings in NAVI M...

Page 66: ...w information is On Viewing traffic list Traffic Information is displayed onscreen in a list This allows you to check how many traffic incidents have occurred their location and their distance from your current position Checking all traffic information 1 Touch Info Traffic in NAVI MENU then touch Traffic Events The list with received traffic information is shown 2 Touch or to view the incident lis...

Page 67: ...dicate the length of the traffic congestion Displayed only when the scale on the map is 0 75 mile 1km or lower Traffic congestion Orange with white outline stop and go traf fic Red with white outline stopped traffic Black with white outline closed blocked roads 3 Icon for traffic information Appears only when the scale on the map is 10 mi 20 km or lower Refer to Selecting traffic information to di...

Page 68: ...oice p The following types of traffic incidents on the route will be checked stop and go stopped traffic and closed blocked roads If there is a traffic congestion information on the route When receiving information about a traffic congestion the message announcing the pre sence of a traffic congestion is indicated On this screen you can select the following items Yes The route is recalculated taki...

Page 69: ...formation on the list The traffic flow information on the route can also be displayed as an onscreen list p The method for checking the traffic flow in formation displayed on the screen is the same for Checking all traffic information Refer to Checking all traffic information on page 66 Touch Info Traffic in NAVI MENU then touch Traffic Flow You can use instead of in the traf fic events list scree...

Page 70: ...ion When an XM tuner GEX P10XMT is con nected you can receive stock price sports and other information and display it onscreen You may also register favorite information on the navigation system Displaying stock prices This navigation system can display the prices of up to 12 stocks Touch Info Traffic in NAVI MENU and then touch Stock Info The screen displays a list of stock prices p Although the ...

Page 71: ...yed items depend on the infor mation which is sent from each station p My Favorites can store up to 50 items 1 Touch Info Traffic in NAVI MENU then touch Set My Favorites The screen will display a list of categories The information appearing onscreen is automati cally updated at regular intervals 2 Touch the category you want to browse from the list 3 Touch an item you wish to store If an item is ...

Page 72: ...2 1 Status Depending on the XM tuner s GEX P10XMT reception status any one of the following may appear OK No problem Updating Updating encryption code Check antenna Improper antenna connection Not Connected 2 Signal Strength Depending on the signal strength any one of the following may appear Very Strong Strong Marginal Weak No signal 3 Radio ID The radio ID appears p If you have subscribed to eit...

Page 73: ...nc or if your free one year period has expired you are subject to charges by Signature s Nationwide Auto Club Inc You are also subject to charges by Signature s Nationwide Auto Club Inc for roadside services not included in the Emergency Roadside Assistance service The terms and conditions regarding the Emergency Roadside Assistance service provided by Signature s Nationwide Auto Club Inc are dete...

Page 74: ...to provide information to a driver that may be useful during an emergency situation and if they are in a safe location If not or in all major accidents call 911 1 Touch Info Traffic in NAVI MENU and then touch Emergency Info 2 Touch Locate Car Service A list of auto services appears onscreen 3 Touch the Category of the auto service you wish to use A red check appears next to the selected cate gory...

Page 75: ...ed Splash Screen The screen that appears when the Navigation system starts up AV Background Background for the screen during AV operations or during play back Navigation Background Background of navigation menu screen Several background pictures are stored in the Pioneer DVD Map Disc If you want to use these pictures insert the Pioneer DVD Map Disc Here a method for changing the background picture...

Page 76: ...er of the screen Repeat Selected picture is repeated in a pattern to cover the whole screen The background image starts changing After a short while the new background image ap pears p When you select images stored on the Pioneer DVD Map Disc you cannot select the layout method p When the picture starts to change do not turn off the vehicle engine until the mes sage appears to indicate that the pi...

Page 77: ...irection your vehicle is traveling in Clock Displays the current time Adjust Look Touch Adjust Look to display a screen for se lecting the panel pattern Touch one of the pat terns from among those displayed onscreen to change the panel to the selected pattern p If you touch Peak Hold Reset the maxi mum and minimum green line values indi cated in Acceleration and Side Acceleration are reset p You c...

Page 78: ...ry based on the outer dimensions of the tires Checking the connections of leads and installation positions Check that leads are properly connected be tween the navigation system and the vehicle Please also check whether they are connected in the correct positions 1 Touch Settings in NAVI MENU then touch Hardware Info 2 Touch Connection Status The Connection Status screen appears 4 5 6 7 1 3 2 1 Sp...

Page 79: ...wer cable connection is correct 6 Illumination When the headlights or small lamps of a ve hicle are on On is displayed If the or ange white lead is not connected Off appears 7 Back Signal When the gear lever is shifted to R the sig nal switches to High or Low Which of these is displayed depends on the vehicle Editing the Navigation Utilities En 79 Chapter 05 Editing the Navigation Utilities ...

Page 80: ...ng Back switch to Settings Menu 3 Touch KM Mile Setting Mile Yard is displayed below KM Mile Setting indicating that KM Mile Setting is set to Mile Yard If you want to change another setting select the item you want to change and repeat the procedure in step 3 Items Users can Change This section describes the details of the set ting for each item Settings marked with an as terisk show that they ar...

Page 81: ... Average Speed When calculating estimated time of arrival and the number of hours to the destination set the average speed for the freeway or ordin ary road using and Minor Ordinary Road When KM Mile Setting is set to Mile or Mile Yard it can be set in 5 mile in crements from 10 miles to 100 miles 35 miles When KM Mile Setting is set to km it can be set in 5 km increments from 20 km to 110 km 55 k...

Page 82: ...n the Map on page 58 Address Book Displays Address Book For details concerning operations refer to Editing Registered Locations on page 62 Route Options Displays Route Options menu For details concerning operations refer to Modifying the Route Calculation Conditions on page 59 Edit Current Route Displays the screen for adding or deleting way points For details concerning operations refer to Editin...

Page 83: ...an enlarged map around the point where your vehicle is approaching an intersection entrance exit of freeway or a junction On Switches to an enlarged map Off Does not switch to an enlarged map Arrow in AV Set whether to display the guidance informa tion with arrows on the AV operation screen On Displays guidance information with arrows on the AV operation screen Off Does not display guidance inform...

Page 84: ...d Normally set this to Off Repeat Repeat demo drive Off Demo Mode is set off p If you eject the DVD Map Disc during the demo drive the demo mode will be stopped Time Adjusts the systems clock The time difference between the time originally set in your navigation system is set here You can also select summer time On Off For details refer to step 7 in Installing the Program on page 156 Summer Time C...

Page 85: ...ation Status on page 77 Service Info Screen Displays the disc production number and ver sion information Restore Factory Settings Reset various settings registered to the naviga tion system and restores to the default or fac tory settings To restore touch Yes p About the item return to the default please check Display Information on page 177 Customizing Your Navigation System En 85 Chapter 06 Cust...

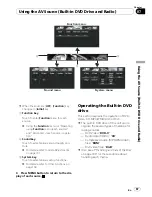
Page 86: ...to the AV operation screen 2 Press MENU button to change to AV MENU 3 Touch Sound Function or System to enter the menu you want to operate Each menu is displayed The items that cannot be operated according to the sources or condi tions are indicated in gray p If you touch AV Source the screen changes to AV Source screen Using the AV Source Built in DVD Drive and Radio En 86 Chapter 07 ...

Page 87: ...ns For details refer to Other Functions on page 138 4 Press MENU button to return to the dis play of each source Operating the Built in DVD drive This section explains the operation of DVD Video CD MP3 WMA AAC or DivX p The built in DVD drive of this unit can re cognize the several types of media as fol lowing sources DVD Video DVD V Audio data CD DA CD Compressed audio MP3 WMA AAC files ROM DivX ...

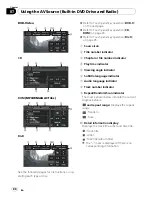
Page 88: ...cator 3 Chapter or file number indicator 4 Play time indicator 5 Viewing angle indicator 6 Subtitle language indicator 7 Audio language indicator 8 Track number indicator 9 Repeat Random Scan indicator The marks shown below indicate the current playback status and repeat range Displays the repeat range Random Scan a Detail information display Displays the track title artist and disc title Track ti...

Page 89: ...older 002 p When playing back files recorded as VBR variable bit rate files the play time will not be correctly displayed if fast forward or re wind operations are used p If more than 255 tracks are stored in the folder some time may be required to dis play the track list Touch panel key operation DVD V 1 Touch DISC in AV Source screen to se lect the built in DVD drive If no disc is loaded in navi...

Page 90: ...p pens fast rewind fast forward continues even if you release m or n To resume playback at a desired desired point touch f m or n opposite to key pushed for five seconds p You can also perform fast rewind fast for ward by holding o or p button on the hardware Operation using Function menu DVD V Refer to step 3 in How to Display each Menu on page 86 Function menu 1 3 2 1 Repeating play Each touch o...

Page 91: ...Playback starts from the selected menu item p Touch Touch to switch direct touch con trol Refer to Using DVD menu direct touch con trol on this page Frame by frame playback This lets you move ahead one frame at a time during playback Touch r during playback Each time you touch r you move ahead one frame To return to normal playback touch f p With some discs images may be unclear during frame by fr...

Page 92: ...se or slow motion playback re turns you to normal playback Changing the subtitle language during playback Multi subtitle With DVDs featuring multi subtitle recordings you can switch between subtitle languages during playback Touch S Title during playback Each time you touch S Title switches be tween subtitle language p With some DVDs switching between subti tle languages may only be possible using...

Page 93: ...uch panel keys Touch panel keys CD 2 2 3 1 Touch panel keys ROM 3 2 4 2 1 1 Playback and Pause Pause lets you temporarily stop disc play back Touching f switches between playback and pause PAUSE is displayed and playback is paused 2 Skip the track or file forward or back ward Touching p skips to the start of the next track or file Touching o once skips to the start of the current track or file Tou...

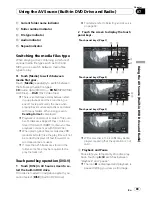
Page 94: ...ers Touch p is only displayed when the list is dis played p If the current folder is the ROOT folder is displayed in gray p If the upper folder has no MP3 WMA AAC files the track or file currently playing will not change Randomly play tracks with one touch All of the songs in a disc can be played at ran dom by only touching one key Touch Shuffle All To cancel the random play switch Random to Off i...

Page 95: ...en On and Off Scan play is performed in the current repeat play range When you find the de sired track touch Scan to turn scan play off p After track or folder scanning is finished normal playback of the tracks will begin again p If you turn Scan to On during the re peat play range is Track the repeat play range changes to Folder automatically p If you turn Scan to On during the re peat play range...

Page 96: ...to Display each Menu on page 86 Function menu 1 2 1 Repeating play Each touch of Repeat changes the set tings as follows Folder Repeat the current folder Disc Repeat all files File Repeat just the current file p If you select another folder during repeat play the repeat play range changes to Disc p If you perform file search or fast forward rewind during File the repeat play range changes to Folde...

Page 97: ...inutes 00 seconds and touch 7 1 0 and 0 in order To cancel the input numbers touch Clear 3 While the input number is displayed touch Enter This starts playback from the selected scene Changing audio system during playback Multi audio With DivX featuring multi audio recordings you can switch between audio systems during playback Touch Audio during playback Each time you touch Audio switches be twee...

Page 98: ...ur registration code refer to Displaying your DivX VOD registration code on page 136 p DivX VOD content is protected by a DRM Digital Rights Management system This restricts playback of content to specific re gistered devices If the message is displayed after load ing a disc containing DivX VOD content touch Play Playback of the DivX VOD content will start p Touch Next or Previous to switch be twe...

Page 99: ... information display or preset list dis play Detail information display Preset list display Storing and recalling broadcast frequencies If you touch any of the preset tuning keys P1 PRESET 1 P6 PRESET 6 you can easily store up to six broadcast frequencies for later recall with the touch of a key Preset tuning keys P1 P6 1 When you find a frequency that you want to store in memory keep touching a p...

Page 100: ...al strength When finished BSM stops flashing To cancel the storage process touch Stop p Storing broadcast frequencies with BSM may replace broadcast frequencies you have saved using P1 P6 Tuning in strong signals Local seek tuning lets you tune in only those radio stations with sufficiently strong signals for good reception 1 Touch Local in Function menu 2 Touch On to turn local seek tuning on To ...

Page 101: ...r 3 Title Folder number indicator 4 Chapter Track number indicator 5 Play time indicator 6 Repeat indicator 7 Disc number list 8 File type indicator When playing a ROM the file type indicator is displayed 1 AV1 Input is set to M DVD For details refer to Setting the video input on page 139 2 Touch M DVD in AV Source screen to select the multi DVD player For details refer to Selecting an AV source o...

Page 102: ... display Displays the track title artist and album title Track title Artist Album title p The mark is displayed if there is no corresponding information 8 Repeat Random Scan indicator The marks shown below indicate the current playback status and repeat range Displays the repeat range Random Scan 1 Touch USB in AV Source screen to se lect the USB For details refer to Selecting an AV source on page...

Page 103: ... player USB memory Track Repeat just the current track Folder Repeat the current folder p If you select another folder during repeat play the repeat play range changes to All p If you perform track search or fast forward rewind during Track the repeat play range changes to Folder Playing tracks in a random order Random play lets you play back tracks in a random order within the repeat range All or...

Page 104: ...h channel The icon of a newly established channel that is not contained in the disc can not be displayed When no icon can be dis played the following substitute icon is displayed Substitute icon p The logo data is not displayed during the memory navi mode p The following functions are not available on the GEX P10XMT GEX P920XM Switching the XM display p The following functions are not available on...

Page 105: ...modes between the two meth ods for selecting and listing channels All CH Mode or CH Number Mode You can select a channel from all channels Category Mode You can select a channel within the selected category Touch Mode to select the desired channel select mode Touch Mode repeatedly to switch between the two modes Switching between the detailed information display and the preset list display You can...

Page 106: ...Mode to select Category Mode 2 Touch or to select the de sired category You can also select the category by pressing the o or p button 3 Touch or to select the de sired channel within the selected category p When using the GEX P10XMTor GEX P920XM press and hold the o or p button to continuously move up or down the channels in the category Selecting a channel from the XM channel list display The li...

Page 107: ...You cannot memorize the song title or the artist name of the channel 000 p There is a possibility the memorized title is not displayed correctly When the memorized track is broadcast A beep sounds and a message is displayed Touch Yes to switch to that station and listen to that track p If the memorized track is not selected in the MyMix list no notification will be pro vided even when that track i...

Page 108: ...h Memo in Function menu 2 Touch the song title that you want to exclude from the notification list The check mark is removed and the song title is excluded from the notification list Deleting the memorized tracks You can delete each one of the memorized tracks from the song title list 1 Touch Memo in Function menu 2 Touch the track you want to delete and hold it for two seconds or more That track ...

Page 109: ... Using the song alert function Using the direct traffic announcement function Using the MyMix function 1 Source icon 2 SIRIUS band indicator 3 SIRIUS preset number indicator 4 SIRIUS channel number indicator 5 SIRIUS channel select mode indicator Shows what channel select mode has been selected You can select a channel from all channels in All CH Mode and select a channel from the selected categor...

Page 110: ...you touch any of the preset tuning keys Preset1 Preset6 to easily store up to six broadcast stations for later recall with the touch of a key 1 Select the channel that you want to store in memory 2 Touch Preset to display the preset list 3 Keep touching a preset tuning key Preset1 Preset6 until the SIRIUS preset number e g P CH 1 stops flashing The number you have touched will flash in the SIRIUS ...

Page 111: ...only the song title and the artist name are mem orized Memorizing the song title and the artist name of a song The song title and artist name of the song you are listening to can be memorized Touch Memo The song title and artist name of the song you are listening to are memorized and a confir mation message appears p Up to 12 song titles and artist names can be memorized Trying to save more than 1...

Page 112: ... ID repeats displaying RADIO ID and the ID code one after the other p You can also display the Radio ID to select RADIO ID from channel category in Category Mode Advanced SIRIUS tuner operation 1 1 Function display Refer to step 3 in How to Display each Menu on page 86 Setting the notification of memorized tracks Display the song title list memorized for the MyMix Function MyMix list You can chang...

Page 113: ...An alert will be displayed when a game with the team you selected is about to start or is currently playing You can also display game information and changes to the broadcast channel p The Game Information function is available when Game Alert function is turned on 1 Touch Game Info in Function menu The game name and the broadcast channel are displayed 2 Touch Tune To p The game score will be upda...

Page 114: ...FAD BAL are inop erable in Sound menu About the telephone source standby mode Once connected via Bluetooth wireless tech nology this navigation system will remain on telephone source standby in the background while the connection is sustained This means you can freely use the other functions of this system but still be ready to receive a call Setting up for hands free phoning Before you can use th...

Page 115: ...e p The name if registered on the phone book and phone number are displayed 5 Touch to end the call Making a call from the history list The most recent calls made dialled received and missed are stored in the call history list You can browse the call history list and call numbers from it p Up to 12 calls are stored in each list p The call history is stored only when the re gistered phone is connec...

Page 116: ...ot be reflected to the list Calling a number in the preset dial list 1 Touch one of preset keys P1 to P6 The phone number registered to the selected preset key is displayed p Touching ADD adds or deletes be fore the phone number p Each touch of ABC 123 changes the dis play on the list between the name and the phone number 2 Touch to make a call p The estimated call time appears in the dis play p T...

Page 117: ... This function is available only if your cellu lar phone features voice recognition func tion p Operation varies depending on the type of your cellular phone For more details con cerning operation refer to the instruction manual of your cellular phone p This function can be operated only when the connection is established by HFP Hands Free Profile 1 Touch Voice Voice recognition function of the ce...

Page 118: ...ton p The rejected call is recorded in missed call history list For details refer to Making a call from the history list on page 115 Advanced hands free phoning operation 1 1 Function display Refer to step 3 in How to Display each Menu on page 86 p When your cellular phone is not con nected you cannot select Phonebook Transfer or Clear Memory p You can only select Echo Cancel while transmitting or...

Page 119: ...le cellular phones You can have the navigation system search for any available phones in the area that have Bluetooth wireless technology then select which one you want to connect to from a list displayed onscreen 1 Touch Phone Connect in Function menu The phone connection menu screen appears 2 Touch Search When available cellular phones featuring Bluetooth wireless technology are found de vice na...

Page 120: ... Bluetooth technology is allocated a unique 48 bit device address It consists of a 12 digit of hexadecimal string This navigation system can display the BD ad dress of your registered cellular phone featur ing Bluetooth technology 1 Touch Phone Connect in Function menu The phone connection menu screen appears 2 Touch Phone Name The 12 digit hexadecimal string is displayed p Without connecting you ...

Page 121: ...the phone book in the cellular phone con tains image data phone book may not be correctly transferred 1 Touch Phonebook Transfer in Function menu The phonebook transfer screen appears p Hands free phoning connection is discon nected to establish the connection for phone book transfer The navigation system now ready to be transferred the phone book from the phone 2 Use cellular phone to perform pho...

Page 122: ...nput number is deleted letter by letter from the end of the numbers Continuing to press deletes all of the numbers OK The change is fixed and the phone book edit screen reappears Name edit screen You can input letters or numbers Next Each touch of Next changes the characters that can be input as follows Upper case letters lower case letters upper case symbols lower case symbols The input text is d...

Page 123: ...All Calls switches between On and Off p If both the automatic reject and automatic answer functions are set to On automatic reject is prioritized and all incoming calls are automatically rejected p If the Refuse All Calls is set to On re jected incoming calls will not be stored in the missed call list Setting a ring tone The navigation system offers to turn the ring tone for incoming calls on or o...

Page 124: ...ning operation refer to the iPod s own er s manual Operating the iPod Music 3 7 2 5 6 4 1 For details refer to Advanced iPod operation on page 126 p Some functions cannot be reproduced de pending on the generation of the iPod p If the error occurs when an iPod with video compatibilities is connected to the naviga tion system the icon is displayed Refer to Problems in the AV screen during iPod play...

Page 125: ...system for controlling an iPod are designed to imitate iPod operation This allows you to search and play songs as you would with an iPod 1 Touch one of the categories in which you want to search for a song Playlists playlists Genres genres Artists artists Albums albums Podcasts podcasts The search screen is displayed p When connected to an iPod that can han dle podcasts you can search by podcast p...

Page 126: ...back or forward to another video touch o or p Touching p skips to the start of the next video Touching o once skips to the start of the current video Touching again will skip to the previous video When the video with chapters played touch ing p skips to the start of the next chapter Touching o once skips to the start of the current chapter Touching again will skip to the previous chapter 6 To perf...

Page 127: ... player 1 2 If you connect a Bluetooth adapter e g CD BTB200 sold separately to this unit you can control a Bluetooth audio player via Bluetooth wireless technology For details concerning operation refer to the Bluetooth adapter s op eration manual This section provides brief in formation on Bluetooth audio player operations with this unit that slightly differs or is cut short from the operations ...

Page 128: ...e p Depending on the Bluetooth audio player you connected to this navigation system operations on this navigation system to control the player may differ from those ex plained in this manual 1 Source icon 2 Device name Touching Name switches between equip ment name and BD address 1 Touch BT AUDIO in AV Source screen to select the Bluetooth audio source For details refer to Selecting an AV source o...

Page 129: ...dress SYSTEM NAME system name SYSTEM VER version BT MODULE VER Bluetooth module version External Unit Operating the external unit 1 2 The term external unit refers to a Pioneer product such as one available in the future that although incompatible as a source en ables control of basic functions by the naviga tion system Two external units can be controlled by the navigation system When two externa...

Page 130: ...al function You can turn automatic and manual function on or off You can switch between Auto and Manual functions of the external unit connected Initially this function is set to Auto p Operating commands set for Auto and Manual operations vary depending on the external unit connected Touch A M Touching A M switches between Auto and Manual AV Input AV CAUTION For safety reasons video images cannot...

Page 131: ...a curve in which low pitched and high pitched sounds are boosted Natural Natural is a curve in which low pitched and high pitched sounds are slightly boosted Vocal Vocal is a curve in which the midrange which is the human vocal range is boosted Flat Flat is a flat curve in which nothing is boosted Custom1 Custom1 is an adjusted equalizer curve that you cre ate Custom2 Custom2 is an adjusted equali...

Page 132: ... Low Mid High Band You can select the equalizer band Frequency You can select which frequency to be set as the center frequency Level You can select the decibel dB level of the selected EQ Q You can select the details of the curve char acteristics 1 Touch EQ Menu in Sound menu 2 Touch Customize 3 Touch c or d to select the equalizer band to adjust Each time you touch c or d selects equalizer bands...

Page 133: ...When Preout the subwoofer controller set ting in Initial menu is Sub W you can se lect Sub Woofer Refer to Setting the rear output and subwoo fer controller on page 137 2 Touch On to turn subwoofer output on To turn subwoofer output off touch Off 3 Touch Reverse or Normal to select the phase of subwoofer output 4 Touch or to adjust the output level of the subwoofer 6 to 6 is displayed as the level...

Page 134: ...he source you wish to ad just 2 Touch SLA in Sound menu 3 Touch or to adjust the source vo lume 4 to 4 is displayed as the source volume is increased or decreased Sources are set to same source level adjust ment volume automatically CD ROM DivX S DVD and M DVD EXT 1 and EXT 2 AV 1 and AV 2 XM and SIRIUS Setting Up the DVD DivX Player Configure the DVD DivX player DVD DivX Setup adjustments 1 1 DVD...

Page 135: ...ng a regular display select either Letter Box or Panscan Selecting 16 9 may result in an unnatural picture p If you select the TV aspect navigation sys tem s display changes to the same setting Touch TV Aspect Each touch of TV Aspect changes the set tings as follows 16 9 Wide screen picture 16 9 is dis played as it is initial setting Letter Box The picture is in the shape of a letter box with blac...

Page 136: ...rst need to register the unit with your DivX VOD content provider You do this by generating a DivX VOD registration code which you submit to your provider Touch DivX VOD Your 8 digit registration code is displayed p Make a note of the code as you will need it when you register with a DivX VOD provider Setting the Auto Play When a DVD disc with DVD menu is inserted this unit will cancel the DVD men...

Page 137: ... can select whether to use the sub woofer controller s low pass filter phase built in Preout Sub W or the auxiliary Preout Full p When 5 1CH setting is On the rear out put and subwoofer setting is not available 1 Touch Rear SP in Initial menu 2 Touch Rear SP to switch the rear out put setting When no subwoofer is connected to the rear output select Full When a subwoofer is connected to the rear ou...

Page 138: ... is ended p Even when you receive a phone call naviga tion voice guidance cannot be attenuated or muted Use Volume to control the navi gation voice guidance volume Switching 5 1CH setting When the navigation system is combined with the multi channel processor system e g DEQ P8000 and AXM P8000 sold separately you can use the multi channel sound Enter the following setting when combining the multi ...

Page 139: ... image and sound are output only when AV 1 AV 2 has both video and sound The Video image and sound are output only when the appropriate setting on AV1 Input or AV2 Input Setup adjustments 1 1 System menu display Refer to step 3 in How to Display each Menu on page 86 Setting the video input You can switch the setting according to the connected component p Select Video to watch video of a con nected...

Page 140: ...itch to another setting p Initially this function is set to Off 1 Touch Camera in System menu 2 Touch Camera to turn rear view cam era setting on Touching Camera switches between On and Off p Unless this setting is On you cannot switch to Rear View mode 3 Touch Polarity to select an appropriate setting for polarity Each time you touch Polarity switches be tween the following polarity Battery When ...

Page 141: ...hout sensing any disparity even on a wide screen Cinema cinema A picture is enlarged by the same propor tion as Just in the horizontal direction and by an intermediate proportion between Full and Zoom in the vertical direction ideal for a cinema sized picture wide screen pic ture where captions lie outside the frame Zoom zoom A 4 3 picture is enlarged in the same pro portion both vertically and ho...

Page 142: ...lights are on nighttime These are switched automati cally depending on the vehicle s headlights are on or off p You cannot adjust Color and Hue for the source without video and navigation map display p If you select Source sources without video and sources with video are saved se parately in the memory p The picture adjustment may not be able to be used with some rear view cameras p The same setti...

Page 143: ...zerbaijani az 0126 Kashmiri ks 1119 Sundanese su 1921 Bashkir ba 0201 Kurdish ku 1121 Swahili sw 1923 Belorussian be 0205 Kirghiz ky 1125 Tamil ta 2001 Bulgarian bg 0207 Latin la 1201 Telugu te 2005 Bihari bh 0208 Lingala ln 1214 Tajik tg 2007 Bislama bi 0209 Laotian lo 1215 Thai th 2008 Bengali Bangla bn 0214 Lithusnian lt 1220 Tigrinya ti 2009 Tibetan bo 0215 Latvian Lettish lv 1222 Turkmen tk 2...

Page 144: ...en reconnected Press RESET button while the power is on When the ignition switch is turned ON or turned to ACC the motor sounds The navigation system confirms whether a disc is loaded or not This is a normal operation You cannot position your vehicle on the map or the positioning error is large The quality of signals from the GPS satellites is poor causing reduced positioning accuracy Such a loss ...

Page 145: ...affected The map continually reorients it self The traveling direction is set to Heading up Touch on the screen and change the map display Tracking marks are not dis played Tracking Display is turned off Check Tracking Display settings and make sure Always or This Trip is selected Page 83 The daylight display is used even when the vehicle lights are on Daytime is set to Day Night Dis play Check Da...

Page 146: ... Connect the parking brake cord and apply the parking brake The parking brake is not applied Connect the parking brake cord and apply the parking brake The audio and video skip This unit is not firmly secured Secure this unit firmly Rear display picture disappears The source disc being listened to in the navigation system has been ejected Before ejecting the disc switch the source This problem may...

Page 147: ...h panel calibration Page 157 NO SIGNAL is displayed at the right corner on the map While waiting for a response from the XM tuner Wait for a while and try the operation again You are in an area that cannot re ceive XM tuner reception Move into an area that can receive XM tuner reception Your current location provides very poor reception Change your location UPDATING is displayed at the right corne...

Page 148: ...multiple angles You are trying to switch to multiple angle viewing of a scene that is not recorded from multiple angles Switch between multiple angles when watch ing scenes recorded from multiple angles The picture is extremely unclear distorted and dark during play back The disc features a signal to prohibit copying Some discs may have this Since the navigation system is compatible with the copy ...

Page 149: ...peed signal input pink lead wire of the power cable correctly Although it can be operated with Simple hy brid mode without connecting the speed sig nal input the precision of the positioning will be less accurate Vibration is detected Please power off the system and check the installation After you have checked please re boot the system and press OK The navigation unit is installed in a place wher...

Page 150: ... added another service to your account since you last powered on the navigation system When you subscribe to both services this message will stop appearing when you turn the ignition ON ACC ON Radio is being updated with the lat est encryption code Wait until the encryption code is fully up dated UPDATING The selected channel is not in cluded in your subscription Select another channel Radio is be...

Page 151: ...s through toll roads including toll areas The address does not exist Do you want to continue If the house number is entered with out specifying city or street and that house number does not exist on the data Re enter the existing house number by follow ing the instructions shown on the screen Or proceed to the next step without entering the house number and specify the city or street first There i...

Page 152: ... dirty Or the pick up lens of the DVD drive is dirty Try re reading the data by inserting a clean disc Clean the pick up lens with a commercially available cleaning kit for DVD then try to reading again JPEG file is corrupt Change is cancelled The data is damaged or an attempt was made to set a JPEG image that does not conform to specifications as the background picture Use the appropriate data af...

Page 153: ...ot be stored Previous setting will be kept Recovery was performed for the memory area after failing to read the disc data for some reason the memory area that was previously set will be recovered Clean the disc Clean the DVD drive Consult the Pioneer Local dealer if this mes sage persists This function is not available with the current map disc The current position is areas not stored on the DVD M...

Page 154: ...re returns to within normal operating limits Error not defined ERROR FF FF Undefined error Press RESET button Refer to Page 28 in this manual Non playable tracks are skipped FILE SKIPPED Files that are protected by digital rights management The protected files are skipped Impossible to play all tracks PROCETED DISC DRM Pro tected All the files on the inserted disc are secured by DRM Replace disc F...

Page 155: ...r switches to the next or pre vious page in the list 7 Touch OK 8 Enter the password you want to set p Five to sixteen characters can be entered for a password 9 Touch OK 10 Reenter the password in step 7 to con firm the setting 11 Touch OK The password is set Enter the password In password input screen you must enter the current password If you enter the incorrect password three times the navigat...

Page 156: ...nstallation of the program starts immediately p Do not insert anything other than a disc into the disc loading slot p If you cannot insert a disc completely or if an inserted disc is not recognized check that the label side of the disc is up Press EJECT button to eject the disc and check the disc for damage before inserting the disc again 3 Touch Yes Oui When you start the navigation system for th...

Page 157: ...p of your navigation system Chapter 2 explains the basic operation of your navigation system For details refer to Time on page 84 Adjusting the Response Positions of the Touch Panels Touch Panel Calibration If you feel that the touch panel keys on the screen deviate from the actual positions that respond to your touch adjust the response po sitions of the touch panel screen There are two adjustmen...

Page 158: ...isc is removed from the navigation sys tem after the data is stored navigation is per formed using the data in the memory memory navi mode In the memory navi mode you can play a music CD or DVD Video on the navigation system while navigation is taking place The operation is automatically switched to the memory navi mode when the DVD Map Disc is removed from the navigation system Navigation in the ...

Page 159: ... de leted even when the vehicle s engine is turned off The memorized area may be deleted in the fol lowing circumstances Yellow lead of the navigation system or the vehicle battery is disconnected RESET button is pressed Navigation software is updated System language is changed Navigation operation during the memory navi mode 1 Operation possible s Operation restricted Operation not possible NAVI ...

Page 160: ...the DVD Map Disc is removed data cannot be read any more and preparation for memory navi mode will be canceled ac cordingly Since the reading of the map data used in the memory navi mode is not complete the map scale may switch to a larger scale In this case route guidance will continue up to the location already memorized In memory navi mode you will be notified in three cases when the distance t...

Page 161: ... tuner GEX P10XMT GEX P920XM which is sold separately is con nected the logo data is not displayed dur ing memory navi mode Cautions relating to auto reroute in memory navi mode Auto rerouting in memory navi mode is de signed to return you to your original route wherever possible In memory navi mode persistently deviating from the route may result in one of the follow ing A clearly circuitous rout...

Page 162: ...ur position The current loca tion is measured by detecting driving distance with the speed pulse the turning direction with the Gyrosensor and inclination of the road with the G sensor The 3D Hybrid Sensor can even calculate changes of altitude and corrects for discre pancies in the distance traveled caused by driving along winding roads or up slopes Also the navigation system learns the driving c...

Page 163: ...ou can expect your position as shown on the map to show fewer errors p If you use chains on your wheels for winter driving or put on the spare wheel errors may suddenly increase because of differ ence in wheel diameter The system detects the fact that the tire diameter has changed and automatically replaces the value for calculating distance p If ND PG1 is used or if your vehicle is oper ating in ...

Page 164: ...gnals cannot be re ceived learning and error correction are not possible If GPS positioning has been operating for only a short time your vehi cle s actual position and the current loca tion mark on the map may diverge considerably Once GPS reception is re stored accuracy will be recovered Vehicles that Cannot Obtain Speed Pulse Data p The speed pulse data comes from the speed sensing circuit The ...

Page 165: ...hat is not on the map If you drive in zig zags If the road has connected hairpin bends If there is a loop or similar road configura tion If you take a ferry If you are driving on a long straight road or a gently curving road If you are on a steep mountain road with many height changes Appendix En 165 Appendix Appendix ...

Page 166: ...r tires for ones with a different size If trees or other obstacles block the GPS signals for a considerable period If you drive very slowly or in a start and stop manner as in a traffic congestion If you join the road after driving around a large parking lot When you pass around a traffic circle When starting driving immediately after starting the engine If you insert the disc and turn your naviga...

Page 167: ...icinity Search only City Center search is possible If you cannot search in a currently selected zone the system may forcibly switch to the zone selection screen A Freeway Search covers all areas regard less of the disc on which the information is stored If a Vicinity Search is performed on the border of an area not stored on the disc the system will not necessarily select the nearest facility The ...

Page 168: ...pdated If this happens the system will automatically try to recover the deleted information but data can be recovered only for areas stored on the disc For items that could not be re covered a recovery process will begin when you set another disc Handling and Care of the Disc Some basic precautions are necessary when handling your discs DVD Map Discs Do not use discs other than those intended for ...

Page 169: ...isc Read the precautions with the package of discs before using them When DVD R DVD RW discs are used playback is possible only for discs which have been recorded with the Video format video mode It is not possible to play back DVD R RW discs which have been re corded with the Video Recording format VR mode It may not be possible to play back DVD R DVD RW discs which have been recorded with the Vi...

Page 170: ...cide with the actual playback sequence However there also is some writing software which per mits setting of the playback order Some audio CDs contain tracks that merge into one another without a pause When these discs are converted to MP3 WMA AAC files and burned to a disc the files will be played back on this player with a short pause between each one regardless of the length of the pause betwee...

Page 171: ...he disc The numbers in the figure indicate the order in which folder numbers are assigned and the order to be played back Indicates the order in which folder num bers are assigned Indicates each file The number is as signed in the order of the track to be played back 3 1 2 1 First tier 2 Second tier 3 Third tier Notes This unit assigns folder numbers The user cannot assign folder numbers It is not...

Page 172: ...s do not use these extensions for files other than DivX video files DivX subtitle files Srt format subtitle files with the extension srt can be used Only one subtitle file can be used for each DivX file Multiple subtitle files cannot be associated Subtitle files that are named with the same character string as the DivX file before the extension are associated with the DivX file The character strin...

Page 173: ... not using this navigation system avoid exposing it to direct sunlight as much as possible The LCD screen should be used within the temperature ranges shown below Operating temperature range 14 F to 122 F Storage temperature range 4 F to 176 F Do not use the LCD screen at temperatures higher or lower than the operating tem perature range because the LCD screen may not operate normally and the LCD ...

Page 174: ...ful information about how a route is set CAUTION When a route is calculated the route and voice guidance for the route is automatically set Also for day or time traffic regulations only informa tion about traffic regulations at the time when the route was calculated is shown One way streets and street closures may not be taken into consid eration For example if a street is open during the morning ...

Page 175: ...of your current heading In such cases you are instructed to turn around please do so safely and in accordance with local traffic rules In some cases guidance may direct you past your destination and then indicate a U turn to get back to it In some cases a route may begin on the opposite side of a railway or river from your actual current location If this happens drive towards your destination for ...

Page 176: ...hite dots For details concerning operations refer to Tracking Display on page 83 Types of the Road Stored in the Disc There are three types of roads marked on the map of this disc Roads included in the route guidance and roads not included Turn by Turn Routable Roads contain full attri bute data and can be used for full Route Gui dance Pioneer Navigation will display full route guidance including ...

Page 177: ...51 Address Book 52 62 Destination History 52 62 Freeway Search 52 Telephone Search 52 Cancel Route 53 Info Traffic Page Traffic On Route 67 Traffic Events 66 Traffic Flow 2 69 Traffic Settings 2 70 XM Status 72 Stock Info 70 Set My Favorites 71 My Favorites 71 Emergency Info 74 Overlay POI 1 58 Route Options Page Edit Current Route 56 59 View Current Route 55 59 Recalculate 59 Number of Routes 2 5...

Page 178: ...tory Settings 85 Shortcut menu p The shortcuts displayed onscreen can be changed The shortcuts described here are those that can be selected with the system as default setting p Items marked with an asterisk 3 cannot be removed from Shortcut menu Refer to Short Cut Selection on page 82 Shortcut menu Page Destination 3 43 49 Change Route 3 Reroute 55 Cancel Route 53 Route Profile 55 Route Scroll 55...

Page 179: ...age Rear SP Rear SP 137 Preout 137 PIN Edit 137 Mute Input Guide 138 5 1CH 138 System menu Page AV1 Input 139 AV2 Input 139 Camera Camera 140 Polarity 140 Antenna Control 140 Wide Mode 141 V Adjust 142 Screen Off 142 Illumi Color 140 Screen Color 141 Function menu DVD V Page Repeat 90 L R Select 90 DVD DivX Setup 134 Appendix En 179 Appendix Appendix ...

Page 180: ...epeat 94 Random 95 Scan 95 DivX Page Repeat 96 DVD DivX Setup 90 RADIO Page BSM 100 Local 100 M DVD Page Repeat 90 Random 95 Scan 95 USB Page Repeat 103 Random 103 Scan 103 XM Page Memo 108 Appendix En 180 Appendix ...

Page 181: ...book Transfer 121 Phonebook Name View 121 Clear Memory 122 Auto Answer 123 Refuse All Calls 123 Ring Tone 123 Auto Connect 123 Echo Cancel 124 iPod Page Repeat 126 Shuffle 127 Wide Screen 127 iPod Charge 127 BT AUDIO Page Connection Open 129 Disconnect 129 Device Info 129 Appendix En 181 Appendix Appendix ...

Page 182: ...4 3 Wide screen displays have an aspect ratio of 16 9 providing a bigger picture for exceptional presence and atmosphere Bit rate This expresses data volume per second or bps units bits per second The higher the rate the more information is available to reproduce the sound Using the same encoding method such as MP3 the higher the rate the better the sound Chapter DVD titles are divided into chapte...

Page 183: ...ari ety of purposes Guidance mode The mode in which guidance is given as you drive to your destination the system automati cally switches to this mode as soon as a route has been set Guidance point These are important landmarks along your route generally intersections The next gui dance point along your route is indicated on the map by the yellow flag icon Home location Your registered home locati...

Page 184: ...isc letting you choose as desired Multi session Multi session is a recording method that al lows additional data to be recorded later When recording data on a CD ROM etc all data from beginning to end is treated as a sin gle unit or session Multi session is a method of recording more than 2 sessions on one disc Multi subtitle Subtitles in up to 32 languages can be re corded on a single DVD letting...

Page 185: ...le bit rate Generally speaking CBR constant bit rate is more widely used But by flexibly adjusting the bit rate according to the needs of the audio com pression it is possible to achieve compression with a priority on sound quality Voice guidance The giving of directions by a recorded voice in guidance mode Way Point A location that you choose to visit before your destination a journey can be buil...

Page 186: ...Weight 105 g 0 23 lbs Display Screen size aspect ratio 7 inch wide 16 9 effective display area 156 mm 89 mm 6 1 8 in 3 1 2 in Pixels 336 960 1 440 234 Type TFT active matrix transmis sive type Color system NTSC compatible Operating temperature range 14 F to 122 F Storage temperature range 4 F to 176 F Angle adjustment 50 to 110 initial settings 90 Audio Continuous power output is 22 W per channel ...

Page 187: ...0 2 V Audio 1 0 V 1 kHz 0 dB Number of channels 2 stereo MP3 decoding format MPEG 1 2 Audio Layer 3 WMA decoding format Ver 9 0 L3 AAC decoding format MPEG 4 AAC only encoded by iTunes m4a DivX decoding format Home Theater Ver 3 Ver 4 Ver 5 2 avi divx FM tuner Frequency range 87 9 MHz to 107 9 MHz Usable sensitivity 8 dBf 0 7 µV 75 W mono S N 30 dB Signal to noise ratio 75 dB IHF A network Distort...

Page 188: ...A PTY LTD 178 184 Boundary Road Braeside Victoria 3195 Australia TEL 03 9586 6300 PIONEER ELECTRONICS OF CANADA INC 300 Allstate Parkway Markham Ontario L3R 0P2 Canada TEL 1 877 283 5901 TEL 905 479 4411 PIONEER ELECTRONICS DE MEXICO S A de C V Blvd Manuel Avila Camacho 138 10 piso Col Lomas de Chapultepec Mexico D F 11000 TEL 55 9178 4270 先鋒股份有限公司 總公司 台北市中山北路二段44號13樓 電話 02 2521 3588 先鋒電子 香港 有限公司 ...

Reviews: