4. REMOVING THE
FINISHED PART,
CLEANING AND
POST-EXPOSING
17
18
1
. Use your print controller to drive the print plate
up until the print is clear of the vat. Allow the
print to drain for a few minutes to reduce the
chance of drips.
2. Make preparations for cleaning the print. You
will ideally need a large sink with a good supply
of hot water. The ambient light level should be
low. Have a spray bottle with a hot, very dilute
solution of washing up liquid is also useful.
Wear protective gloves at all times you come
into contact with liquids. You can also clean
with IPA if available (Iso Propyl Alcohol).
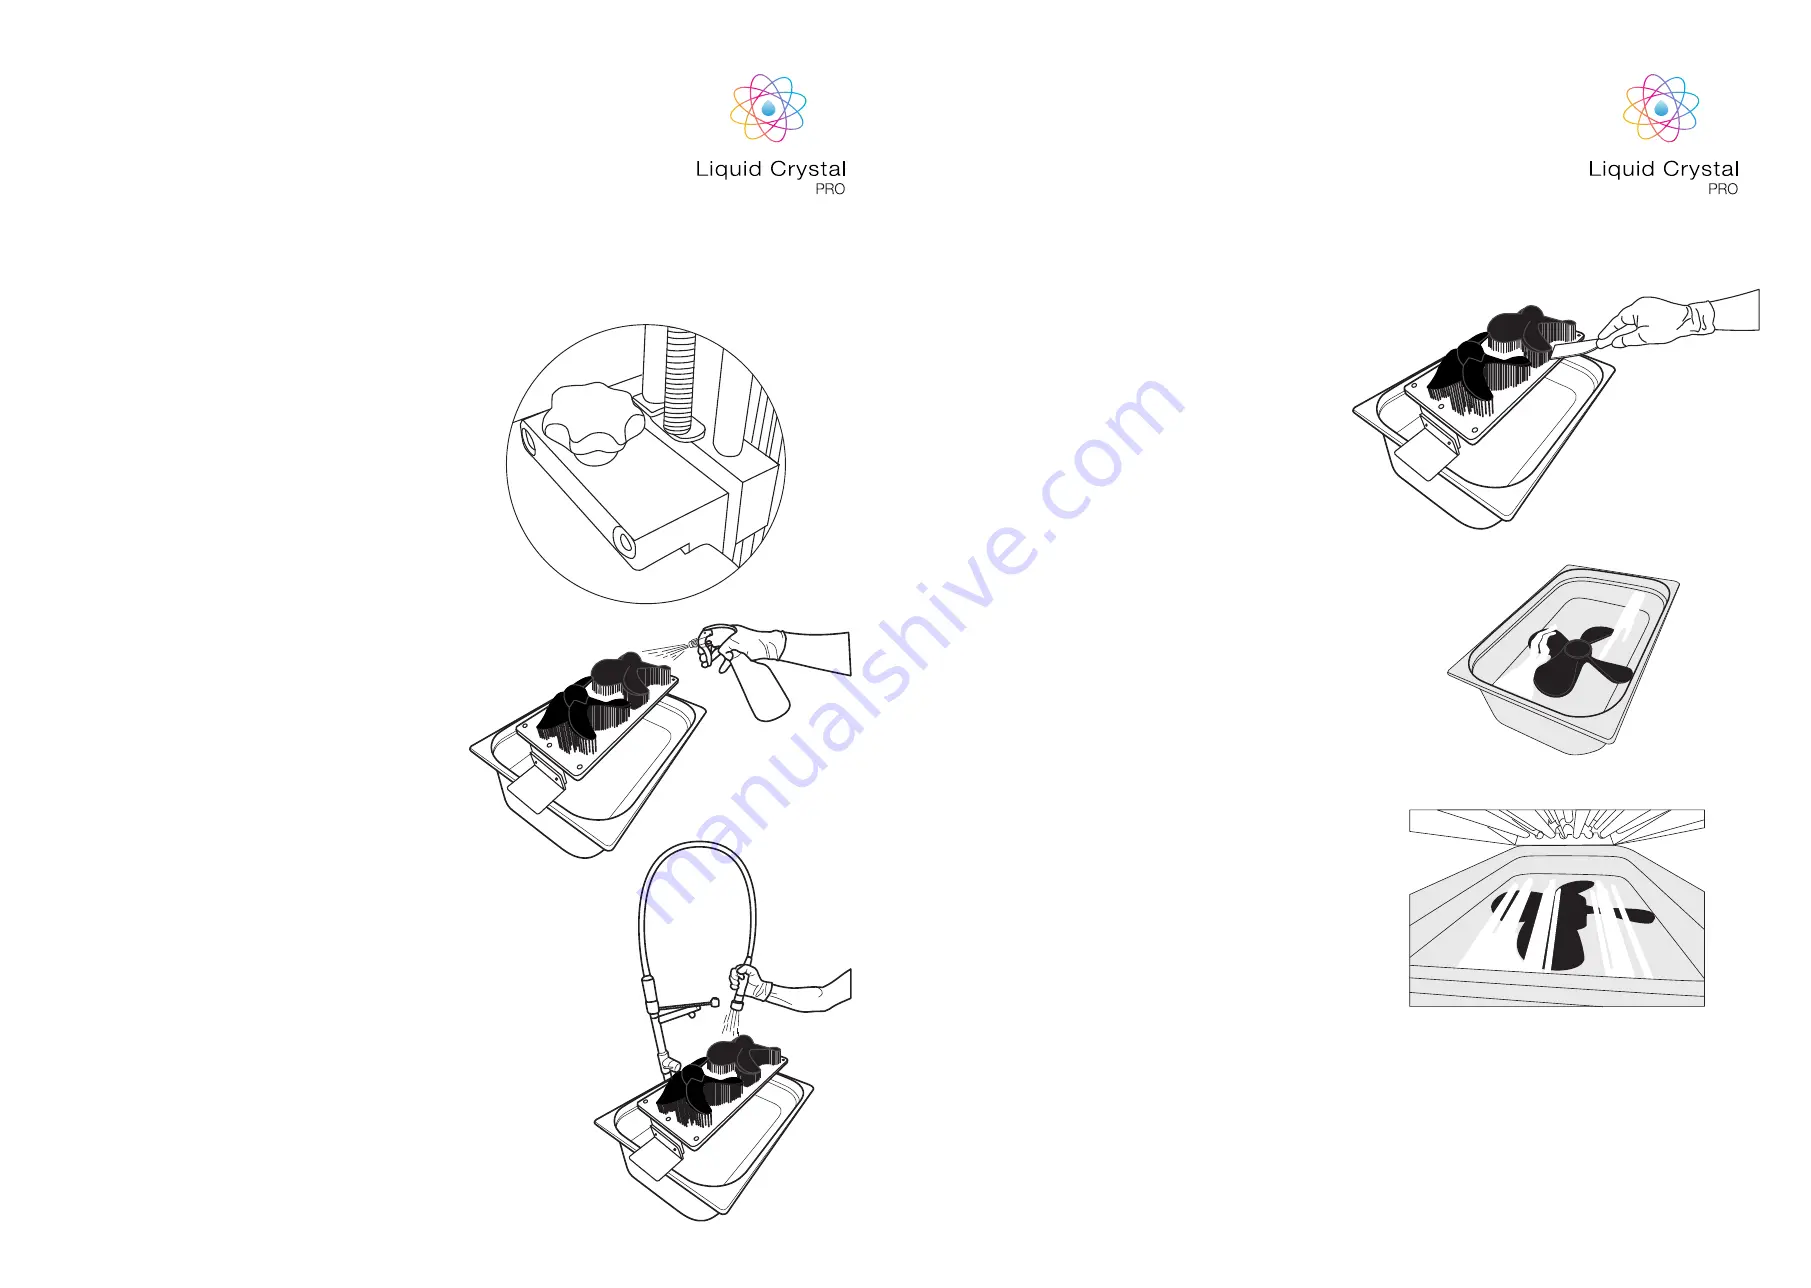
3. Loosen the bolts that secure the print plate
to the drive carriages. Grip the print plate L
brackets firmly and take the weight of the print.
Carefully slide the print plate towards you and
out of the machine. Close the printer door take
care not to drip resin.
4. When your print is finished remove the platform
from the printer and lay it with the object
facing upwards in a large plastic tray. Spay the
part throughouly to remove all the unreacted
surface polymer. When you have covered the
entire surface, finish by spraying with warm
water. You can use a sponge or soft brush to
clean detailed parts. Alternatively use a large
utrasonic cleaner.
5. Using a scraper detach the supports at the base
to remove the part from the platform. Handle it
gently as it won’t achieve full strength until after
full post exposure. Note that for large models,
we recommend post curing the model on the
build plate in order to minimize any possible
warping. If your part is strongly adhered to the
build platform you can aide removal by heating
the metal to expand it by applying hot water or
a hot air gun to it.
6
. Fill the tray with clean water and place the
part in it so that it is fully covered. Expose to
strong visible or UV light for 120 mins to dry the
surface and achieve full hardness. In the case
of larger prints you will have to turn it over so
the underside receives light as well. For larger
models, we recommend placing the whole
platform in water under UV light.
7. Clean the print plate thoroughly. Make sure all
cured resin is removed from the underside of
the plate as this may cause damage to the vat
or screen. Hot soapy water and/or methylated
spirits can be used to clean off uncured resin.
Make sure the print plate is completely dry
before returning it to the printer.
8. Once the printed part(s) have been fully post-
exposed they should be removed from the
water and dried thoroughly. Any support
material can be removed using clippers.The
part can be sanded if neccessary.


