OPUS
Liquid Crystal
Once you select ‘Light On’, you can turn
To check the printer screen function, select
‘Test LCD’. Photocentric logo will be displa-
yed in the centre of the screen.
Network Page
LC Opus can be connected to a network to facilitate
remotely monitor prints in progress.
5.3 CONNECTING TO A NETWORK
Once your LC Opus is switched on, if you have
plugged in an ethernet cable or the provided Wi-Fi
dongle you can connect it to a network. This allows
5.3.1 Connecting to a Network via Ethernet Cable
Plug an ethernet cable into the designated socket
at the back of LC Opus. Once the ethernet cable is
connected, you will see an IP address in the top left
corner of the Main GUI page.
5.4 PHOTOCENTRIC STUDIO SET-UP
A 32GB
for Photocentric Studio. This allows you to activate
a perpetual license for up to two PCs. Photocentric
Studio can be downloaded from this webpage:
https://photocentricgroup.com/studio/
On
guidance on the following:
- The minimum system requirements
for Photocentric Studio
- Installing the software
- Getting started
- Updating the software
the below steps: -
1. Upon opening Photocentric Studio, select LC Opus
down menu, click ‘Apply’ for the software to load.
support as necessary. Please refer to the Photocentric
Studio Support software videos for further guidance
by following the link to the
LC Opus Resource Hub
.
to print from the tool panel for use when setting up
the print.
your PC.
Please refer to Section 5.5 for further guidance.
5.5 UPLOADING FILES
5.5.1 Online File Transfer
1. Connect to a Network. (See Section 5.3 for further
guidance).
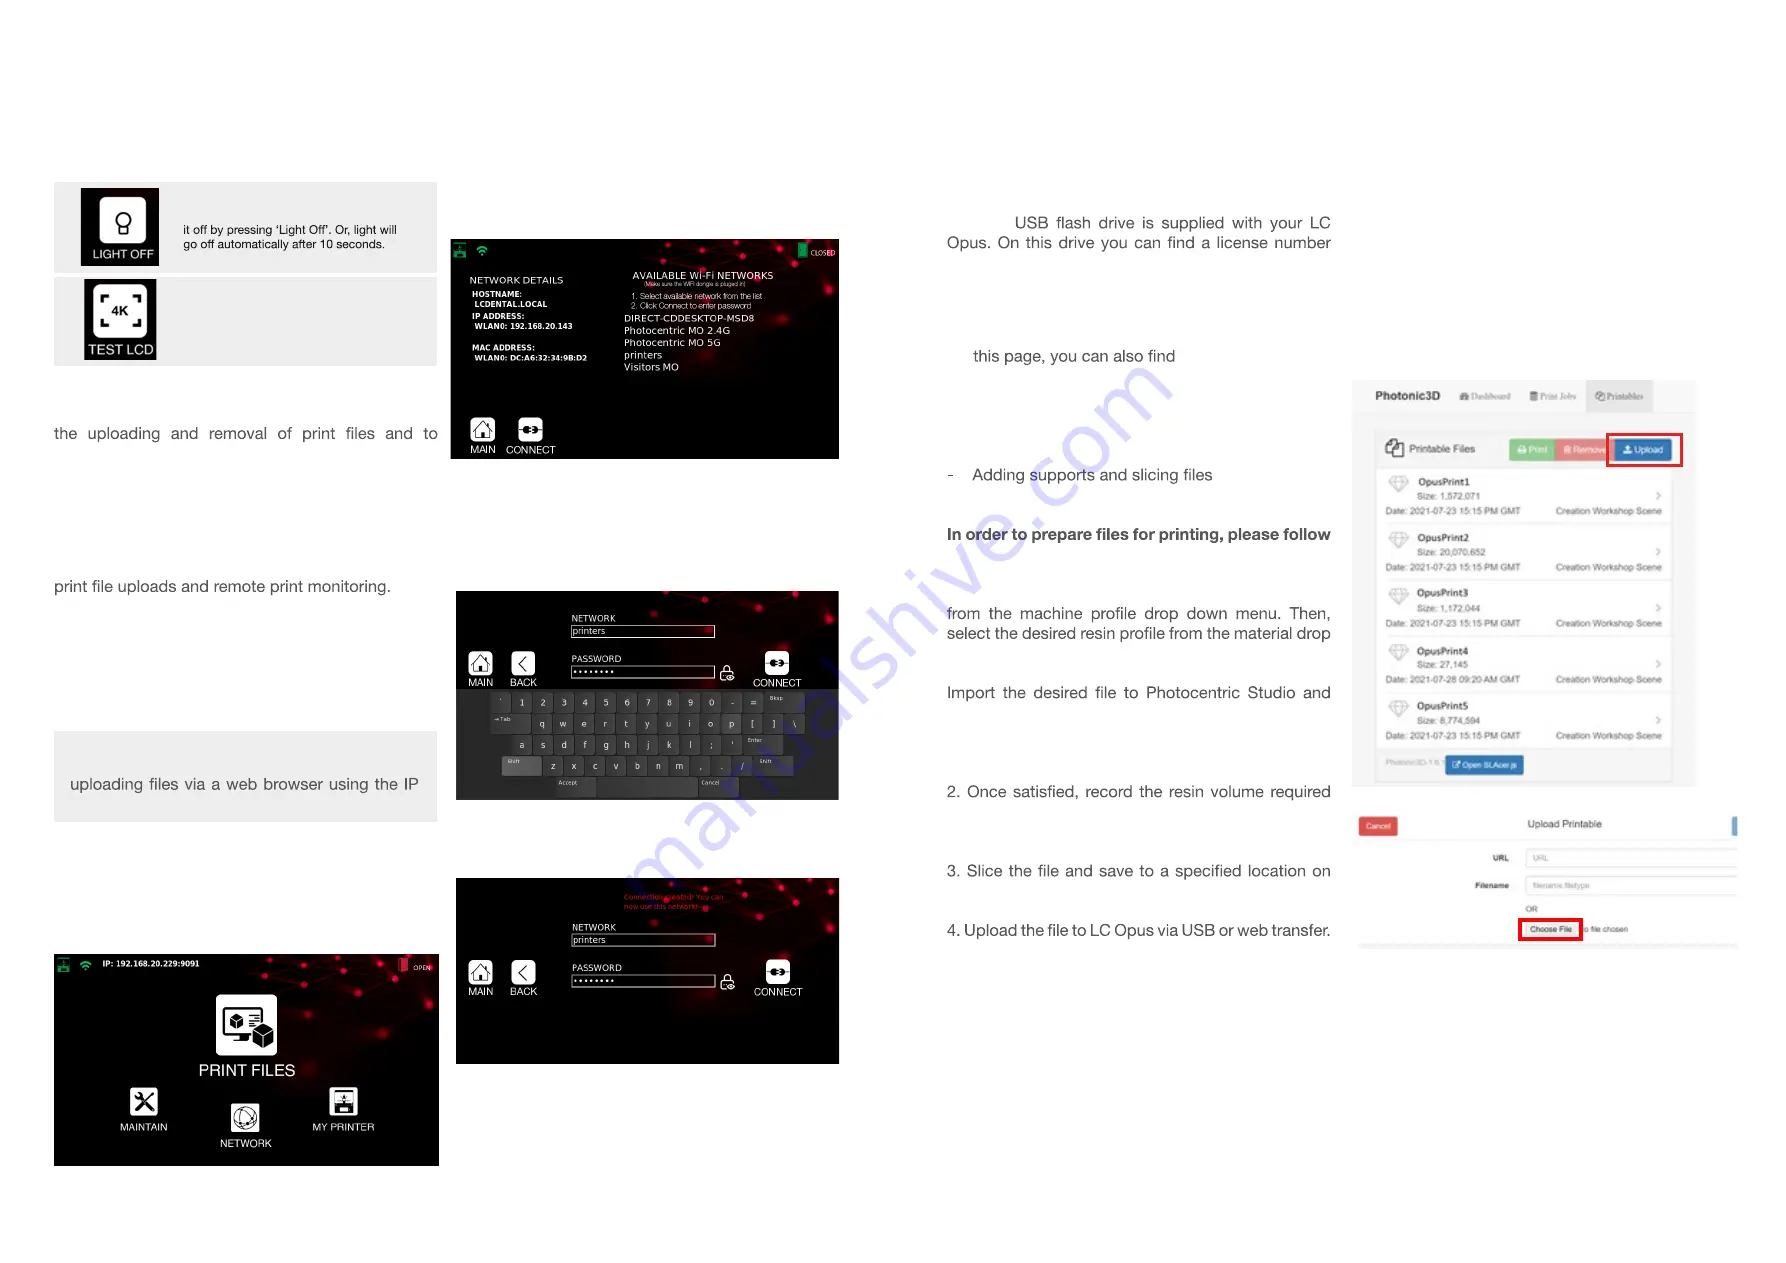
2. Open a web browser on your PC.
3. Type the printers’ IP address into the search bar.
4. Select ‘Upload’.
3. Select the desired network from the list.
4. Select ‘Connect’.
5. Select the text frame labelled ‘Password’.
6. Enter the password for this network by using the
on-screen keyboard. Password characters can be
displayed by selecting the lock icon to the right of
the text frame.
7. Select ‘Connect’ and wait for the connection to be
established.
8. Select ‘Main’.
9. The Wi-Fi icon at the top left of the ‘Main’ screen
should now be green, and an IP address should be
displayed next to it.
5.3.2 Connecting to a Network via Wi-Fi
1.Plug in the Wi-Fi dongle to the USB port at the
back of the printer.
2.On the ‘Main’ screen, select ‘Network’
NOTE:
Refer to Section 5.5 for further guidance on
address.
OPUS
Liquid Crystal
8
7


