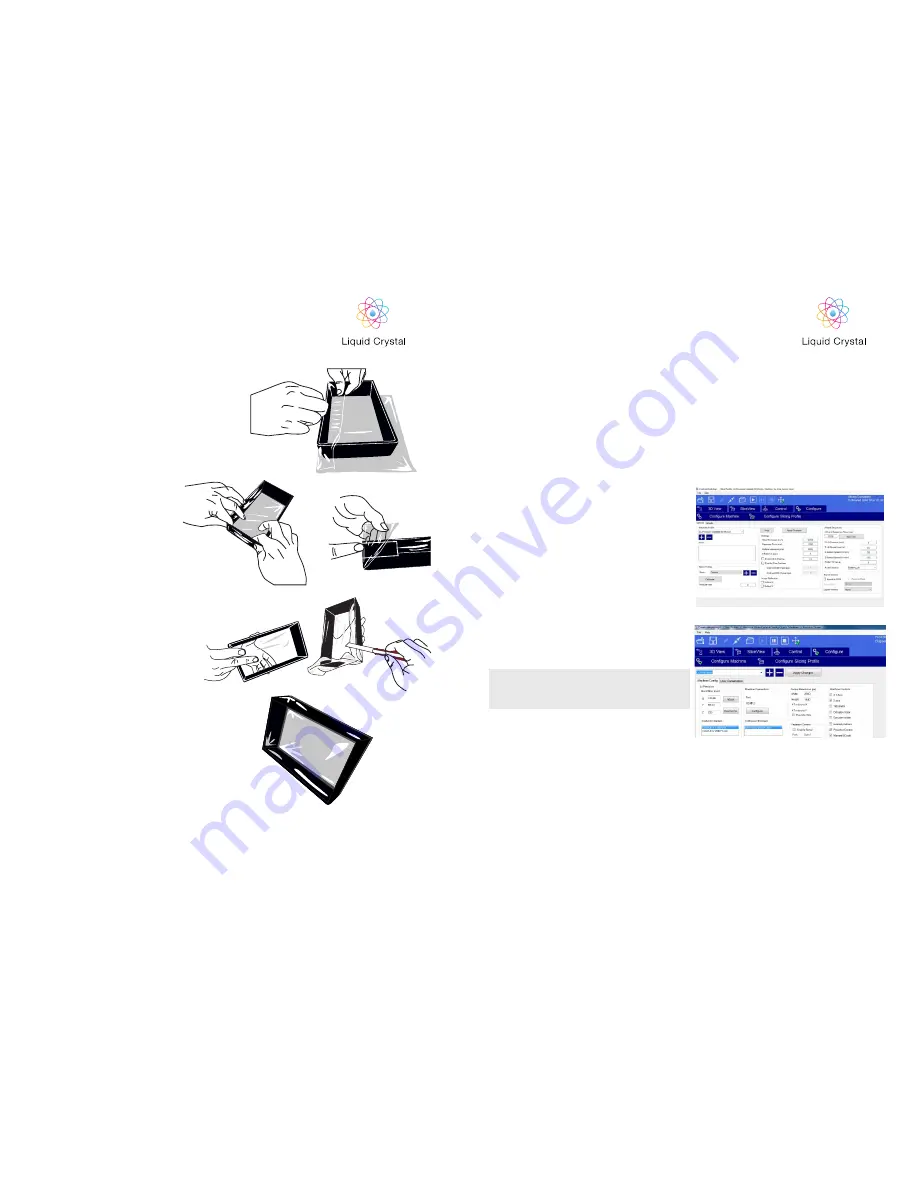
4.
Fold over the other side of the film and pulling
it firmly tight in the middle stretch the edges
out so there are no creases.
5.
Pull each side of the film up and onto the sides
of the vat.
6.
Apply single sided tape at the corners over the
folds to keep the film tight. The vat should now
be tensioned. Trim excess edges off.
7.
Finally, fill with water and leave on absorbent
paper to check for leaks. Drain and dry with
paper towel before use.
If you are unsure of the process and need a video
guide, then please visit the Support section of our
website.
17
18
8. PRINTING YOUR
OWN PARTS
STARTING A PRINT WITH
CREATION WORKSHOP
In this section, we will learn how to use Creation
Workshop to prepare your 3D parts for printing.
1. Home the printer by consulting section 2 the
homing procedur.
2. Open Creation Workshop.exe and load your
objects (STL, OBJ or AMF).
3. With the object loaded and located in the
build area check the settings of the printing
profile. Go to the “Configure” screen and open
the “Configure Slicing Profile” tab. Select the
printing profile from the “Machine Profiles” list
that matches your resin and desired resolution
for example “LCPrecision High Tensile Cream 50
Microns”.
Note: Always click “Apply Changes” to save if
you had to change any values. If you don’t click
this your data will not be re-set.
4. Now click “3D View” and check that the object
is correctly placed inside the printing area.
5. Press the slice button to start the slicing
operation. A confirmation window will show.
Always re-click the “Slice” button if you adjust
the file in any way.
6. Now check the “Slice View” screen to check that
the first layer of every object is in contact with
the build base. If it is above the build platform
it will not adhere. If you click on the view box
located in the bottom left corner you can scroll
forward through the slicing views using the
slider bar and check that the object is always
You should now have successfully printed the ring
and it’s time to print your own parts.
PRECISION
PRECISION


