6
Acapela 16
English
Front Panel
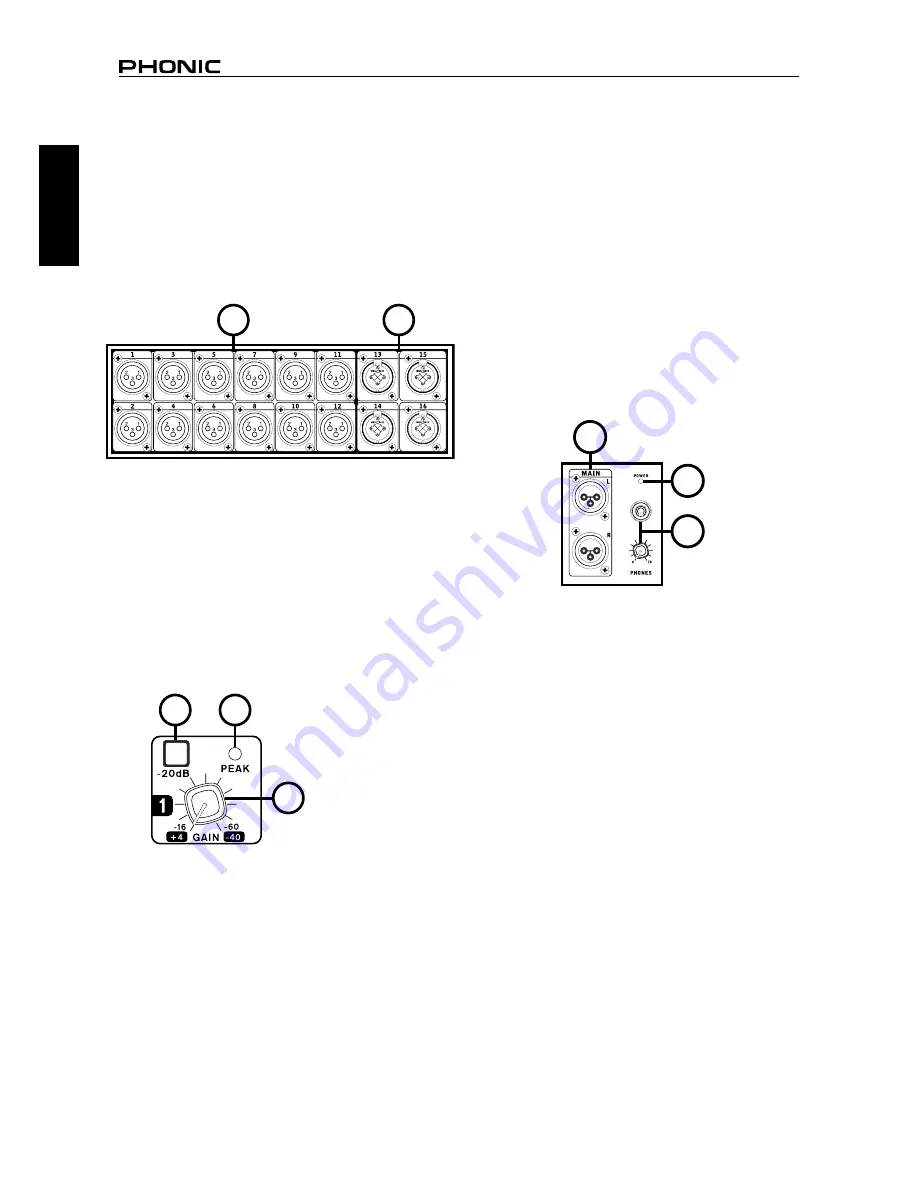
1. XLR Inputs
These balanced XLR input connectors are found on
the first 12 input channels and are appropriate for
microphone or line-level input connectors.
2. Combo Jack Inputs
In addition to the twelve XLR microphone inputs, the
Acapela offers four combo jacks. These balanced
input connectors – as amazing as it sounds – accept
both XLR and ¼” phone jack inputs.
3. Gain Control
You’ll find one gain control for every input channel
of the Acapela 16. These adjust the incoming signal,
contouring the input source to a suitable level for the
Acapela.
4. -20 Button
Like the gain controls, these buttons will help con-
tour your input signal to the Acapela. Pushing the
-20 buttons will cut the signal to the corresponding
channels by 20 dB, thus allowing low-impedance
devices to be used.
5. Peak LED
One of these LEDs accompanies each of the gain
controls and -20 buttons. This LED will light up when
the corresponding channel’s signal is coming in too
hot. Turn the gain down a touch so that the peak LED
doesn’t light up. If this doesn’t help, the -20 button
could. If the LED still lights up, you may need an ex-
orcist. Failing that, you could try adjusting the output
level of the device connected to the input in question.
6. Main Output
This balanced stereo XLR output is for the final Main
mix of the Acapela. To have a Main signal, make sure
your input channels are on, routed to the main mix,
and that the Main mix itself is turned on within the
Acapela software.
7. Headphone Output and Control
The stereo headphone output will take its signal from
the Control Room mix. Any mixes that are soloed on
the Acapela 16 will then also be sent to the head-
phone output for monitoring. The level control that
accompanies the headphone output will allow you to
contour the output signal to a level that is right for you.
8. Power LED
This LED will let you know when the Acapela 16 is
turned on.
1
2
4
3
5
6
8
7


