WelcomeEye / Link / V1
F13
Step 4. :
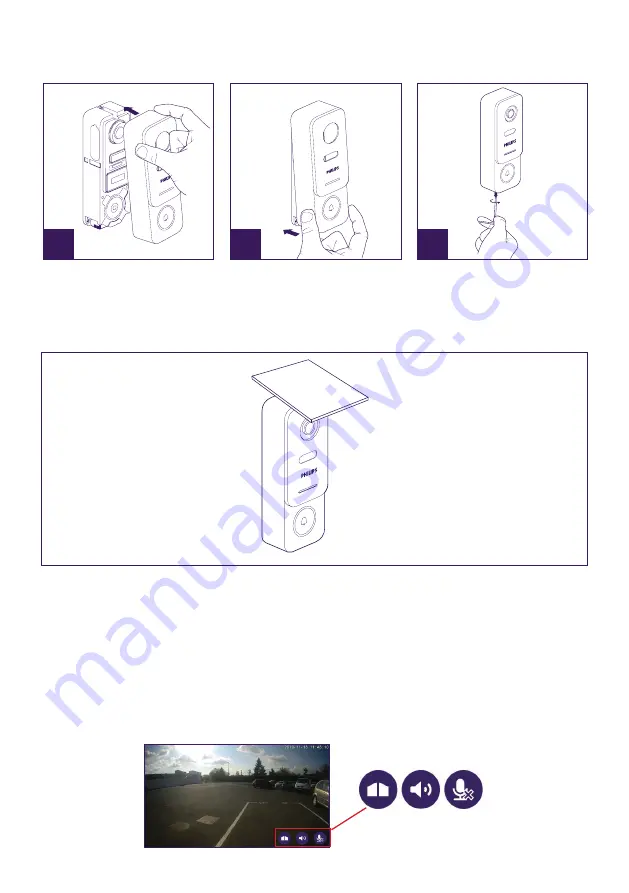
Attach the front, positioning the top (A) first, then the bottom (B). Use the anti-
theft screw provided (C) to complete installation.
A
B
C
Step 5. :
The intercom panel is designed for outdoor use. However, applying a protective
silicone seal may prevent the front from opening when the battery needs to be recharged.
A suitable shield or hood is preferable for preventing the infiltration of rain water along the
wall or pillar.
7. USER MANUAL
A. When someone presses the button on the intercom panel button, this triggers a call or
notification to the mobile device. Remember to authorise calls or notifications from
Philips
WelcomeHome
in your mobile device settings.
Note:
To avoid battery overconsumption, smartphone notifications are limited to 10 calls/
day.
B. Once you have accepted the call, you will be able to see and respond to your visitor.
If the microphone is not switched on, press the microphone logo.
Summary of Contents for WelcomeEye Link 531034
Page 2: ...WelcomeEye Link V1 2 ...
Page 39: ...WelcomeEye Link V1 F37 ...


