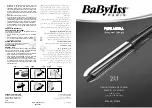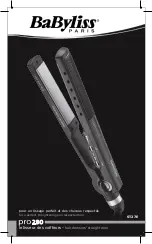
GC8620
3-12
DISASSEMBLY ADVICE - IRON
LIGHT STRIP CAP ASSY 1
INLAY AND LIGHT STRIP ASSY 2
REFLECTOR MOLDED 3
LED MICROSWITCH HOLDER ASSY 4
TRIGGER SPRING 5
TRIGGER MOLDED 6
MICA PLATE 7
PLASTIC WASHER (1x) 8 (FRONT)
DECORATION CAP PRINTED 9
Remove
Screw A
Disassemble
LIGHT STRIP 1
Fig 1. Using “-” screw driver to lift up the Inlay and release
the catch at the end of the handle.
Apply forces
Fig 2. Position of the catch to be applied forces
at the end of the handle.
Remove
Screw B
Disassemble
INLAY AND LIGHT STRIP ASSY 2
Disassemble
REFLECTOR MOLDED 3
Remove
Screw C
Disassemble
LED MICROSWITCH HOLDER
ASSY
4
Disassemble
TRIGGER SPRING 5
Disassemble
TRIGGER MOLDED 6
Remove
Screw D
Disassemble
MICA PLATE 7
Disassemble
PLASTIC WASHER (1x) 8
Remove
Screw E1, E2
Remove
Screw F
Disassemble
DECORATION CAP PRINTED 9
RYTON RING 10
DEVIATOR HOUSING MOLDED 11
IRON THERMISTOR ASSY 12
PLSTIC WASHER (2x) 8 (REAR)
HOSE CORD MOUNTED ASSY 14
HOUSING PRINTED 15
SOLEPLATE MOUNTED ASSY 16
Remove
Screw A
Disassemble
LIGHT STRIP 1
Remove
Screw B
Disassemble
INLAY AND LIGHT STRIP ASSY 2
Disassemble
REFLECTOR MOLDED 3
Remove
Screw C
Remove
Screw E1, E2
Remove
Screw D
Disassemble
MICA PLATE 7
Disassemble
PLASTIC WASHER (1x) 8
Disassemble
RYTON RING 10
Remove
Screw G1, G2, G3, G4
Disassemble
DEVIATOR HOUSING MOLDED 11
Remove
Screw H
Disassemble
IRON THERMISTOR ASSY 12
Remove
Screw I1, I2
Disassemble
PLASTIC WASHER (2x) 8
Disconnect
Wires
Release
Hose clip (2x)
Remove
Screw J
Disconnect
Wires
Disassemble
HOSE CORD MOUNTED ASSY 14
Disassemble
HOUSING PRINTED 15
Disassemble
SOLEPLATE MOUNTED ASSY 16


