14
English
S-VIDEO
IN
VIDEO
OUT
IN
AUX 1
AUX 2
Step 2: Connecting to TV
This connection enables you to view the
video playback from this unit. You only
need to choose
one
of the options
below to make the video connection.
– For a standard TV, follow option 1 or 2.
– For a progressive scan TV, follow
option
3.
– For a HDMI TV, follow option 4.
Helpful Hint:
– It is important to connect this unit directly
to the TV in order to enjoy optimum video
quality.
– To hear the TV audio through this unit,
connect AUDIO IN-AUX sockets on the unit
to the audio output on your TV (cables not
supplied). Then press AUX/DI (MP3 LINK)
repeatedly until ‘AUX 1’ or ‘AUX 2’ is
displayed on the front panel.
Option 1
Option 2
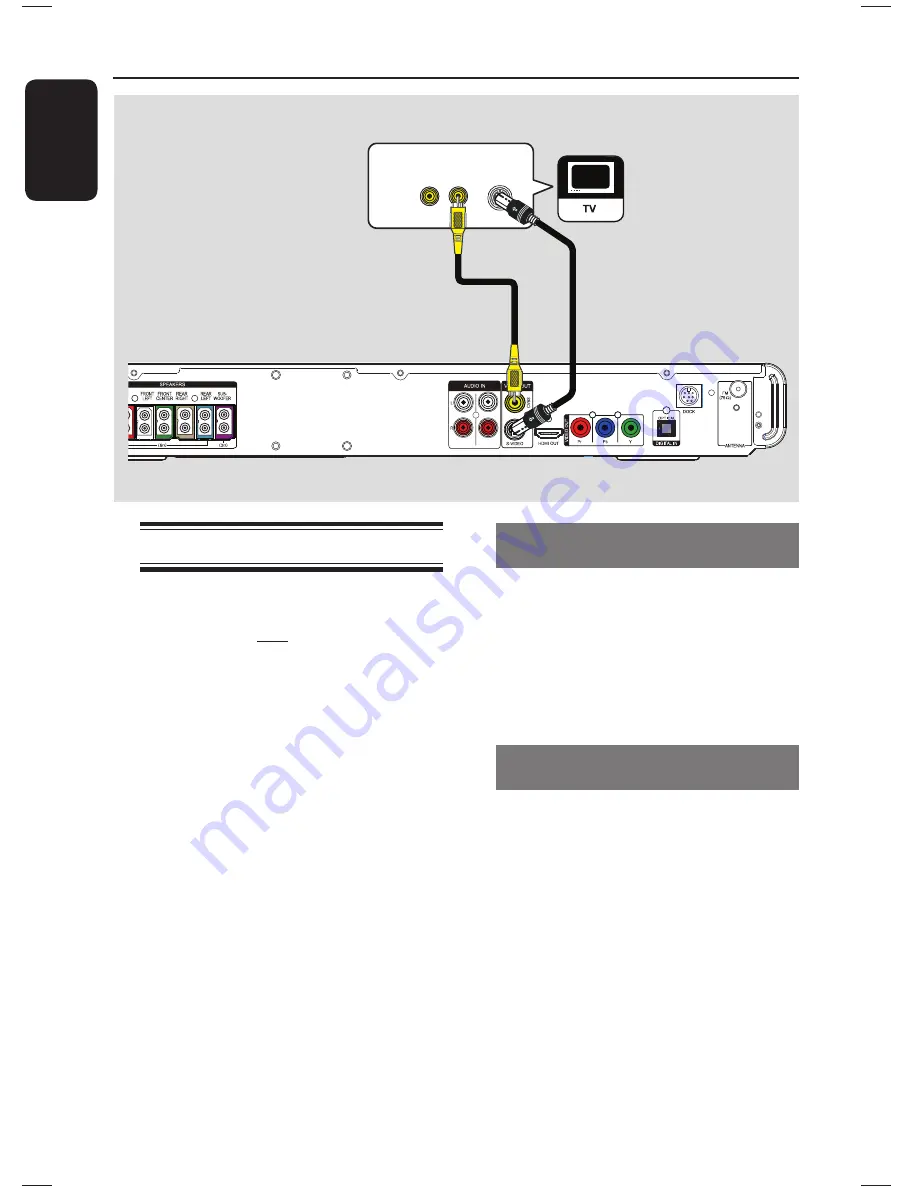
Option 1: Connecting to the Video
socket
Use a composite video cable (yellow
- not supplied) to connect the
CVBS
socket on the main unit to the video
input socket (or labeled as A/V In, Video
In, Composite or Baseband) on the TV.
It provides good picture quality.
Option 2: Connecting to the
S-Video socket
Use an S-video cable (not supplied) to
connect the
S-VIDEO
socket on the
main unit to the S-Video input socket
(or labeled as Y/C or S-VHS) on the TV.
It provides good picture quality.
Basic Connections
(continued)
Main Unit (rear)
1_hts3566D_78_eng1.indd 14
1_hts3566D_78_eng1.indd 14
10/14/2008 4:47:35 PM
10/14/2008 4:47:35 PM
Summary of Contents for HTS3566D
Page 59: ...59 English ...
Page 60: ...114 ...
Page 62: ...116 ...
Page 63: ...117 ...
Page 64: ...118 ...
Page 65: ...119 ...
Page 66: ... 2008 Philips Consumer Lifestyle All right reserved 12nc sgpjp 0842 78 2 ...


