- 76 -
12.
Manage MyChoice
To manage MyChoice you have to go to the [
Professional Settings
] [
Features
] [
MyChoice
] [
Manage
]
menu.
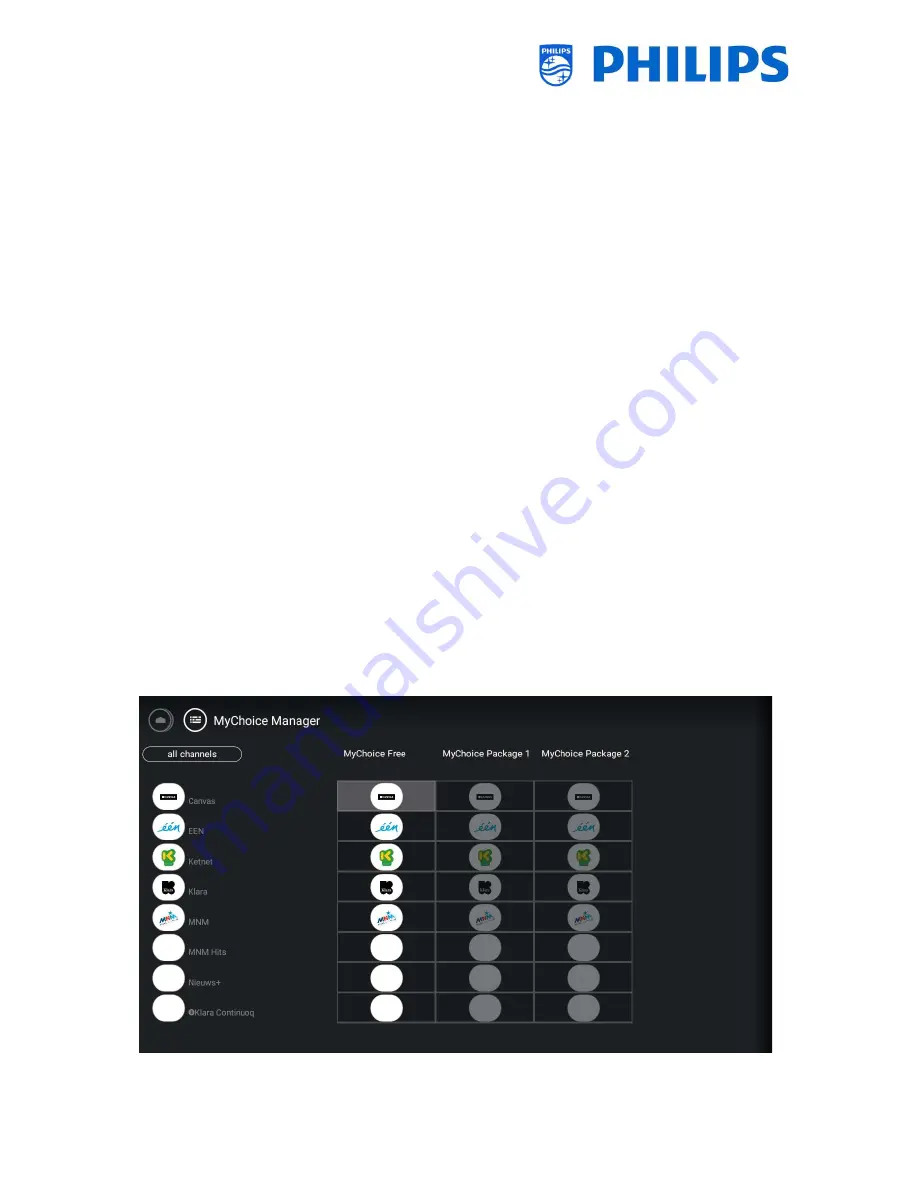
When you open this menu you will get an overview of the MyChoice channels, externals and features
and the 3 category where they can be linked to.
12.1
How does it work
In this manual we will cover only the configuration of MyChoice on the TV, all details about the account
and credits are covered in a different manual. Please contact your TP Vision country sales manager to
setup an account and buy the credits.
During the installation of the TV sets collect the following information: Room number, TV model and
serial number. These are required on MyChoice website when rooms are configured. Make sure that
all values are correct because the MyChoice website is generating pin codes based on this information.
You can gather all these details during the installation or by entering the CSM menu (you can get the
needed info in a text file, see chapter ‘CSM (Customer Service Menu)’) and afterwards enter them in
the administration part of the MyChoice website.
The most important step for MyChoice is the clock. If the clock is not defined or the TV doesn’t have
the correct time, MyChoice will display the following message: ‘
MyChoice is not available at the
moment
’.
12.2
How to configure MyChoice
There are 3 packages available: ‘
MyChoice Free
’, ‘
MyChoice Package 1
’, and ‘
MyChoice Package 2
’. By
default all channels, externals and features are in the ‘
MyChoice Free
’ package.


