background image

English

33

About timer recording

Use the timer recording to automatically 
start and stop a recording at a scheduled 
date/time. When a timer recording has 
been scheduled, the recorder tunes to 
the correct TV programme at the 
specifi ed time and begins recording.

This recorder can schedule up to

 8 

recordings

 at a time. During recording, 

it is not possible to change the recorder’s 
channel. 

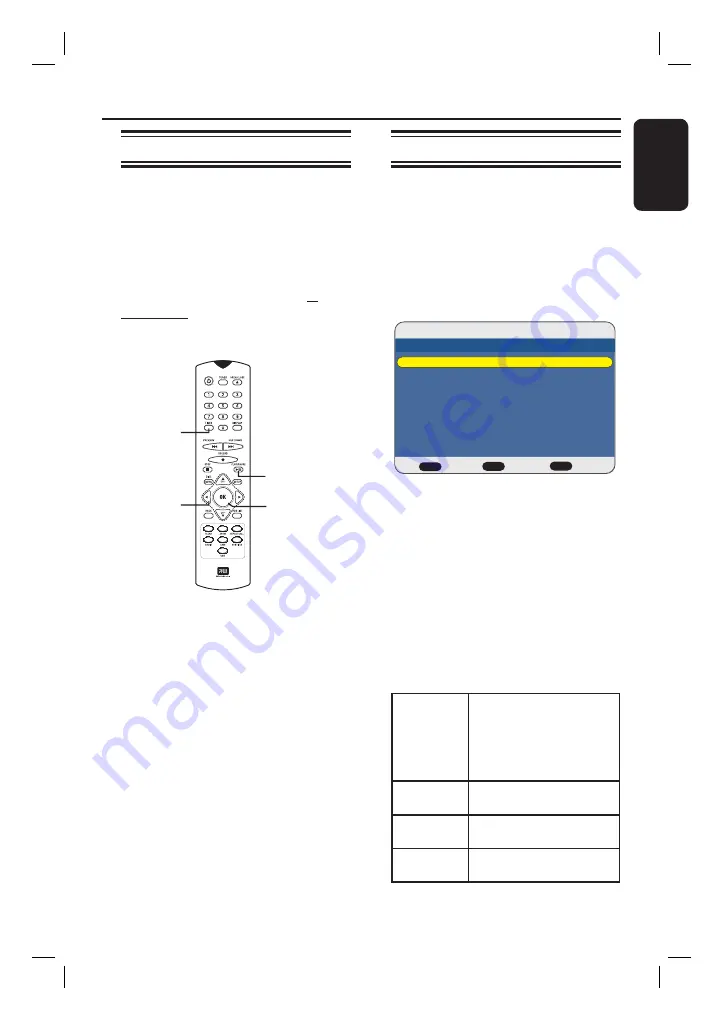
TIMER

PLAY/PAUSE

OK

About ‘VPS/PDC’

[VPS/PDC is not available in some countries. 
‘PDC’ (Programme Delivery Control) is not 
available to users in the UK].

‘VPS’ (Video Programming System) or 
‘PDC’ (Programme Delivery Control) is 
used to control the start and duration of
TV channel recordings. If a TV 
programme starts earlier or ends later 
than was scheduled, this recorder will 
then turn on and off at the correct time.

VPS/PDC is intended to record the entire 
programme. To set a timer that is longer/ 
shorter than the VPS/PDC broadcast 
time, you must turn off the VPS/PDC.

Timer Recording

Schedule a timer recording

Before you start...

Ensure that the recorder system clock is 
correct.

A

 Turn on the TV to the correct viewing 

channel for the recorder.

B

 Press 

TIMER

 on the remote control.

 The timer recording list appears.

Timer Recording List

BACK

TIMER

Back

Exit

Edit

OK

               - -/- -   - -:- -    - -:- -       - - -          - -              - -            - - -

Target  Date   Start    End    Source  Quality  VPS/PDC  Repeat  Status

16/07/2007 12:40:00

C

 Select an empty list in the menu and 

press 

OK

 to access timer entry fi eld.

 Make sure that the yellow bar is 

placed at an empty list.

D

 Use 

ST

 keys to toggle between the 

values of each fi eld. Use 

W


X

 keys to 

move to the previous/next the entry 
fi eld. 

  You may also use the numeric keypad on 

the remote control to key in the setting 
value.

Target

 }

Select the recording 
destination.
* If you have selected 

DVD

 }, insert a 

recordable DVD into the 
recorder.

Date

 }

Enter the date for 
recording (day/month).

Start

 }

Enter the start time of 
recording (hours : minutes).

End

 }

Enter the end time of 
recording (hours : minutes).

HDR3500_05_eng_30381.indd   33

HDR3500_05_eng_30381.indd   33

2008-02-27   10:51:40 AM

2008-02-27   10:51:40 AM

Summary of Contents for HDR3500

Page 1: ...HDR3500 Register you product and get support at www philips com welcome EN HDD DVD recorder 6 HDR3500_05_eng_30381 indd 1 HDR3500_05_eng_30381 indd 1 2008 02 27 10 51 30 AM 2008 02 27 10 51 30 AM ...

Page 2: ...ire to the terminal marked N or coloured black Connect the brown wire to the terminal marked L or coloured red Do not connect either wire to the earth terminal in the plug marked E or e or coloured green or green and yellow Before replacing the plug cover make certain that the cord grip is clamped over the sheath of the lead not simply over the two wires Copyright in the U K Recording and playback...

Page 3: ...ached to a product it means the product is covered by the European Directive 2002 96 EC Please inform yourself about the local separate collection system for electrical and electronic products Please act according to your local rules and do not dispose of your old products with your normal household waste The correct disposal of your old product will help prevent potential negative consequences fo...

Page 4: ...n utsättas för osynlig laserstrålning som överskrider gränsen för laserklass 1 Observera Stömbrytaren är sekundärt kopplad och bryter inte strömmen från nätet Den inbyggda nätdelen är därför ansluten till elnätet så länge stickproppen sitter i vägguttaget SF Luokan 1 laserlaite Varoitus Laitteen käyttäminen muulla kuin tässä käyttöohjeessa mainitulla tavalla saattaa altistaa käyttäjän turvallisuus...

Page 5: ...907 093 5 315 448 and 6 516 132 Manufactured under license from Dolby Laboratories Dolby and the double D symbol are trademarks of Dolby Laboratories DivX DivX Certified and associated logos are trademarks of DivX Inc and are used under license i Link is also known as FireWire and IEEE1394 This connection is used for the transfer of high bandwidth digital signals as used by digital video DV camcor...

Page 6: ...a camcorder to the front sockets 22 Step 3 Installation and Setup 23 Watch TV Control TV Programmes 25 About Time Shift Buffer temporary hard disk storage 25 Viewing live TV 25 Pause live TV 26 Instant replay forward 26 Recording Before Recording 27 Media for recording 27 Default recording settings 28 Recording settings 29 Record TV Programmes 31 Record the current TV programme 31 Record a specifi...

Page 7: ...46 Searching by time 46 Resume playback from the last stopped point 47 Edit Recordings Edit Recordings 48 About the content menu 48 Accessing the options menu 49 Erase title s 50 Protect Unprotect a title 50 Rename a title 50 Divide a title HDD and DVD RW only 51 Erase part of a title HDD and DVD RW only 52 Manage your HDD titles 52 System Settings Setup Menu Options 54 Accessing the Setup Menu 54...

Page 8: ...id high temperature moisture water and dust This unit must not be exposed to dripping or splashing Do not place any object or items that can damage the apparatus e g liquid filled objects lighted candles Cleaning discs CAUTION Risk of damage to discs Never use solvents such as benzene thinner commercially available cleaners or anti static sprays intended for analogue discs Wipe the disc with a mic...

Page 9: ...et Refer to the type plate on the rear or bottom of the product for identification and supply ratings Accessories supplied Remote control and batteries RF Antenna cable Quick Start Guide Region codes DVD films are usually not released at the same time in all regions of the world thus all DVD players are programmed to a specific region code This device will only play Region 2 DVDs or DVDs manufactu...

Page 10: ...om your Satellite Receiver or any other connected device Ensure that the device is connected to the EXT2 TO VCR SAT socket i Link i Link also known as FireWire or IEEE1394 is a digital connection to connect your camcorder to make high quality copies of your camcorder video The connector is found on the front panel of the DVD recorder HDR3500_05_eng_30381 indd 10 HDR3500_05_eng_30381 indd 10 2008 0...

Page 11: ... increments to the recording time Sockets behind the flap Flip down the door as indicated by the OPEN X label on the front panel h CAM VIDEO L AUDIO R Sockets for connecting composite video and audio input cables from an analogue camcorder DVD player or VCR Press CAM on the remote control to view the input source i USB Socket to connect a USB flash drive USB memory reader or digital camera Press U...

Page 12: ... PLAY PAUSE u Pauses or resumes a live TV programme Starts or pauses playback of any recorded title or disc h SETUP Enters or exits the setup menu i W X Cursor keys for moving to the left right In Time Shift mode press and hold to jump backward to the start or jump forward to LIVE mode of the Time Shift Buffer ST Cursor keys for moving up or down In tuner mode selects the next previous TV channel ...

Page 13: ...ZOOM Enlarges a picture on the TV screen during playback t CLEAR Clears the title name entry while in editing mode Clears the timer entry field Clears any marked segments in the Time Shift Buffer u AUDIO Selects an audio language or channel v CAM Switches to the camcorder that is connected to the CAM or DV IN sockets on the front panel w USB Switches to USB mode and displays the USB content menu q...

Page 14: ...ol directly at the remote sensor iR on the front panel and select the desired function CAUTION Remove batteries if they are exhausted or if the remote control is not to be used for a long time Do not mix batteries old and new or carbon and alkaline etc Batteries contain chemical substances so they should be disposed of properly HDR3500_05_eng_30381 indd 14 HDR3500_05_eng_30381 indd 14 2008 02 27 1...

Page 15: ...V directly from an off air antenna or Cable box or VCR you may have to disconnect some of the cables before you can make the above connection A Connect the existing Antenna Cable TV signal or from the Cable Box Satellite Receiver RF OUT or TO TV to the ANTENNA IN socket on the recorder B Connect an RF antenna cable from the TV OUT socket on the recorder to the antenna input socket on your TV VHF U...

Page 16: ...nt Connect any additional devices to EXT2 TO VCR SAT socket on the recorder Option 2 Using an S Video socket Connect an S video cable not supplied from the S VIDEO OUT socket on the recorder to the S Video input socket usually labelled as Y C or S VHS on the TV Option 3 Using aVideo CVBS socket Connect a composite video cable yellow not supplied from the CVBS OUT socket on the recorder to the vide...

Page 17: ... white not supplied from the AUDIO L R sockets on the recorder to the audio input sockets on the TV Option 4 Note To enable the Y Pb Pr YUV connection you must set the recorder s video output correctly A Make an additional video connection from the recorder your TV using Scart S Video or CVBS B Turn on your TV to the correct viewing channel for the above video connections C When installation and s...

Page 18: ...r with a digital multichannel sound decoder to enjoy multichannel surround sound Connect a coaxial cable not supplied from the COAXIAL DIGITAL OUT socket to the digital coaxial input socket of the receiver amplifier or labelled as COAXIAL IN or DIGITAL IN Helpful Hint Before you start operating set the appropriate audio output settings Otherwise no sound or noise interference may occur See the cha...

Page 19: ...order to the corresponding scart input socket on the TV C Connect another scart cable not supplied from the EXT2 TO VCR SAT socket on the recorder to the scart output socket usually labelled as TV OUT or TO TV on the Cable Box Satellite Receiver Helpful Hint If your TV is connected to the recorder via the COMPONENT VIDEO Y Pb Pr sockets connect the external cable box satellite receiver to the EXT2...

Page 20: ...x to the ANTENNA IN socket on the recorder B Connect an RF antenna cable from the TV OUT socket on the recorder to the antenna input socket on your TV usually labelled as ANT ANTENNA IN RF IN C Connect a scart cable not supplied from the EXT1 TO TV socket on the recorder to the corresponding scart input socket on the TV D Connect another scart cable not supplied from the EXT2 TO VCR SAT socket on ...

Page 21: ...our TV usually labelled as ANT ANTENNA IN RF IN C Connect a scart cable not supplied from the EXT1 TO TV socket on the recorder to the corresponding scart socket on the TV D Connect another scart cable not supplied from the EXT2 TO VCR SAT socket on the recorder to the scart output socket on the VCR usually labelled as TV OUT or TO TV E Connect another scart cable not supplied from the scart socke...

Page 22: ...ection to a personal computer It is not possible to record from the recorder to your camcorder via the DV IN socket on your recorder Option 2 Using theVIDEO In socket Use the VIDEO connection if your camcorder has only a single video output Composite Video CVBS A Use a video cable yellow not supplied to connect the CAM socket on the recorder to the S VHS or Video output socket on the camcorder B U...

Page 23: ... menu language options appears The language options are different depending on your country or region It may not correspond to the illustrations shown in the user manual Menu Language Select a menu language English Français Deutsch Español OK BACK Next Page Prev Page D Select the language for this recorder s on screen display and press OK The country setting menu appears Country Setting OK BACK Ne...

Page 24: ...r two separate mono channels Select On to improve the sound transmission or Off if the reception is poor Rename channel Highlight Rename in the menu and press OK to show the keyboard screen The maximum input is up to 5 characters Note Use W XST keys to navigate in the keyboard menu and press OK to select the character number symbol To end move to Finish in the menu and press OK J Press X to move t...

Page 25: ...programme B State of the Time Shift Buffer LIVE The live TV programme broadcast OR HH MM The time of the TV programme being viewed C The current time Viewing liveTV 2 TUNER DISPLAY CH CH A Turn on the TV If necessary switch the TV to the correct input channel for viewing the recorder s playback B Press STANDBY ON 2 to turn on the recorder You should see the TV programme on the TV If not press TUNE...

Page 26: ...le has been recorded to the hard disk all content in the Time Shift Buffer will be cleared The Time Shift Buffer will begin storing TV programmes in tuner mode again Control TV Programmes continued Pause liveTV In tuner mode A To pause live TV press u on the remote control 10 00 12 18 12 18 X B To resume playback press u again To return to watching the live TV programme press TUNER Instant replay ...

Page 27: ...a DVD R on other DVD player it must be finalised see the chapter Setup Menu Options Disc settings Finalise After this is done no more data can be added to the disc DVD R DL DVD R Double Layer It contains the same usage as DVD R the only difference is the capacity of 8 5 GB It offers two recordable layers on a single DVD disc The layers are accessible from the same side of the disc so recording can...

Page 28: ... The system setup menu appears on the TV B Use ST keys to select Recording and press X to access its options OK Confirm BACK Back SETUP Exit DVD Recorder Setup Tuner Disc Playback Recording Audio Video System Recording Quality SAT Record Recording Language Auto Chapter Marking SP Off Language 1 5 min C Use ST keys to select the setting you wish to change and press OK to confirm Instructions and ex...

Page 29: ...ecording will automatically be transferred Selecting another recording mode is not possible SAT Record This feature is only available if you have connected a Satellite Receiver or another device to the EXT2 TO VCR SAT scart socket on this recorder Off Turn off the function EXT2 Enable this recorder to start and stop recording according to the signal received from the connected device Recording Lan...

Page 30: ...he recording quickly Off No chapter marker will be inserted in the recording 5 min 10 min 15 min or 20 min Chapter markers are inserted automatically during recording at approximately 5 five 10 ten 15 fifteen or 20 twenty minutes interval Note If you have selected SLP as the default mode of recording quality the minimum chapter marker interval available is at least 10 ten minutes HDR3500_05_eng_30...

Page 31: ...me To stop the recording before the scheduled time press STOPÇ To watch current recording in progress A Press HDD LIST on the remote control B Use STWX keys to select the title marked by â on the thumbnail C Press PLAY PAUSE u to start playback Record a specific segment of theTV programmes This function is only possible for recording of TV programmes stored in the Time Shift Buffer Note Once you s...

Page 32: ... the USB socket on the front panel of the recorder B Press USB to view the contents menu C Use STWX keys to select the file to play and press PLAY PAUSE u to start playback Playback from other connected devices This function is possible only if the TV is connected to the recorder using the EXT1 TO TV socket Press STANDBY ON 1 to view the picture from the device which is connected to the EXT2 TO VC...

Page 33: ... time you must turn off the VPS PDC Timer Recording Schedule a timer recording Before you start Ensure that the recorder system clock is correct A Turn on the TV to the correct viewing channel for the recorder B Press TIMER on the remote control The timer recording list appears Timer Recording List BACK TIMER Back Exit Edit OK Target Date Start End Source Quality VPS PDC Repeat Status 16 07 2007 1...

Page 34: ...to prepare for recording Changing Deleting a timer recording A Turn on the TV to the correct viewing channel for the recorder B Press TIMER on the remote control The timer recording list appears Timer Recording List 16 07 2007 12 40 00 HDD 15 07 18 05 19 20 P 05 SP Off Once Valid Target Date Start End Source Quality VPS PDC Repeat Status C Use ST keys to select a timer programme which you want to ...

Page 35: ...y pause playback on the external device C Press RECORD z to start recording D Start playback on the external device To pause the recording press PLAY PAUSE u To continue recording press u again E To stop the recording press STOP x A new HDD title will be saved F To exit press TUNER Automatic recording from a Satellite Receiver This function is applicable only if the Satellite Receiver is connected...

Page 36: ...e DV IN socket on the front panel C Press CAM twice on the remote control The recorder switches to DV IN mode All the content in the Time Shift Buffer will be cleared D Turn on the DV camcorder and locate the content where you want the recording to begin Pause playback on the external device E Press RECORD z to start recording F Select the preferred recording medium HDD or DVD Note If you have sel...

Page 37: ...ecording Date time of recording Record quality length of recording The title thumbnail A Turn on the TV to the correct viewing channel for the recorder B Insert a recordable DVD into the recorder C Press HDD LIST on the remote control D Use STWX keys to select the title to copy and press OK The edit menu is displayed HDD Menu HDD BACK Exit Back Confirm OK PR 2 15 07 18 05 HDD Play Erase Copy Prote...

Page 38: ...0 2GB All C Use STWX keys to select the title you want and press OK to start playback If you have many title recordings press fast reverse or fast forward to toggle between the pages of HDD titles for selection D During playback use the following keys on the remote control to access additional playback functions Playback features RC key To start or pause playback u To access the playback options m...

Page 39: ...WX keys to navigate within the menu and select the file you want to play then press OK During playback the available playback options are displayed at the bottom of the screen For more playback information read the chapter Playback an audio CD MP3 WMA Playback a picture disc or Playback a DivX disc for details D To stop playback press STOP x or remove the USB flash drive USB memory card reader fro...

Page 40: ...rs are designed with regional restrictions Before playing a disc make sure the disc is for the same region as your player Do not push the disc tray or put any objects other than discs on the disc tray It may cause the disc player to malfunction Start disc playback A Press STANDBY ON 1 to switch on the recorder B Press OPEN CLOSEç The disc tray opens C Carefully place the disc into the tray with th...

Page 41: ...ack Select PBC and use WX keys to toggle between On or Off B To stop playback press STOP x Playback a recordable DVD disc A Insert a recordable DVD disc B Press DISC MENU The disc menu appears C Use W XST keys to select a title and press u to start playback D To stop playback press STOP x Playback an audio CD MP3 WMA This recorder can playback most MP3 audio files and JPEG picture files recorded o...

Page 42: ...se ST keys to reach the title you want to play then press u to start playback During playback If multilingual subtitles are embedded on the DivX disc you can press SUBTITLE to change the subtitle language while playing Note To select another character set for the subtitle file see chapter Setup Menu Options Playback settings DivX Subtitle Font D To stop playback press STOP x Helpful Hints Subtitle...

Page 43: ...ring slideshow playback AUDIO Press DISC MENU to return to the main menu E To stop playback press STOP x If the disc contains of MP3 music and JPEG picture files you can start a musical slide show playback Select an MP3 file and press OK to start playback Select a picture file in the menu and press OK to start slideshow playback Supported JPEG picture formats File format The file extension has to ...

Page 44: ... selection is complete press OK The options menu appears C Select Playlist and press OK The selected files are added to the playlist D Use STWX keys to select Playlist and press u to start playback 2 TUNER DISPLAY DISC MENU AUDIO SUBTITLE REPEAT 1 ALL Selecting another title chapter track When a disc contains more than one chapter or track you can change to a different track title or chapter as fo...

Page 45: ...at playback options vary depending on the disc type Repeat chapter title all titles A During playback press REPEAT1 ALL to select one of the repeat options Repeat chapter DVD DVD R RW Repeat track title CD VCD DVD Repeat all CD VCD DVD B To cancel repeat playback press REPEAT1 ALL repeatedly to select Off or press STOP x Repeat a specific segment A B You can repeat the playback of a specific segme...

Page 46: ...anguage changes only through the DVD disc menu To access the disc menu press DISC MENU Switching camera angles This option is only available for DVDs that contain sequences recorded from different camera angles You can view the picture from these different angles A During playback press DISPLAY to display the playback options menu If multiple angles feature is supported the icon will appear B High...

Page 47: ...esume mode option is set to On see the chapter Setup Menu Options Playback settings Resume Load in a disc and press u to start playback from the last stopped point To cancel the resume mode and start playback from the beginning When playback stopped press STOP x again Additional Playback Features continued HDR3500_05_eng_30381 indd 47 HDR3500_05_eng_30381 indd 47 2008 02 27 10 51 44 AM 2008 02 27 ...

Page 48: ... recording D The control keys that can be used and their functions Disc content menu screen The disc menu index screen shows your recordings on a recordable DVD It should appear on the TV once you load a recordable DVD or when you press DISC MENU on the remote control OK BACK Edit Exit Play PLAY PR 2 15 05 18 05 PR 10 01 04 10 00 PR 3 20 03 13 05 PR 1 13 02 10 05 PR 4 10 03 11 30 PR 2 15 01 18 00 ...

Page 49: ...st editing or accidental loss of recordings Edit Rename the title or erase unwanted scenes in the title Set Genre Assign a genre to the title Sort Fomat Sort the titles according to a preferred format or create new genre groups Access the disc options menu Note If a DVD R has been finalised it cannot be edited To erase lock or finalise the recordable DVD see the chapter Setup Menu Options Disc set...

Page 50: ...title to prevent any accidental loss of recordings A Press HDD LIST or DISC MENU B Use STWX keys to select the preferred title and press OK The options menu appears C Use ST keys to select Protect and press OK A confirmation message appears D Select OK in the menu to proceed or Cancel to abort Press OK to confirm If a title is protected the option in the menu will change to Unprotect Helpful Hint ...

Page 51: ...Edit Recordings continued Divide a title HDD and DVD RW only You can divide a title into two titles Note that each title length must be more than 6 six seconds Warning Once a title has been divided it cannot be merged again A Press HDD LIST or DISC MENU B Use STWX keys to select the preferred title and press OK The options menu appears C Use ST keys to select Edit and press OK D Select Divide and ...

Page 52: ...nt A and press OK to set the beginning point G Select Set Point B and press OK to set the end point H To erase from points A to B select OK and press OK To recover the erased scenes for DVD RW discs only In edit menu select Undo Erase and press OK Manage your HDD titles This recorder provides options to help you manage and search for your HDD titles You can assign each HDD title to a genre group a...

Page 53: ...ct the preferred title and press OK The options menu appears C Use ST keys to select Sort Format and press OK D Use ST keys to select Create Genre and press OK E Select an unnamed genre and press OK A keyboard screen appears F Use W XST keys to highlight a character number symbol and press OK to select The maximum display is up to 8 characters You can use the following keys on the keyboard screen ...

Page 54: ...ter Disc settings DVD Recorder Setup Tuner Disc Playback Recording Audio Video System Audio Language Subtitle Language TV Shape Resume DivX R VOD DRM DivX Subtitle Font English Off 16 9 On CentralEur See this chapter Playback settings DVD Recorder Setup Tuner Disc Playback Recording Audio Video System Recording Quality SAT Record Recording Language Auto Chapter Marking SP Off Language 1 5 min For ...

Page 55: ...oder to allocate the connected decoder to this channel Press OK to set the decoder to On or Off Rename Press OK to enter the rename entry field Use W X S T keys to highlight a character number symbol in the keyboard menu and press OK to select Once complete move to Finish in the menu and press OK Note The maximum input is up to five characters Use the following keys on the keyboard screen to edit ...

Page 56: ...nel manually Use ST keys to increase or decrease the frequency by 0 06 0 07 MHz Standard Use ST keys to select a TV system standard that produces the least distortion of picture and sound Country Setting Select the country of your area for automatic channel tuning Auto Scan Re install all TV programme channels on the recorder Select this option and press OK to start automatic channel search This p...

Page 57: ... R Lock To prevent the recording from being erased or edited accidentally you can lock the recordable DVD 1 Press OK to select 2 A confirmation message appears Select OK to proceed or Cancel to abort then press OK to confirm Note If the current disc is locked the option in the menu will change to Unlock You can use this option to unlock a DVD R DVD RW recorded on another DVD recorder Make Compatib...

Page 58: ...e current disc information To exit the menu press SETUP Label The name of the disc Title No The total number of titles on the disc Typically the maximum title number is 99 Media The disc type Status The status of the disc recordable blank finalised or full Space The space used and total space Remainder The remaining space represented by a bar graphic Label Title No Media Status Space Remainder No ...

Page 59: ...wide screen display with black bands on the upper and lower portions of the TV screen 16 9 Select this for wide screen TV frame ratio 16 9 Resume Start playback of a disc at its last stopped point This only applies to playback after the recorder has been switched to standby mode or if the disc had been ejected from the disc tray This option is only available for DVDs VCDs Off Turn off the resume m...

Page 60: ...rvice at www divx com vod Follow the instructions and copy the video from your computer onto a CD R RW or recordable DVD for playback on this recorder Note All downloaded videos from DivX VOD can only be played back on this recorder DivX Subtitle Font Select the font type that supports the recorded DivX subtitle Standard Displays a standard list of Roman subtitle fonts provided by this recorder Ce...

Page 61: ... device is connected to the COAXIAL DIGITAL OUT socket on the recorder PCM Select this if the connected device is unable to decode multichannel audio Dolby Digital and MPEG 2 multi channel signals are converted to PCM Pulse Code Modulation Automatic The audio signals will be played back according to the audio stream on disc Night Mode This mode improves audio playback at a low volume High volume o...

Page 62: ...YUV Interlace For component video connection YUV P Scan For component video connection to progressive scan TV Use your TV remote control to switch to the correct viewing channel Refer to your TV s user manual on how to select the correct video input on your TV Note Video output setting is not required for S Video or Composite CVBS video connection HDR3500_05_eng_30381 indd 62 HDR3500_05_eng_30381 ...

Page 63: ...n saver prevents damage to the TV screen by avoiding exposure to a static image for too long On Switch to TV screen saver mode when playback has been stopped or paused for more than 15 minutes Off Turn off the screen saver function Format HDD Erase all marked unmarked recordings on the HDD This option is not available when recording to HDD is in progress Restore Default Restore all the settings of...

Page 64: ...up menu appears C Use ST keys to select Video and press X D Use ST keys to select YUV P Scan and press OK OK Confirm BACK Back SETUP Exit DVD Recorder Video Tuner Disc Playback Recording Audio Video System Video Output SCART RGB YUV Interlace YUV P Scan E Read the instructions on the TV and confirm your action by pressing OK The setup is complete and you can now enjoy the high quality picture Alte...

Page 65: ...S tape or DVD is not copy protected What are Titles and Chapters A DVD disc contains Titles and Chapters which are similar to the Titles and Chapters of a book A Title is often a complete movie and is broken down into Chapters or individual scenes from the movies Title Chapter Title Chapter Chapter Chapter Chapter chapter markers Programmes are recorded as a single title it may consist of one chap...

Page 66: ...nel until you see the DVD screen See your TV user manual for details Check the video connection between the recorder and the TV Your DVD recorder might have been set to Progressive Scan mode while your TV does not support Progressive Scan Follow the steps below 1 Connect the supplied AV cable red white yellow from the CVBS OUT sockets on the rear panel of the DVD recorder to the TV s Video In and ...

Page 67: ...n press OPEN CLOSE on the set Insert the disc with the label facing up Wrong region code The DVD must be coded for ALL regions or Region 2 to be played back on this DVD recorder There is no recording on the disc or wrong disc type Read the chapter Playback from Disc Playable discs Make sure the disc is not scratched or warped Clean the disc or replace a new one Check if the disc is defective by tr...

Page 68: ...nal title index picture may be visible Error while finalising or the disc has not been finalised This happens if you try to copy DVDs or video cassettes that is copy protected Even though the picture on the TV is fine but the recording on the recordable DVD disc is faulty This interference is unavoidable with copy protected DVDs or video cassettes The recordable DVD disc has a limited recording li...

Page 69: ...cture Playback Disc formats DVD R RW DVD R RW DVD R DL Picture CD Picture compression formats JPEG Picture enhancement Rotate Zoom Storage Media Recording media DVD R DVD RW DVD R DVD RW DVD R DL Tuner Reception Transmission TV system PAL SECAM Aerial Input 75 Ohm coaxial IEC75 Connectivity Rear Connections SCART 2x S Video Out Video CVBS Out Component video Y Pb Pr Out Audio left right Out Digita...

Page 70: ...s full There is no storage space for new recordings READING Disc is being recognised by the recorder NO DISC No disc has been inserted If a disc has been inserted then it is possible that the disc cannot be read OPEN Disc tray is opening or opened HELLO The recorder has been turned on REG ERR When the DVD inserted is in a wrong region code as the recorder STOP When playback recording is stopped BU...

Page 71: ...which features small decrease in image quality in spite of its high compression ratio MP3 A file format with a sound data compression system MP3 is the abbreviation of Motion Picture Experts Group 1 or MPEG 1 Audio Layer 3 By using the MP3 format one CD R or CD RW can contain about 10 times more data then a regular CD MPEG Motion Picture Experts Group A collection of compression systems for digita...

Page 72: ... M NTSC M 4 COSTA RICA NTSC M NTSC M 4 CROATIA PAL B PAL G 2 CUBA NTSC M NTSC M 4 CYPRUS PAL B PAL G CZECH REPUBLIC PAL D PAL K 2 DAHOMEY SECAM K1 DENMARK PAL B PAL G 2 DJIBOUTI SECAM B SECAM G 5 DOMINICAN REP NTSC M NTSC M 4 ECUADOR NTSC M NTSC M 4 EGYPT SECAM B PAL B SECAM G PAL G 2 EL SALVADOR NTSC M NTSC M 4 EQUAT GUINEA PAL B 5 ESTONIA PAL B was SECAM PAL D 5 ETHIOPIA PAL B PAL G 5 FIJI PAL B...

Page 73: ...G 5 NORWAY PAL B PAL G 2 OMAN PAL B PAL G 2 PAKISTAN PAL B 5 PANAMA NTSC M NTSC M 4 PARAGUAY PAL N PAL N 4 PERU NTSC M NTSC M 4 PHILIPPINES NTSC M NTSC M 3 POLAND PAL D PAL K 2 PORTUGAL PAL B PAL G was SECAM D 2 PUERTO RICO NTSC M NTSC M 1 QATAR PAL B 2 REUNION SECAM K1 RUMANIA PAL D PAL K 2 RUSSIA SECAM D SECAM K 5 RWANDA SECAM K1 5 SABAH SAWARA PAL B ST KITTS NTSC M NTSC M SAMOA US NTSC M 1 SAUD...

Page 74: ...9 245 30381 SGPjl 0809 05 1 HDD DVD Recorder HDR3500 Meet Philips at the Internet http www philips com http www philips com welcome HDR3500_05_eng_30381 indd 74 HDR3500_05_eng_30381 indd 74 2008 02 27 10 51 47 AM 2008 02 27 10 51 47 AM ...

Reviews: