


10
Pronto remote control
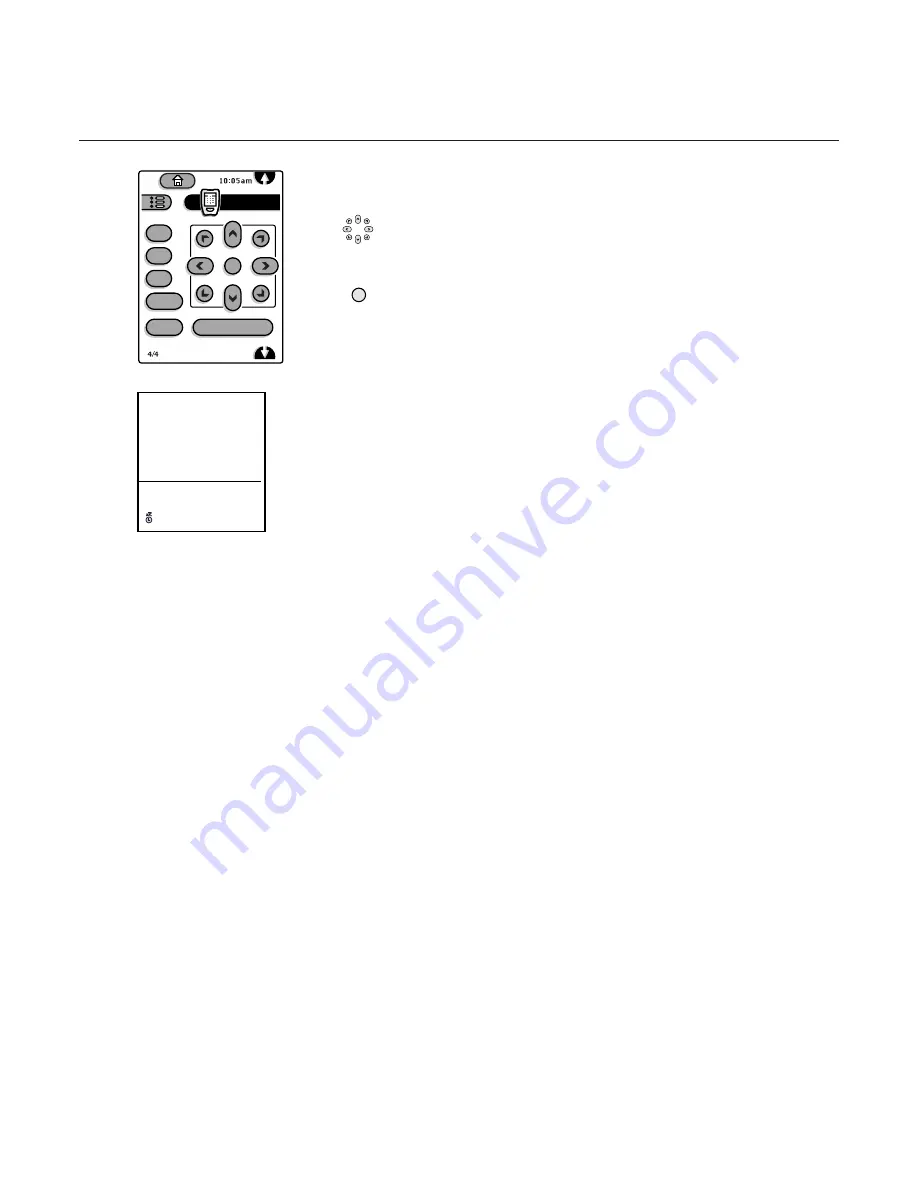
4/4
This is the fourth control panel of four
Tap the up/down, left/right cursor buttons to move up or down the list of
controls and to make adjustments to the selected controls.
Tap any of the diagonal cursor buttons up right, up left,down right or down left
to exit the current menu branch.
Tap the OK button to activate your choice when it is requested.
menu
Tap the menu button to display/cancel the on-screen main menu.
info+
Tap this button to display (when available) information about the current channel
and program or source.
The information display is divided in two zones.
The upper zone presents the time and information on the current program:
number, name, video and audio formats of the incoming signal, CC availability,
availability of alternate or secondary audio programs (a plus sign appears if you
have more than one choice), ratings and program title if available.
The lower zone presents information about the currently selected settings:
display format, sound mode and (if on) the sleep timer icon and the minutes
remaining.
Note: When in GUIDE Plus+ mode, the info+ button has a GUIDE Plus+ function.
See p. 33.
b
Dual Screen/PIP on/off
See Settings, General menu, p. 25 and Dual Screen/PIP, p. 30.
c
Switching screens in Dual Screen or PIP
See Settings, General menu, p. 25 and Dual Screen/PIP, p. 30.
fi
Multi-PIP
Tap
fi
to turn on/off Multi-PIP.
The Multi-PIP format that launches on the button press is determined by the
selection you made in the Multi-PIP Format list in the General menu, see
Settings, General, p. 26 and Multi-PIP Format, p. 31.
Note: Continuing to hold the
fi
button down will cycle the TV through the various
formats (PIP3, PIP8, PIP12), launching a new format after each second the button is
held down.
Tap the
fi
button again to return to a full main screen picture.
zoom
Tap the zoom button to activate the zoom function.
Tap the OK button repeatedly to select one of the zoom magnifications (x1,
x4, x9, x16).
Additionally you can shift the selected zoom window over the screen with the
cursor buttons up/down, left/right or in a diagonal way.
The zoom window is reset after selecting another TV channel, another display
format or when another display format is selected automatically.
Zooming is disabled in Dual Screen mode.
Tap the zoom button again to deactivate the zoom function.
Page
6
Page
7
TV
info+
zoom
fi
c
b
menu
OK
OK
11
WPIX
12:47
4:3
Stereo
(cc)
SAP
TV-PG-DLSV
Kids with Guns
Widescreen
Surround
05:22


