


Reviews:
No comments
Related manuals for VG2053/VG4053

GB14H1T
Brand: Daewoo Pages: 23

SV-210X
Brand: Samsung Pages: 3

SV-170N
Brand: Samsung Pages: 2

SV-170
Brand: Samsung Pages: 2

SV-140G
Brand: Samsung Pages: 2

SV-160GS
Brand: Samsung Pages: 2

SV-2000DS
Brand: Samsung Pages: 23

SV-2000M
Brand: Samsung Pages: 26

sv 255B
Brand: Samsung Pages: 27
SV-21
Brand: Samsung Pages: 44

SV-210F
Brand: Samsung Pages: 66

sv 255B
Brand: Samsung Pages: 48

SV-200B
Brand: Samsung Pages: 72

SV-200X
Brand: Samsung Pages: 77

SV-100G
Brand: Samsung Pages: 61

SP-C15P
Brand: Samsung Pages: 67
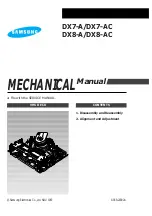
DX7-A
Brand: Samsung Pages: 73

SV-1000S
Brand: Samsung Pages: 77


