background image

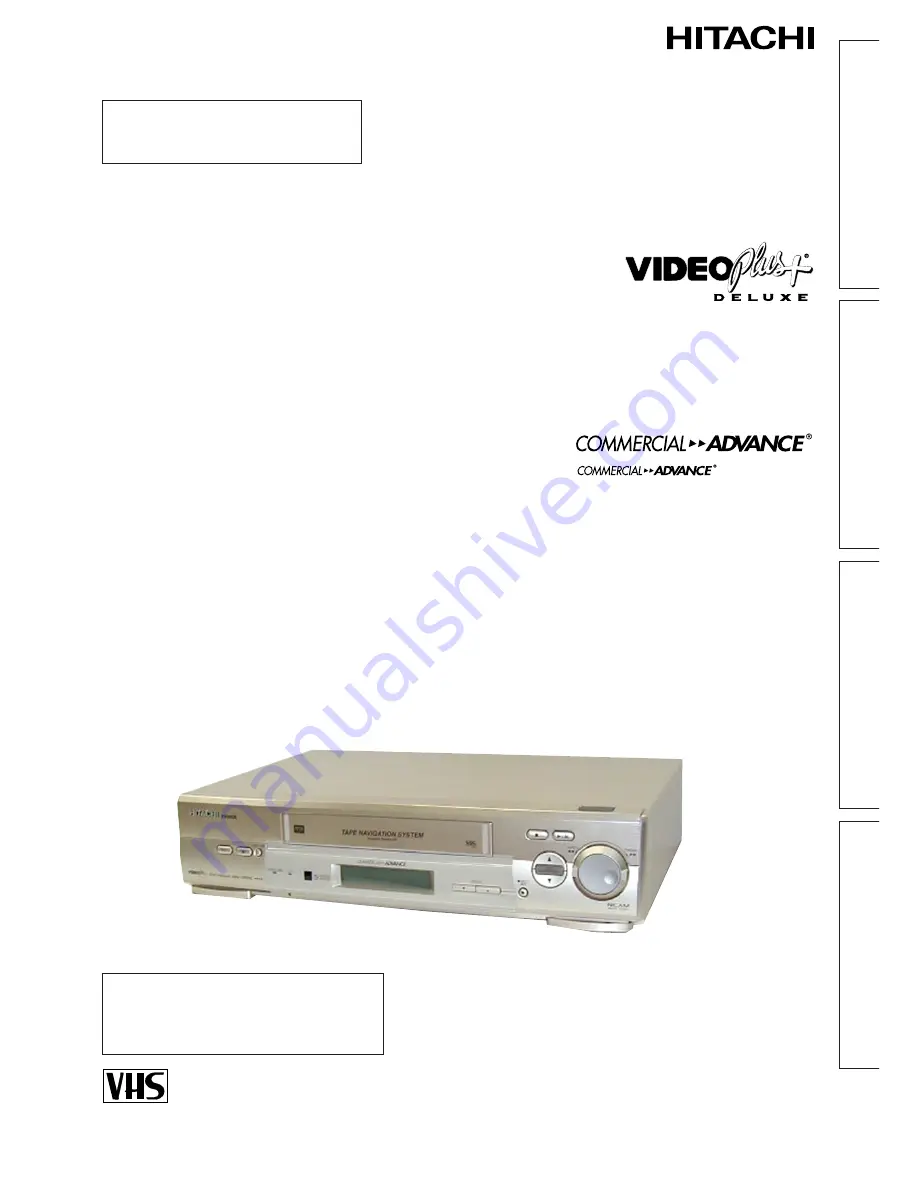
VIDEO CASSETTE RECORDER

VT-FX980E(UKN)

Instruction manual

Auto Install System — simply
plug in all leads and press the
OPERATE button.

FOR FURTHER INFORMATION
PLEASE CONTACT OUR CUSTOMER
HELP LINE ON 01628-643029

To obtain the best performance

please read this instruction manual completely.

PAL

BASIC

O

PERA

TIONS

SETTING

U

P

ADDITIONAL

O

PERA

TIONS

SUBSIDIAR

Y

INFORMA

TION

QR32061                                                                  

is a

registered trademark of SRT, 
Inc. A Jerry lggulden invention
licensed in association with
Arthur D. Little Enterprises, Inc.

VIDEO Plus+ and PlusCode are
registered trademarks of Gemstar
Development Corporation.  The
VIDEO Plus+ system is
manufactured under licence from
Gemstar Development Corporation.

Summary of Contents for VT-FX980E

Page 1: ...mance please read this instruction manual completely PAL BASIC OPERATIONS SETTING UP ADDITIONAL OPERATIONS SUBSIDIARY INFORMATION QR32061 is a registered trademark of SRT Inc A Jerry lggulden invention licensed in association with Arthur D Little Enterprises Inc VIDEO Plus and PlusCode are registered trademarks of Gemstar Development Corporation The VIDEO Plus system is manufactured under licence ...

Page 2: ...s lead on this equipment is supplied with a moulded plug incorporating a fuse the value of which is indicated on the pin face of the plug Should the fuse need to be replaced an ASTA or BSI approved BS1362 fuse must be used of the same rating If the fuse cover is detachable never use the plug with the cover omitted If a replacement fuse cover is required ensure it is of the same colour as that visi...

Page 3: ...rogrammes 27 Tape Analyzer 30 Instant Recording Timer IRT 31 Timer Recording 32 VIDEO LINK Recording Using Satellite Decoder or TV 40 This section tells you how to use the additional functions Section 4 Subsidiary Information Tape Navigation 42 Navi Lock 49 Soap Recording 51 MOVIETEXT 53 54 Special Characteristics Linear Time Counter 55 Automatic Rewind 55 Rewind Shut Off 55 Mode Lock Function 55 ...

Page 4: ...of tape used during recording 2 pcs Aerial Cable for connecting this VCR and a TV Remote Control Handset Batteries for remote control handset R6 The VIDEO Plus programming system allows you to programme the VCR for timer recording by simply entering a PlusCode programming number MOVIETEXT MOVIETEXT is a registered trademarks of Hitachi Home Electronics Europe Ltd Satellite receiver controller Tape...

Page 5: ... a complete TV tuner just like your normal TV and can be pre tuned to receive up to 49 TV programmes To preset satellite programmes see page 73 Auto Clock Setting using PDC signal and Setting the Clock Manually Pages 19 20 The clock display area in the VCR display panel will look like until you set the 24 hour clock The clock must be set to the correct time before you can programme the VCR for tim...

Page 6: ...art connection PRECAUTIONS On Installation Do not install the unit near heat sources such as radiators or air ducts or in a place subject to direct sunlight excessive dust mechanical vibrations or shocks Never bring a magnet or magnetized object near the VCR because it will adversely affect the performance of the VCR Ensure the VCR is installed on a flat surface The unit is designed for operation ...

Page 7: ...OUT SORTIE SON R D L G Aerial Satellite Cable box decoder Aerial cable supplied TV set To AC outlet AC 230V 50Hz AERIAL Aerial socket RF OUT Scart connector lead available from your dealer not supplied Scart socket Connecting your VCR to your television using scart lead Set your TV to its proper AV line scart lead to receive signal via the scart connector lead This connection will improve the pict...

Page 8: ... 71 21 AUDIO OUT L R sockets for stereo system connection 22 AERIAL signal input 6 23 RF OUT signal out to TV 6 24 Scart socket 7 VCR Display 25 Time 20 Time counter or 55 VCR mode indicator 23 PLAY playback 23 SRCH visual search 24 SLOW slow play 23 REW rewind 24 FF fast forward 24 STILL play pause and frame 23 advance 26 VCR operate mode 23 27 Audio indicators 25 28 record flashes during 27 reco...

Page 9: ...ll 23 13 INDEX button INDEX feature 57 14 button 54 15 MOVIE TEXT button 53 16 TV mute button 80 17 TV PROG button 80 18 TV Operate button 80 19 TV volume button 80 Note Four buttons 16 19 are used only when operating the TV 20 PROG programme up down button 13 21 AUX button select L1 L2 or L3 67 input 22 Display clock timer programme 20 information 23 VIDEO Plus programming button 33 24 Number but...

Page 10: ...2 then point it at the receiver on the front of the VCR The REC play rewind fast forward stop pause and frame advance buttons can control your VCR even if TV is displayed when the REMOTE display see page 60 for details is set to 1 or This VCR is designed so it can be controlled when either VCR 1 or VCR 2 is selected see page 60 Note Be sure to press the mark of the tape transport button on the rem...

Page 11: ...MERCIAL ADVANCE PROG NK R VIDEOLINK CA 1 2 3 Exit MENU AUTO COMMERCIAL ADVANCE PROG NK VIDEOLINK CA Switch on your TV and select an unused programme number i e one not used for BBC1 ITV etc Please consult your TV instruction manual as your TV may have a special VCR programme number which must be used Note This programme number will be your VCR programme from now on 4 6 5 If appears press the stop ...

Page 12: ... the STOP button on the remote control or on the VCR is pressed the RF from the VCR will be turned off The VCR RF channel will change as follows COMMERCIAL ADVANCE PROG REC IRT REW FWD TAPE NAVIGATION VIDEOLINK CA COMMERCIAL ADVANCE PROG VIDEOLINK REC IRT REV FWD TAPE NAVIGATION Safety Tab 8 9 Press the play still 6 button the test pattern will disappear and the VCR will now come out of standby mo...

Page 13: ...lay as illustrated will appear on the TV screen Press the ENTER button to select AUTO The display as illustrated will appear on the TV screen and will appear in the VCR display The VCR will start auto tuning auto channel mapping auto clock setting and auto RF seek function It takes about 3 minutes The following stations are stored in programme numbers 01 05 automatically 01 BBC1 02 BBC2 03 ITV 04 ...

Page 14: ...l 42 programme number 04 Press the 0000 button The channel number changes to indicating that the channel has been deleted Repeat steps 3 and 4 until all unwanted channels have been erased After deleting them press the MENU button COMMERCIAL ADVANCE PROG OLINK CA FWD REV INDEX ENTER MENU PROG PROG AUX VCR TV OPERATE MOVIE TEXT CA REC NAVI TV Cursor MENU Deleting Unwanted Preset Channels N M UAL A R...

Page 15: ...el 7 Repeat steps 3 through 6 for other channels 8 After fine tuning them press the MENU button FWD REV INDEX ENTER MENU PROG PROG AUX VCR TV OPERATE MOVIE TEXT CA REC NAVI TV Cursor MENU Fine tuning of the picture of the received channel N M UAL A R 0 0 0 0 0 0 0 O 1 2 3 4 5 6 7 G P C 2 3 2 4 4 2 2 H 6 3 3 2 7 1 2 DE C BBC1 BBC2 ITV CH4 Exit MENU SELECT CHANGE 0 9 0000 N M UAL A R 0 0 0 0 0 0 0 O...

Page 16: ...TV screen Press pause button to fine tune the channel and press pause again to store the channel FWD REV INDEX ENTER MENU PROG PROG AUX VCR TV OPERATE MOVIE TEXT CA REC NAVI TV Cursor MENU To change the channel manually You may do this if you have accidently deleted a channel or particular channel was not found PRE TUNING OF BUILT IN TV TUNER N M UAL A R 0 0 0 0 0 0 0 O 1 2 3 4 5 6 7 G P C 2 3 2 4...

Page 17: ...er 03 Cursor still in the programme number 04 Press the play button to programme number 03 to confirm the channel change Note You will be unable to do programme number changeability if channels are not installed for the programme number For example to exchange PROG 01 CH_ _ with PROG 02 BBC2 CH33 3 0 N M UAL A R 0 0 0 0 0 0 0 O 1 2 3 4 5 6 7 G P C 2 3 4 2 4 2 2 H 6 3 2 3 7 1 2 DE C BBC1 BBC2 CH4 I...

Page 18: ...erform the above selection Press the pause button twice to store the programme The DEC display changes to indicating that the channel has been stored 7 To end press the MENU button FWD REV INDEX ENTER MENU PROG PROG AUX VCR TV OPERATE MOVIE TEXT CA REC NAVI TV Cursor MENU N M UAL A R 0 0 0 0 0 0 0 O 1 2 3 4 5 6 7 G B B I C B B T H C C V 4 P 1 2 C 2 3 2 4 4 2 2 H 6 3 3 2 7 1 2 DE C R 0 0 0 0 0 0 0 ...

Page 19: ...which does not contain a time signal the VCR clock cannot be set automatically by pre tuning the VCR to the channel In this case use the procedure on page 20 to set the clock manually The time which has been set automatically may drift from the correct time depending on the signal condition or the programme being broadcast In this case use the remote control handset to set the time on the VCR cloc...

Page 20: ...ill need to be reset Controls Remote Display 1 2 3 4 Be sure to check that VCR1 or VCR2 is displayed This VCR is designed so it can be controlled when either VCR1 or VCR2 is selected See REMOTE on page 60 Press the CLOCK button Set the time and date For example press 1 0 2 0 for 10 20 and then 1 2 0 5 0 1 for the 12th of May 2001 0 00 for midnight 12 00 for noon The day of week appears automatical...

Page 21: ...n or off Remember that The VCR automatically enters the playback mode when a cassette without its safety tab is inserted If you have inserted a cassette without the safety tab and press the REC button will flash in the VCR display for several seconds and the cassette will be ejected automatically Be sure to check the safety tab before inserting a cassette for the above reasons Type of video casset...

Page 22: ...Instant Recording Timer IRT Page 31 This tells you how to use the IRT feature The IRT feature allows you to quickly set up the VCR to record a TV programme for a specified period Timer Recording Pages 32 39 The built in 24 hour timer permits the unattended recording of up to 12 preselected programmes within a period of 1 year including daily and weekly programmes In additional to the conventional ...

Page 23: ...y button without a cassette inserted will flash in the VCR display to warn you During playback you can use the following features Pause playback Press the pause button on the remote control handset or play still 6 button on the VCR to stop the picture on the screen during playback Press the button again to reset to normal playback If the screen jitters vertically press the PROG or buttons on the V...

Page 24: ...on Note When a cassette has not been inserted will flash in the VCR display to warn you Playing an NTSC tape If your TV has a PAL60 system mode you can play an NTSC tape on the TV Insert an NTSC tape into the VCR and press the play button Note Although this VCR can also play NTSC SP and EP tapes noise may enter the Hi Fi sound with NTSC EP tapes In this case press the CH1 2 button to switch off th...

Page 25: ...G SP LP EXTEND MENU CLOCK COUNT DISP FWD REV 0000 VCR1 2 TV CLOCK CORRECT PDC DLY WKL AUX VIDEO PLUS CL 5 CH1 2 CH1 2 A DUB V DUB CH1 2 select button When playing stereo or monaural tapes Press the CH1 2 select button on the remote control handset so that both the and indicators on the front panel of the VCR light When only the or indicator lights only the left or right audio channel of the Hi Fi ...

Page 26: ...e the shuttle ring knob If the shuttle ring knob is operated during normal or still playback turning the ring knob to the positions indicated gives the special effects shown Release the shuttle ring knob for normal play or still play If the shuttle ring knob is operated during still play and is then released the VCR re enters the still play mode If the VCR is left for more than 30 seconds to one m...

Page 27: ...ash in the VCR display for several seconds and the cassette will be ejected automatically If you press the REC or REC IRT button without a cassette inserted will flash in the VCR display to warn you COMMERCIAL ADVANCE PROG REC IRT REV FWD TAPE NAVIGATION If you want to avoid recording unwanted material press the pause button Press the button again to continue recording To prevent tape damage the V...

Page 28: ...dcast is the same as normal recording The STEREO indicator will appear on the TV screen for a few seconds if a programme being broadcast in stereo is selected STEREO M1M2 Note You can monitor the desired audio channel with the CH1 2 select button on the remote control handset Press the CH1 2 select button until you hear the desired audio channel The selected audio channel is shown on the VCR Durin...

Page 29: ...o track Controls TV Screen NICAM ON OFF selection Press the MENU button Press the cursor button to select the CH option and the press the ENTER button The CH PRESET display as illustrated on the TV screen 1 2 Press the cursor button to select NICAM Press the or cursor button to change the NICAM setting and then press the MENU button Usually select The VCR discriminates whether the broadcast is NIC...

Page 30: ... exit R C V MODE O V T I A D P E E O A L N I A N L K YZER AUDIO PROGRAM PLAY SD SELECT SET Exit MENU 2 L AUTO MIX 1 L REMOTE 2 1 R C V MODE O V T I A D P E E O A L N I A N L K YZER SD SELECT SET Exit MENU 2 L 1 L AUDIO PROGRAM PLAY AUTO MIX REMOTE 2 1 FWD REV INDEX ENTER MENU PROG PROG AUX VCR TV OPERATE MOVIE TEXT CA REC NAVI TV Cursor MENU Tape Analyzer function during recording Controls TV Scre...

Page 31: ...EC IRT button until you select the required recording time the time changes in hours and minutes in the following sequence 0 15 0 30 0 45 1 00 1 15 1 30 1 45 2 00 3 00 4 00 5 00 6 00 During recording the remaining time is displayed At the end of the recording time when the display shows 0 00 the VCR will turn off automatically To stop recording during IRT press the stop button on the VCR or on the...

Page 32: ...imer See pages 33 to 39 for details Press the OPERATE button to turn off the VCR To interrupt a recording after it starts press the OPERATE button and then the stop button either on the remote control or on the VCR within 10 seconds If a cassette with its safety tab snapped off is inserted it will be ejected automatically and the indicator in the VCR display will start flashing when the VCR is tur...

Page 33: ... TV guide or newspaper etc for the programme you want to record by using the number buttons After entering the PlusCode programming number press the ENTER button The programmed details appear If you wish to change the programme allocations see the additional operations page 62 If you wish to change the start ON time or end OFF time press the EXTEND button for start time or for end time The start O...

Page 34: ...COUNT DISP CH1 2 FWD REV 0000 VCR1 2 TV CLOCK PDC AUX TRANS 3 2 1 6 5 4 9 8 0 7 SP LP CORRECT DLY WKL CL CORRECT SP LP TRANS 0 9 EXTEND VIDEO PLUS A DUB V DUB Press the SP LP button to select the recording speed SP LP or no display Note If you select no display the VCR will record at the speed displayed by the on screen display Check the recording speed after programming the timer If you are progr...

Page 35: ... See page 39 for recalling and clearing the programming from the VCR memory and for programme priority If the TRANS button is pressed when the VCR clock has not been set will flash in the VCR display Reset the VCR clock If your timer programme has a TV programme channel number that you have not preset in the VCR will appear in the VCR display when you try to transfer this programme to the VCR In t...

Page 36: ...FF CH 1 SP VCR TRANS ON OFF DAY MONTH SA CH 1 3 4 Select the stop time For example press 1800 for 18 00 6 00 p m 5 Programming the timer without using VIDEO Plus programming system Things to know before starting programming While you are programming the timer the display panel on the handset will prompt you through the procedure Always press the button before a single digit channel hour and minute...

Page 37: ...e VCR shows the timer programme number for a few seconds If the TV is turned on and tuned to the video programme number the programmed details appear on the TV screen 6 SP VCR TRANS ON OFF DAY MONTH SA CH 1 SP VCR TRANS ON OFF DAY MONTH TH CH 1 SP VCR TRANS ON OFF DAY MONTH SU MO TU WE TH FR SA CH 1 SP VCR TRANS ON OFF DAY MONTH WKL WE CH 1 SP VCR TRANS ON OFF DAY MONTH TH CH 1 ENTER 1 4 2 3 PROG ...

Page 38: ...ation transferred will be rejected In this case clear unnecessary programme numbers from the VCR memory 11 12 COMMERCIAL ADVANCE PROG VIDEOLINK Must be lit OPERATE VCR Display ENTER TRANS 3 2 1 1 2 3 6 4 9 8 0 7 PROG SP LP EXTEND MENU CLOCK COUNT DISP CH1 2 0000 VCR1 2 TV CLOCK CORRECT PDC DLY WKL AUX CL 5 CLOCK VIDEO PLUS A DUB V DUB VIDEOLINK CA Press the CLOCK button to switch the display panel...

Page 39: ...amme 1 10 00 11 00 Programme 3 11 00 Programme 4 FWD REV INDEX MENU PROG PROG AUX VCR TV OPERATE MOVIE TEXT CA REC NAVI TV ENTER Cursor MENU 3 2 1 2 3 6 4 9 8 0 7 PROG SP LP EXTEND MENU CLOCK COUNT DISP CH1 2 0000 VCR1 2 TV CLOCK CORRECT PDC DLY WKL AUX CL 5 0 MENU PLUS A DUB V DUB No V P V E R 1 2 3 4 5 6 DATE T I ME CH I EW 17 5 H 1 2 16 00 00 18 T SELECT Exit 0 MENU S P Programme 1 Programme 2 ...

Page 40: ... one of the following a Press and hold VIDEO LINK button for more than 2 seconds b Press the OPERATE button followed by STOP button within 10 seconds To cancel the VIDEO LINK mode setting you can do one of the following a Press the VIDEO LINK button for more than 2 seconds b Eject the tape Notes During VIDEO LINK mode is set to L2 and if you turn on the satellite decoder the VCR will start recordi...

Page 41: ... starts playback when a cassette without the safety tab is inserted Menu Features Pages 58 61 Menu features show you various displays Programme Review OSD feature on off selection VIDEO LINK L1 L2 selection Tape Analyzer on off selection Remote code selection Auto programme play on off selection Audio Mix on off selection and Auto clock set on off selection VIDEO Plus System Setup Page 62 Describe...

Page 42: ...or a tape recorded on another VCR is inserted will appear in the VCR display You will need to store the tape data in memory to activate Tape Navigation during playback 2 If you are using an E 30 E 60 E 120 or E 180 cassette ignore the display If you are using E 240 E 260 or E 300 press the 0000 button on remote control to select the type of tape you are going to use The type of tape you have selec...

Page 43: ...T 5SP 20LP 11 00 19SP No 2 3 No of Programmes Recording Date day month Recorded Channel Recording Start Time Recording Length Recording Speed Tape Bar Mark showing that you have previously viewed the programme Tape No Genre mark Programme No Blank Tape remaining SP 0 2 SELECT SOAP Exit NAVI 6 Operating Guide Interpreting the TAPE NAVI Data Menu Tape Number Number of Programmes Tape Bar View Mark G...

Page 44: ... AUX VCR TV OPERATE MOVIE TEXT CA REC NAVI TV NAVI DATE SEARCH ING START i n m CH Exit NAVI G O R P I V A N E P A T No DATE DATA NO TAPE NAV I START i n m CH Exit NAVI G O R P I V A N E P A T No Broadcast with PDC signal The programme data will be split into three sections This splitting phenomenon occurs for programmes broadcast with the PDC signal in normal IRT and timer recording modes If the P...

Page 45: ...automatically 5 SEARCH ING STOP If you want to turn off the VCR at the beginning of a non recorded blank section Select the blank section REMAIN and press the OPERATE button The VCR will turn off automatically after locating the beginning of the blank section 6 FWD REV INDEX MENU PROG PROG AUX VCR TV OPERATE MOVIE TEXT CA REC NAVI TV ENTER Cursor NAVI FWD REV INDEX ENTER MENU PROG PROG AUX VCR TV ...

Page 46: ...on cannot be used if a cassette recorded on this VCR is inserted 1 2 The programme list of the tape to be deleted will appear on the TV screen Press the button to delete the selected tape number The TAPE LIST menu will appear on the TV screen to show that the selected tape number has been deleted 0 ENTER TRANS 3 2 1 1 4 2 3 6 4 9 8 0 7 PROG SP LP EXTEND MENU CLOCK COUNT DISP CH1 2 0000 VCR1 2 TV C...

Page 47: ...ADVANCE PROG REC IRT REV FWD TAPE NAVIGATION TAPE NAVIGATION button 2 3 4 DATE START i n m CH 0 0 12 12 1 11 0 3 11 6 9 5 00 5 17 12 1 30 23 00 09 00 SP 5SP 6 4 0SP 5 5 5 1 1 SP 10 00 32SP No G O R P Exit MENU B H5 TV I C R B B C1 N1 T TV I SP 0 2 OK 2 3 4 DATE START i n m CH 4 9 10 BC 1 1 8 1 7 4 B 3 3 7 3 3 2 2 3 3 28 5 10 1 2 1 8 1 35 10 19 10 12 SP 7SP 6 4 5SP 7SP 11 11 12SP 1 No G O R P SP 0 ...

Page 48: ... When more than 90 of the memory has been used If you press the REC button the CAUTION message will appear on the TV screen or or When the memory has been used up If you press the REC button the FULL message will appear on the TV screen In such cases if you want to store data of the tape you are going to record delete unnecessary tape data from the memory Please refer to page 46 A C UT ION Exit ME...

Page 49: ...TE and TAPE LIST will not appear on the Tape Navi menu SELECT SET Exit MENU TAPE NAV I I ENU N APE T V A M DELE E T TAPE LIST PROGRAM LOCK SELECT SET Exit MENU TAPE NAV I I ENU N APE T V A M 2 Press the and cursor to select the programme you wish to protect 3 To end press the MENU button 3 FWD REV INDEX MENU PROG PROG AUX VCR TV OPERATE MOVIE TEXT CA REC NAVI TV ENTER Cursor MENU FWD REV INDEX MEN...

Page 50: ...ocked area This position is protected will be displayed on the TV screen and the VCR will eject the tape The will be displayed in the VCR If REC button is pressed after locked programmes no warning message will appear on the OSD screen Press the MENU or NAVI button to skip this display During timer recording If the timer recording is set and the cassette have programme locked the OSD will display ...

Page 51: ... I T P A O S SP 0 2 SELECT SOAP Exit NAVI 6 d Press the ENTER button The Soap Recording menu will appear 3 2 3 4 D DLY T TH U U FR S S A E W MO ATE START i n m CH B 0 0 1 12 H5 12 1 TV I C 11 0 3 R 11 B B C1 N1 T 9 6 5 00 5 17 TV I 12 1 30 23 00 09 00 SP 5 1 SP 0 5 SP 5 5 SP 10 00 32SP 1 I A D Y L ER M I T P A O S SP 0 2 SELECT SOAP Exit NAVI 6 d Press the or cursor to select the day you wish to r...

Page 52: ... cassette is not loaded in the VCR the indicator starts flashing 7 Soap Recording will not operate if Programme listed in Tape data menu does not have the start time Blank of Remain section is selected If the clock is not set If the selected channel no longer exist or has been deleted Notes When 12 programmes maximum are stored for the Soap Recording and you try to register another Soap Recording ...

Page 53: ...te control The subtitle will appear after about 5 seconds on the TV screen and change as follows Off a CC1 a CC2 Notes Each time the MOVIE TEXT button is pressed the subtitle display status on the TV screen will change as follows Subtitle will also appear with external video sources with MOVIETEXT signal Subtitle will also appear with a tape dubbed from another tape with MOVIETEXT signal Subtitle ...

Page 54: ...orded tape The recording is made from antenna input The channel to record in not BBC1 or BBC2 will not operate in the following conditions CA is set to OFF front panel light not on Tape Navigation is set to OFF Playback of tapes not recorded on this VCR When selected input either L1 or L2 or L3 input Tape NAVI data for this tape has been deleted Commercial detection was not on during recording as ...

Page 55: ...ss the buttons and CL buttons simultaneously on the remote control handset The VCR mode is now locked and appears in the VCR display and also is displayed on the TV screen When the VCR operating mode is locked the VCR accepts remote control commands but it will not accept any commands from the buttons on the VCR except the jog and shuttle control To release the VCR lock press the button and CL but...

Page 56: ...u are using an E 240 E 260 or E 300 tape press the CLOCK COUNT button to switch the VCR display to the clock indication and press the 0000 button to adjust the VCR time remaining system for an accurate read out Each time the 0000 button is pressed the TV screen is switched from E240 to E260 E300 no display and back to E240 in sequence Use the tape remaining display as a reference The tape remainin...

Page 57: ...VCR and insert a cassette which was recorded using the tape indexing feature then operate as follows Controls TV Screen Press the INDEX button when a cassette is loaded and the VCR is in the stop mode 1 2 3 4 Press the rewind or fast forward button The tape will be rewound or fast forwarded until an index mark is detected When the VCR has located an index mark it will enter the playback mode for a...

Page 58: ...equired display and then press the ENTER button 3 INDEX ENTER MENU PROG PROG AUX VCR TV OPERATE MOVIE TEXT CA REC NAVI TV MENU Cursor INDEX MENU PROG MOVIE TEXT CA REC NAVI TV ENTER Cursor MENU ENTER TRANS 3 2 1 1 4 2 3 6 4 9 8 0 7 PROG SP LP EXTEND MENU CLOCK COUNT DISP CH1 2 0000 VCR1 2 TV CLOCK CORRECT PDC DLY WKL AUX CL 5 0 VIDEO PLUS A DUB V DUB N E M U SELECT Exit MENU REV I EW CH A N V I O ...

Page 59: ...e When an NTSC tape is played no operation mode will appear on the TV screen regardless of the OSD on or off setting VIDEO LINK L1 or L2 1 Press the or cursor button to select VIDEO LINK 2 Press the or cursor button to change the VIDEO LINK setting and then press the MENU button L1 To record video and audio from TV select L1 L2 Your satellite cable decoder will automatically activate the VCR to st...

Page 60: ...n to select PROGRAM PLAY 2 Press the or cursor button to change the auto programme play setting and then press the MENU button After the timer recording has finished the VCR will automatically rewind the tape to locate the programme just recorded then begin playing it back by merely turning on the VCR Note If two or more programmes are recorded at once the programme recorded last is played back Th...

Page 61: ...t automatically when the VCR is tuned to a channel which is transmitting a PDC signal The clock must be set manually Note If you are setting the clock by remote control the AUTO will be set to FWD REV INDEX MENU PROG PROG U C O MOVIE TEXT CA REC NAVI TV ENTER Cursor MENU R C V MODE O V T I A D P E E O A L N I A N L K YZE R PROGRAM PLAY SD SELECT SET Exit MENU 2 L AUTO 1 L REMOTE 2 1 AUDIO MIX ...

Page 62: ...button The programmed details appear 4 5 6 Notes If you change the TV programme allocations by following the above steps the TV programme number will be automatically over written by the alternate programme number when you programme subsequently If you want to record from external video equipment connected to the Scart socket or DECODER socket press the AUX button to change the TV programme number...

Page 63: ...ia the DECODER socket or L1 to dub the source input via the Scart socket on the back of the VCR If L1 L2 or L3 is not displayed the picture of the TV programme being received will be dubbed 3 Insert a cassette into this VCR and play the tape then press the pause button at the point where dubbing is to stop The VCR enters the play pause mode 4 COMMERCIAL ADVANCE PROG VIDEOLINK REC IRT N VIDEOLINK C...

Page 64: ...NCE PROG VIDEOLINK REC IRT VIDEOLINK CA COMMERCIAL ADVANCE PROG VIDEOLINK REC IRT VIDEOLINK CA COMMERCIAL ADVANCE PROG VIDEOLINK REC IRT VIDEOLINK CA COMMERCIAL ADVANCE PROG VIDEOLINK REC IRT VIDEOLINK CA COMMERCIAL ADVANCE PROG VIDEOLINK REC IRT VIDEOLINK CA COMMERCIAL ADVANCE PROG VIDEOLINK REC IRT VIDEOLINK CA Notes The dubbed picture will contain some colour noise After you have performed vide...

Page 65: ... VCR will be dubbed If the programme number is displayed the audio of the TV programme being received will be dubbed 3 Insert a cassette into this VCR and play the tape then press the pause button at the point where dubbing is to stop The VCR enters the play pause mode 4 COMMERCIAL ADVANCE PROG VIDEOLINK REC IRT VIDEOLINK CA Connect the audio source to this VCR as shown above If the audio source h...

Page 66: ...layed back L When you have selected in the AUDIO MIX display Press the CH1 2 button and turn on and or audio indicators to play the original Hi Fi audio mixed with the dubbed audio on the linear track Press the CH1 2 button and turn off both the and indicators to play the dubbed audio L When you have selected in the AUDIO MIX display Press the CH1 2 button and turn on and or audio indicators to pl...

Page 67: ... on the back of the VCR If L1 L2 or L3 is not displayed the picture of the TV programme being received will be dubbed 3 Insert a cassette into the VCR for recording and the cassette to be copied into the playback VCR 4 COMMERCIAL ADVANCE PROG VIDEOLINK RE IR VIDEOLINK CA Connect the second video equipment to this VCR as shown above Refer to the manual of second video equipment for connection If th...

Page 68: ...e appropriate time Press the pause button again to resume recording 6 7 To end tape dubbing press both stop buttons Controls VCR Display FWD REV INDEX ENTER MENU PROG PROG AUX VCR TV OPERATE MOVIE TEXT CA REC NAVI TV REC COMMERCIAL ADVANCE PROG EOLINK RE IR VIDEOLINK CA COMMERCIAL ADVANCE PROG DEOLINK R I VIDEOLINK CA COMMERCIAL ADVANCE PROG EOLINK RE IR VIDEOLINK CA EDITING Tape Dubbing ...

Page 69: ...r any other Scart Sockets of this VCR This VCR can be used both for recording and playback Whichever case you choose the procedure is the same as explained below Synchro editing is possible if the two VCRs have different remote control codes VCR1 and VCR2 Note If VCR1 appears in the remote display when a button on the remote control is pressed and flashes in the VCR display change the remote contr...

Page 70: ...en set the playback VCR to play pause mode Press the pause button again and both VCRs will begin copying Press the stop buttons on both VCRs when you are finished 9 FWD REV INDEX ENTER MENU MOVIE TEXT CA REC NAVI REC Pause ENTER TRANS 3 2 1 1 4 2 3 6 4 9 8 0 7 PROG SP LP EXTEND MENU CLOCK COUNT DISP CH1 2 FWD REV 0000 VCR1 2 TV CLOCK CORRECT PDC DLY WKL AUX CL 5 VCR1 2 TV Pause VIDEO PLUS A DUB V ...

Page 71: ...er Connect the Satellite Cable Box decoder as follows What is a Satellite Cable Box Broadcast The radio waves are transmitted from the broadcasting station in the same way as an ordinary TV broadcast in the Satellite Cable Box system however the radio waves are scrambled therefore you cannot receive them or view the broadcast on the TV without unscrambling You must connect an exclusive decoder to ...

Page 72: ...e number for VCR video programme number 3 Press the buttons labeled AUX on the remote control until L2 is showing in the VCR display 4 Start recording You can view a Satellite Cable Box programme even when playing back a tape by pressing the VCR TV button to set the VCR to TV mode SATELLITE CABLE BOX DECODER OPERATION ...

Page 73: ...the satellite receiver You can view a satellite programme even when playing back a tape by pressing the VCR TV button to set VCR to TV mode Depending on the type of a satellite receiver its TV output socket must be connected to the VCR DECODER socket to view a satellite programme DECODER CANAL PLUS EURO A V AERIAL ANTENNE RF OUT SORTIE RF AUDIO OUT SORTIE SON R D L G When using a Scart connector l...

Page 74: ...D MENU CLOCK COUNT DISP CH1 2 FWD REV 0000 VCR1 2 TV CLOCK CORRECT PDC DLY WKL AUX VIDEO PLUS CL 5 2 MENU PAUSE 1 A DUB V DUB FWD REV INDEX MENU PROG PROG AUX VCR TV OPERATE MOVIE TEXT CA REC NAVI TV ENTER Cursor MENU Press the stop button If the programme number of the satellite receiver changes to 12 your satellite receiver can be controlled by this VCR Press the MENU button to end programming I...

Page 75: ... press the 0 9 buttons on the remote control When a satellite picture appears on the TV screen press the pause button to store this station number The programme number turns black If not press the pause button again Press the pause button to store this programme number The satellite control set up menu appears on the TV screen The connection display changes from L2 to RF 05 6 Exit MENU INPUT 5 0 F...

Page 76: ...satellite receiver carefully and set up the receiver correctly then perform the above operation After programming the system control code press the MENU button to return to normal operating mode Satellite receiver Brand Type Number HITACHI GRUNDIG AMSTRAD CAMBRIDGE PACE NOKIA MASPRO PHILIPS TECHNISAT FERGUSON UNIDON 19 19 03 13 19 23 16 20 26 12 32 Note This list of satellite receiver brands is a ...

Page 77: ...lay the programme details in the handset Push the CORRECT button once then enter the correct satellite programme number Press the ENTER button and the new programme number will be memorised VCR CH 1 VCR TRANS CH 1 3 VCR DAY MONTH SA 1 VCR TRANS ON OFF DAY MONTH TH SAT CH 1 ENTER TRANS 3 2 1 1 4 2 3 6 4 9 8 0 7 PROG SP LP EXTEND MENU CLOCK COUNT DISP CH1 2 0000 VCR1 2 TV CLOCK CORRECT PDC DLY WKL A...

Page 78: ...Fi Sound Recording Stereo Broadcasts Stereo programmes are recorded in Hi Fi on both the L and R channels and also recorded on the mono track as monaural Recording Bilingual Broadcasts Both main speech and sub speech sounds are recorded on the Hi Fi audio tracks separately See Audio to be recorded according to the NICAM broadcast on page 29 for the sound that will be recorded on the mono audio tra...

Page 79: ...ROG SP LP EXTEND MENU CLOCK COUNT DISP CH1 2 FWD REV 0000 VCR1 2 TV CLOCK CORRECT PDC DLY WKL AUX CL 5 VCR1 2 TV SP LP PROG 0 9 VIDEO PLUS A DUB V DUB This remote control handset is designed to operate 15 different types of TV You must first programme the handset to match the remote system of your TV AUX VCR TV OPERATE TV DAY MONTH SA TV TV Point the handset towards the front of your TV then press...

Page 80: ... When selecting channel 17 for example press the EXTEND button and then button 7 To select channels 20 29 press the EXTEND button and then buttons 0 9 To select channel 26 for example press the EXTEND button and then button 6 Only the remote control of the Mute feature is different between remote transmission codes 01 TV and 02 TV When only the Mute feature is not operated properly by the handset ...

Page 81: ...ng a few basic items Please follow this section before you call for help or take your VCR to your dealer It could save your time and money User Guide Display Page 83 Maintenance Page 84 Specifications Page 85 PDC function Page 86 Battery Safety Guidelines Page 87 Warranty Letter Page 89 Some Do s and Don ts Page 91 ...

Page 82: ...reaks are normal during visual search still and slow playback Will not make timer recordings The VCR should be in standby mode to activate timer recording Programmes entered incorrectly Clock was not set correctly Programme exceeded cassette length No cassette or cassette s safety tab is removed Cannot store tape data in memory Check that TAPE NAVI is specified in the TAPE NAVI MENU If is specifie...

Page 83: ...en set to Set the time and programme the timer Meaning and troubleshooting When programming the timer Your timer programme has a TV programme channel number that you have not preset in the VCR Correct the channel When programming the timer Twelve programmes have already been stored Cancel unnecessary programme and transfer the new programming When you turn off the power after programming the timer...

Page 84: ...eriod of time may cause the playback picture to become blurred or part of the video information to be lost This does not mean that the recorded programme has been erased but head cleaning is required Since this VCR uses an auto head cleaning system dirt does not often adhere to the heads If dirt still cannot be removed consult your dealer Auto Head Cleaning System This system cleans the video head...

Page 85: ...deo More than 43 dB Horizontal Resolution Colour 260 lines Audio Linear Input PERI 3 8 dBm 10 kohm LINE 7 8 dBm 50 kohm Output PERI 3 8 dBm 1 kohm LINE 7 8 dBm 1 kohm S N Ratio 43 dB Frequency Range 70 Hz to 12 kHz Hi Fi Audio Frequency Range 20 Hz to 20kHz Dynamic Range More than 90dB Wow and Flutter Less than 0 005 WRMS RF Audio Reception NICAM Digital Stereo I PAL Rewind Time About 54 seconds w...

Page 86: ... on the PDC function again 5 When the VCR is tuned to a station transmitting a PDC signal but the signal conditions are poor programme the timer with PDC turned off If you programme the timer with PDC turned on the PDC function does not operate normally 6 When reviewing the programmed information as shown in the TV screen above you can see the marking of at the end of the programmed details Refer ...

Page 87: ...87 ...

Page 88: ...88 ...

Page 89: ...er 3 The product serial number is not removed or altered This guarantee does not apply to products acquired second hand or for commercial or communal use This guarantee does not extend to user control adjustments battery replacement and aerial adjustment Any parts replaced under guarantee shall become the property of HITACHI HOME ELECTRONICS EUROPE LTD Please note that evidence of the date of purc...

Page 90: ...90 ...

Page 91: ...switched on when it is unattended unless it is specifically stated that it is designed for unattended operation or has a standby mode Switch off using the switch on the equipment and make sure that your family know how to do this Special arrangements may need to be made for infirm or handicapped people DON T use equipment such as personal stereos or radios so that you are distracted from the requi...

Page 92: ...ce italy hitachi eu com HITACHI FRANCE S A BP 45 69671 Bron Cedex FRANCE Tel 04 72 14 29 70 Fax 04 72 14 29 99 Email conso hitachi compuserve com HITACHI HOME ELECTRONICS HELLAS S A Kifisias 364 Delfon 15233 Halandri Athens GREECE Tel 01 6837200 Email service hellas hitachi eu com HITACHI SALES IBERICA S A Gran Via Carlos III 101 1 08028 Barcelona SPAIN Tel 093 409 2550 Fax 093 491 3513 Email rpla...

Page 93: ...hese set up instructions Even if you never used a VCR before you can connect it up and tune it in quickly by following this Quick Set Up Guide Contents Accessories Supplied 1 Connection 2 Auto Install 3 4 Pre Tuning the Built in Tuner 5 Setting Your Remote Control Handset 6 Fitting the Remote Control Batteries Remove battery cover of the remote control handset Insert the two batteries provided Ens...

Page 94: ...refer to page 3 When viewing pictures on your TV press VCR TV button of the remote control handset so the VCR indicator lights in the VCR display AC Outlet AC 230V 50Hz Mains Lead Please use a scart lead not supplied to get even better picture and sound quality VCR Aerial RF OUT TV set To Aerial IN Aerial cable supplied Aerial Lead AERIAL SCART SOCKET Connect the set and cables as shown below but ...

Page 95: ...een will display as shown After this process is complete the RF output channel will appear in the VCR display For Example RF output channel 35 Refer to item 6 for further tuning 2 3 4 Exit MENU AUTO COMMERCIAL ADVANCE PROG EOLINK RE IR VIDEOLINK CA Plug the aerial lead into the VCR Plug the aerial cable supplied from the VCR RF OUT into the TV aerial input Please refer to page 2 1 COMMERCIAL ADVAN...

Page 96: ...the play still 6 button the test pattern will disappear and the VCR will now come out of the standby mode into the operate mode 8 VIDEOLINK CA COMMERCIAL ADVANCE PROG VIDEOLINK REC IRT REV FWD TAPE NAVIGATION Safety Tab You should now be able to playback a prerecorded cassette Insert the cassette as shown If the safety tab is removed then playback will start immediately If not press the play still...

Page 97: ... illustrated will appear on the TV screen Press the ENTER button to select AUTO The display as illustrated will appear on the TV screen and will appear in the VCR display The VCR will start auto tuning auto channel mapping auto clock setting and auto RF seek function It takes about 3 minutes The following stations are stored in programme numbers 01 05 automatically 01 BBC1 02 BBC2 03 ITV 04 CH4 or...

Page 98: ...4 DAY MONTH VCR TRANS YEAR SA 1 Press the CLOCK button The handset and the VCR clock have now been set up 5 DAY MONTH VCR SA 1 Enter today s date month and year e g 1 2 0 5 0 1 12 May 2001 2 0 0 3 0 2 20 March 2002 The day of the week appears and the first digit of date then flashes Note At any stage during the number entry you can correct any errors by pressing the CORRECT button until the incorr...

Reviews: