


6
PRO TIP
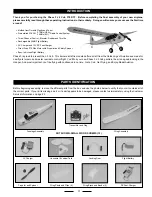
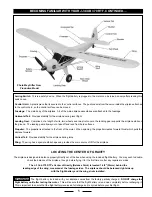
❑
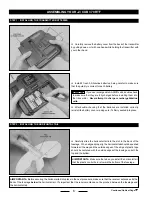
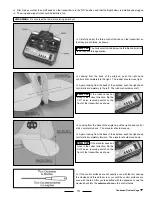
Install 8 fresh AA Alkaline batteries, being careful to make sure
that the polarity is correct for each battery.
If you use rechargeable AA NiCD cells, double-check
to make sure that they are fully charged before installing them into
the transmitter.
Never attempt to charge or recharge Alkaline
cells.
❑
After double-checking that the batteries are installed correctly,
reinstall the battery cover, making sure it's firmly seated into place.
❑
Carefully remove the battery cover from the back of the transmitter
by pulling down on it with one hand while holding the transmitter with
your other hand.
ASSeMBLING YOuR J-3 CuB 370 RTF
STeP 1: INSTALLING THe TRANSMITTeR BATTeRIeS
Continued On Next Page
☛
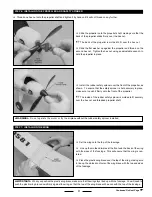
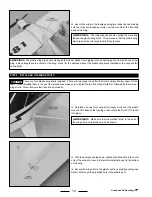
STeP 2: INSTALLING THe HORIzONTAL TAIL
❑
Carefully slide the horizontal tail into the slot in the back of the
fuselage. When aligned properly, the horizontal tail should be pushed
forward all the way and the outside edges of the strips of plastic tape
should be centered with the outside edges of the fuselage, on both the
top and the bottom.
✦
IMPORTANT
✦
Make sure that when you install the horizontal tail
that the plastic control horn is toward the bottom of the fuselage.
✦
IMPORTANT
✦
Before securing the horizontal tail into place in the next procedure, make sure that the receiver antenna exits the
back of the fuselage
below
the horizontal tail. It's important that the receiver antenna not be pinched between the fuselage and
the horizontal tail.