background image

EFL5PL 4  PEREL 

4. Installation 


- Install the device in a location where few people pass by and that is unreachable for unauthorised persons. 
- Make sure there is no flammable material within a 50cm radius of the device. 


5. Use 


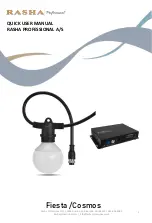
- Make sure the power switch is set to “OFF”. 

- Insert the DC jack of the adaptor into the device, and plug the adaptor into the mains outlet. 

- Set the power switch to “ON”. The device starts operating. 

- Set the power switch to “AUDIO” for music controlled operation through the built-in microphone. 

- You can control the lightning inside the ball by touching it carefully. 

- Set the power switch to “OFF” to stop the device. 


6. Cleaning and Maintenance 


1.  All screws for installing the devices or parts of the device have to be screwed tight and must not be corroded. 

2.  The housing, visible parts, mounting supports and the installation location (e.g. ceiling, suspension, trussing) 

should not be deformed, modified or tampered with e.g. do not drill extra holes in mounting supports, do not 

change the location of the connections… 

3.  The electric power supply cables must not show any damage. 

4.  Disconnect the device from the mains prior to maintenance activities. 

5.  Wipe the device regularly with a moist, lint-free cloth. Do not use alcohol or solvents. 

6.  There are no user-serviceable parts. 

7.  Contact your dealer for spare parts if necessary. 


7. Technical Specifications 


Power Supply 

12V AC/1A adaptor, to be connected to max. 230VAC/50Hz 

Power Consumption 

max. 12W 

Dimensions 

150 x 150 x 300mm 

Total Weight 

0.8kg 

Max. Ambient Temperature 

30°C 


The information in this manual is subject to change without prior notice. 


EFL5PL – 5” PLASMA BALL 


1. Inleiding 


Aan alle ingezetenen van de Europese Unie 

Belangrijke milieu-informatie betreffende dit product 

Dit symbool op het toestel of de verpakking geeft aan dat, als het na zijn levenscyclus wordt weggeworpen, 

dit toestel schade kan toebrengen aan het milieu. Gooi dit toestel (en eventuele batterijen) niet bij het 
gewone huishoudelijke afval; het moet bij een gespecialiseerd bedrijf terechtkomen voor recyclage. U moet 

dit toestel naar uw verdeler of naar een lokaal recyclagepunt brengen. Respecteer de plaatselijke 

milieuwetgeving. 

Hebt u vragen, contacteer dan de plaatselijke autoriteiten inzake verwijdering. 


Dank u voor uw aankoop! Lees deze handleiding grondig voor u het toestel in gebruik neemt. 

Ga na of het toestel niet werd beschadigd tijdens het transport. Zo ja, raadpleeg uw dealer alvorens te installeren. 


Summary of Contents for EFL5PL

Page 1: ...PL 5 PLASMA BALL 5 PLASMA BALL BOULE PLASMA 5 BOLA M GICA PLASMA 5 PLASMA BALL 5 BOLA PLASMA 5 USER MANUAL GEBRUIKERSHANDLEIDING NOTICE D EMPLOI MANUAL DEL USUARIO BEDIENUNGSANLEITUNG MANUAL DE INSTRU...

Page 2: ......

Page 3: ...e voltage stated in the specifications of this manual Do not crimp the power cord and protect it against damage Have an authorised dealer replace it if necessary Always disconnect the device from the...

Page 4: ...rior to maintenance activities 5 Wipe the device regularly with a moist lint free cloth Do not use alcohol or solvents 6 There are no user serviceable parts 7 Contact your dealer for spare parts if ne...

Page 5: ...e de gebruiker heeft aangebracht aan het toestel vallen niet onder de garantie Hou dit toestel uit de buurt van kinderen en onbevoegden 3 Algemene Richtlijnen Dit toestel is ontworpen voor professione...

Page 6: ...lectrique ou lectronique et des piles ventuelles parmi les d chets municipaux non sujets au tri s lectif une d ch terie traitera l appareil en question Renvoyer les quipements usag s votre fournisseur...

Page 7: ...circuits des br lures des lectrochocs etc Un usage impropre annule d office la garantie 4 Installation Installez l appareil hors de port e des personnes non autoris es Evitez les endroits populeux En...

Page 8: ...ado expuesto a grandes cambios de temperatura Espere hasta que el aparato llegue a la temperatura ambiente Aseg rese de que la tensi n de red no sea mayor que la tensi n indicada en las especificacion...

Page 9: ...ible ajustar las descargas en la bola toc ndola cuidadosamente Coloque el interruptor en OFF para desactivar el aparato 6 Limpieza y mantenimiento 1 Apriete bien las tuercas y los tornillos y verifiqu...

Page 10: ...den bernimmt der Hersteller keine Haftung Installation und Wartung sind einer autorisierten Fachkraft vorbehalten Nehmen Sie das Ger t nicht sofortt in Betrieb nachdem es von einem kalten in einen war...

Page 11: ...und schlie en Sie den Adapter an das Netz an Stellen Sie den Stromschalter auf ON Das Ger t f ngt an zu funktionieren Stellen Sie den auf AUDIO f r ein musikgesteuertes Funktionieren ber das eingebaut...

Page 12: ...cnico qualificado deve fazer a instala o Verificar que a tens o de rede n o seja superior a tens o especificada no fim deste manual O cabo de alimenta o n o pode estar danificado substituir o cabo nes...

Page 13: ...amento pilotado pela musica Pode regular as descargas na bola em tocando cuidadosamente Colocar o interruptor em OFF para desligar o aparelho 6 Limpeza e manuten o 1 Apertar as porcas e parafusos e ve...

Reviews: