ISSUED: 12-22-14 SHEET #: 180-9064-4 01-20-16
17
Tips
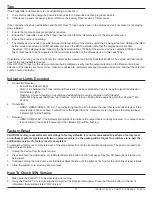
If the Transmitter and Receiver are not establishing a connection:
1. It is recommended to unplug the power to both units for 30 seconds and then plug them back in.
2. If the above tip does not assist, please reference the Factory Reset section of this manual.
If the connection has been established and the HD Flow™3 logo can be seen on the display device, but content is not playing
when initiated:
1. Ensure that source cables are properly connected.
2. Ensure the Transmitter is set to the proper input port and that the Receiver is set to the proper output port.
3. Ensure the source is operating.
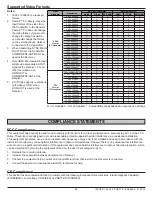
4. The display device needs to be able to support the resolution of the media source that is being streamed. Utilizing the INFO
button, while connected via HDMI, will allow you to see the EDID resolution data that the display device accepts.
(Example - If the display device supports the highest resolution of 720p but the source device is outputting 1080p content,
the content needs to be downscaled to the maximum resolution of the display device, in this case 720p).
If pixelation is occuring on the screen aim the remote at the receiver and hit the Scan/Back button. The system will reboot and
scan for the best available channel.
If the HD Flow™3 logo nor the video content are being displayed, verify that the output selection on the Receiver and input
selection of the display are correct. Also, make sure cables are completely pressed into place and secure, and that the selected
source content is playing.
Indicator
Lights
Decoded
1. Transmitter/Receiver
• Power/Link Indicator Light:
Solid - Link between the Transmitter and Receiver(s) has been established and is ready for signal transmission.
• All Indicator Lights:
Flashing - Units are booting or resetting and establishing a secure connection for AV transfer.
Lights blinking sequentially from top to bottom - Unit is in Scan Pairing Mode searching for other PeerAir™ Pro
devices.
2. Transmitter:
• HDMI1, HDMI2, HDMI3, PC, AV - The indicator light will be lit to indicate the input that is currently selected. If the
selected input does not have a connection or the signal from the media source is not present, the selected input
indicator light will be
fl
ashing.
3. Receiver:
• HDMI, COMPO, AV - The indicator light will be lit to indicate the output that is currently selected. If no output device
is connected to the selected output port the indicator light will be
fl
ashing.
Factory
Reset
CAUTION: Factory reset will revert all settings to factory defaults. It is not recommended to perform a factory reset
on multicast systems (systems with two or more receivers) as the pairing will be forgot. One will have to re-pair the
additional receivers if a factory reset is completed.
To complete a factory reset, complete each of the steps below for both the transmitter and receiver. These do not need to be
done at the same time.
1. Unplug the device from its power source.
2. Press and hold the Link/Source or Link/Output Selection button on the front panel. Plug the DC power back into the unit
being reset.
3. Continue holding the Link/Source or Link/Output Select button until the lights on the front of the unit blink at least 6 times.
4. Allow the system to re-start and show content.
How
To
Check
S/W
Version
1. Make sure the PeerAir™ Pro System is up and running.
2. Using the PeerAir™ Pro remote supplied, point it at the Receiver IR window. Press the Info/OK button. In the list of
information there will be stated “S/W Version:”


