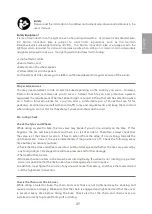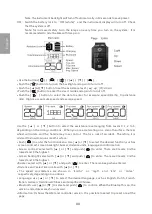
50
51
Brake System
Symptom
Possible cause/consequence and solution
Poor braking performance
The brakes are not inserted.
Insert the brakes
• There is grease stain on the brake disc or shoes. If the brake
disc or shoes are covered in grease, the braking distance will
be longer and the risk of accident and injury increases.
When this happens, please go to an authorized distributor
immediately.
• Clean the brake disc with alcohol.
• Change the brake shoes.
• Bring the dirty disc or shoes to an authorized distributor for
examination.
Symptom
Possible cause/consequence and solution
Poor braking performance
and not distinctive braking
action
● Air in the brake system
The air in the brake system will lead to prolonged braking
distance and the risk of accident and injury increases. If
this happens, do not ride the bike, and bring it to an
authorized distributor to bleed the system.
Leaks in brake system; the pressure loss due to brake system
leaks will result in longer braking distance and the risk of
accident and injury increases. Do not ride a bike with a leaky
brake system.
● Check the brake calipers, piping and connections.
●
Bring the bike to an authorized distributor to correct the
leak.
Symptom
Possible cause/consequence and solution
Poor braking performance
and not distinctive braking
action
• Air in the brake system
The air in the brake system will lead to prolonged braking
distance and the risk of accident and injury increases. If
this happens, do not ride the bike, and bring it to an
authorized distributor to bleed the system.
Leaks in brake system; the pressure loss due to brake system
leaks will result in longer braking distance and the risk of
accident and injury increases. Do not ride a bike with a leaky
brake system.
• Check the brake calipers, piping and connections.
• Bring the bike to an authorized distributor to correct the
leak.
Symptom
Possible cause/consequence and solution
Metallic noises come out of
brakes and it is rough to
decelerate.
Worn brake shoes will lead to longer braking distance and the
risk of accident increases. When the brake shoes are worn
beyond the minimum thickness, the shoe supports will grind
into the friction ring on the brake disc.
• Have the brake shoes and brake disc, if necessary, changed
by an authorized distributor
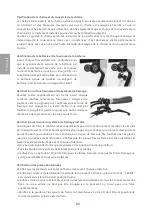
Remove/install the Front Wheel
Remove the Front Wheel
Release the brake calipers after the front wheel is removed. The hydraulic disc brake must not be
operated with the wheels removed. Or, the brake pistons will be fully extended and make contact
with one another. The caliper piston position may be damaged. Only push back the brake caliper
pistons and install brake shoes.
Install the front wheel
Make sure that the lever of the front wheel quick release is in 90° angle with the front wheel axle
before every trip and the lever shall not deviate from its original position. Please refer to the
instructions for the front fork. If the pre-tensioning is low for the quick release, chances are the
front wheel may become loose during the trip and the risk of accident increases. Install the
wheel as instructed.
Remove/install the Rear Wheel
Remove the Rear Wheel
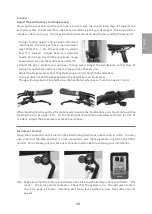
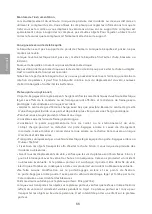
Put the bike upside down as shown in the picture below to remove the rear wheel. Disconnect
the motor wires, undo the nut, and pull the rear gear change wire downwards. The chain comes
loose now, and you can lift the wheel up. The hydraulic disc brake must not be operated with the
wheels removed. Or, the brake pistons will be fully extended and make contact with one another.
The caliper piston position may be damaged. Only push back the brake caliper pistons and
install brake shoes.
Install the Rear Wheel
Place the bike upside down as shown in the picture. Place the wheel in the rear slot and brake
caliper and tighten the nut. Connect the motor wires and adjust the chain. Then, adjust the gear
change wire as appropriate. Install the rear wheel as instructed. Make sure that the tire aligns
with the center of rear wheel axle before every trip.
Tighten and Adjust the Chain
If the chain is not adjusted properly, the chain itself and other parts may be damaged. You need
to bring the bike to an authorized distributor for tensioning if chain is slacking. If the links are
too many, the bearing and seals in the frame may be damaged, and the overall wearing and
abrasion of gear change system will increase.
Remove/install Brake Pads and Discs
Remove Brake Pads
The hydraulic disc brake must not be operated with the wheels removed. Or, the brake pistons
will be fully extended and make contact with one another. The caliper piston position may be
damaged. Only push back the brake caliper pistons and install brake shoes.
Install Brake Pads
The fixing pin of brake shoe has a single-purpose thread lock. The pin may come loose during a
trip if it is used repeatedly. This can lead to brake malfunction and risk of accident. Once the pin
becomes loose, it has to be replaced immediately. The used pin shall be discarded immediately.
Install Brake Disc
The bolt that holds the brake disc in place has a single-purpose thread lock. The bolt may come
loose during a trip if it is used repeatedly. This can lead to brake malfunction and risk of accident.
Once the bolt becomes loose, it has to be replaced immediately. The used bolt shall be
discarded immediately.
Key to the Battery Lock
Your electric bike is delivered with two keys to the battery lock, so make sure you keep one at a
safe place and write down the key number. In case you need to replace the key, consult with an
authorized distributor for the key number.
E
n
g
lis
h
E
n
g
lis
h

