!
PASPORT AirLink
2
4
•
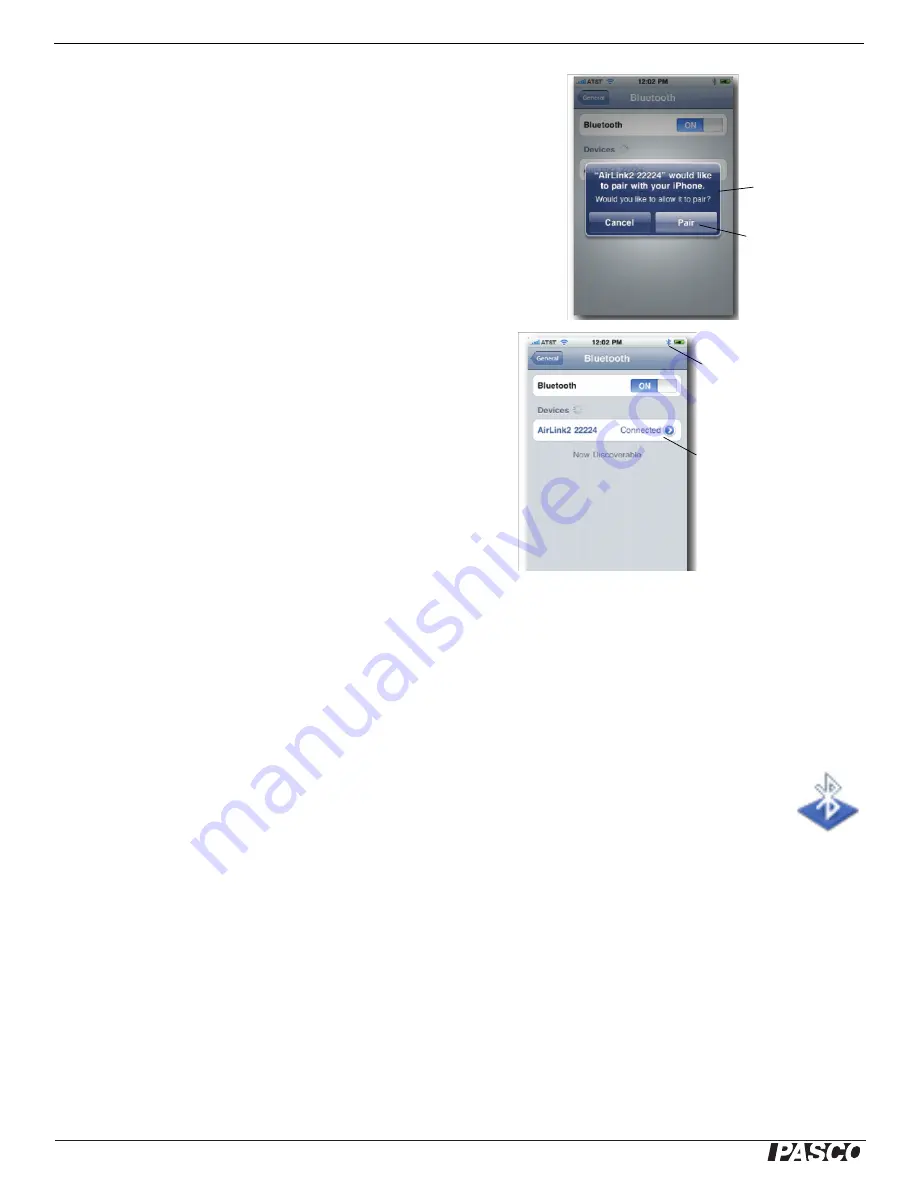
Step 4 (only if the devices had not already been paired): An alert window
will appear after you tap “Not Paired”. Tap “Pair” to complete pairing and
connect the devices. The iPad, iPhone or iPod device and the AirLink
2
need
only be paired once.
•
Step 5: The screen should show that the AirLink
2
is connected. The
green LED on the AirLink
2
should be ON. The Bluetooth icon in
the upper right corner of the device should be blue, indicating an
active connection.
•
Step 6: Exit the Settings app, return to the SPARKvue app, connect
a PASPORT sensor to the AirLink
2
, and start collecting data.
Part Two: Using the PASPORT AirLink
2
with a Computer
Because the AirLink
2
communicates with the computer wirelessly, it does not physically connect to the computer. Instead, you set up
a wireless connection from the computer to the AirLink
2
in software.
You can connect to only one AirLink
2
at a time. Once you connect to an AirLink
2
, no one else can access that AirLink
2
. Depending
on the environment, the AirLink
2
must remain within 30 feet (10 meters) of the computer you intend to use. Actual range may vary.
Setting Up the Computer with Bluetooth
.
•
The AirLink
2
requires DataStudio version 1.9.9 or higher (see the PASCO web site at www.pasco.com).
•
Position the AirLink
2
ON/OFF switch to ON. The green LED will blink slowly (about 1 Hz) when the AirLink
2
is
on.
Note
: Each PASPORT AirLink
2
has an identification number (for example, AirLink2-00056), that is printed on a label on the bot-
tom of the AirLink
2
. Use this ID number to select the AirLink
2
in the DataStudio software when setting up and connecting
Alert window
Tap “Pair”
Bluetooth icon is blue.
AirLink
2
is connected.
Bluetooth
icon


