


®
Wireless Smart Cart
ME
-
1240 (Red) / ME-1241 (Blue)
4
013-14727B
Zero (Tare) the Smart Cart
At the beginning of an experiment, the measurement
from the built-in force and acceleration sensors may not
be zero when the force or acceleration is actually zero.
This is a normal behavior that is corrected when you
zero (or tare) the sensor using the PASCO Data
Collection Software. See Appendix B for information
about setting the built-in sensors to zero.
Collect Data
•
In the SPARKvue Home Screen, select a
measurement from the list under the sensor’s name.
A graph of the measurement versus time opens.
•
In SPARKvue, select the Start button (
) to begin
collecting data.
PASCO Capstone
See the PASCO Capstone Help for information about
setting up the software:
•
In PASCO Capstone, select PASCO Capstone Help
from the Help menu, or press F1.
Connecting the Wireless Smart Cart to a Tablet or a
Computer via Bluetooth
•
For PASCO Capstone, select Hardware Setup in the
Tools palette. The devices in the list are ordered by
proximity to the tablet or computer. Select the Smart
Cart with the address that matches the XXX-XXX
Device ID number on the Smart Cart.
Connecting the Wireless Smart Cart to a Computer with
the Micro USB Cable
•
Connect the micro end of the included Micro USB
Cable into the micro USB port on the side of the
Smart Cart. Connect the other end of the Micro USB
Cable to a USB port on the computer, or into a
powered USB hub connected to the computer.
Zero (Tare) the Force Sensor
At the beginning of an experiment, the measurement
from the built-in force and acceleration sensors may not
be zero when the force or acceleration is actually zero.
This is a normal behavior that is corrected when you
zero (or tare) the sensor using the PASCO Data
Collection Software. See Appendix B for information
about how to set the built-in sensors to zero.
Collect Data
•
In PASCO Capstone, select a display in the main
window or from the Display palette. In the display,
use the <Select Measurement> menu to pick a
measurement to be shown.
•
Select Record to begin collecting data.
Troubleshooting the Wireless Smart Cart
•
If the Wireless Smart Cart loses Bluetooth
connection and will not reconnect, try cycling the ON
button. Press and briefly
hold
the button until the
status LEDs blink in sequence, and then release the
button. Start the Smart Cart in the usual way.
•
If the Smart Cart stops communicating with the
computer software or tablet application, try
restarting the software or application. If the problem
remains, press and hold the ON button for 10
seconds and then release. Start the Smart Cart in
the usual way.
•
Turn Bluetooth off and then turn it back on. Retry.
Set Up the Hardware
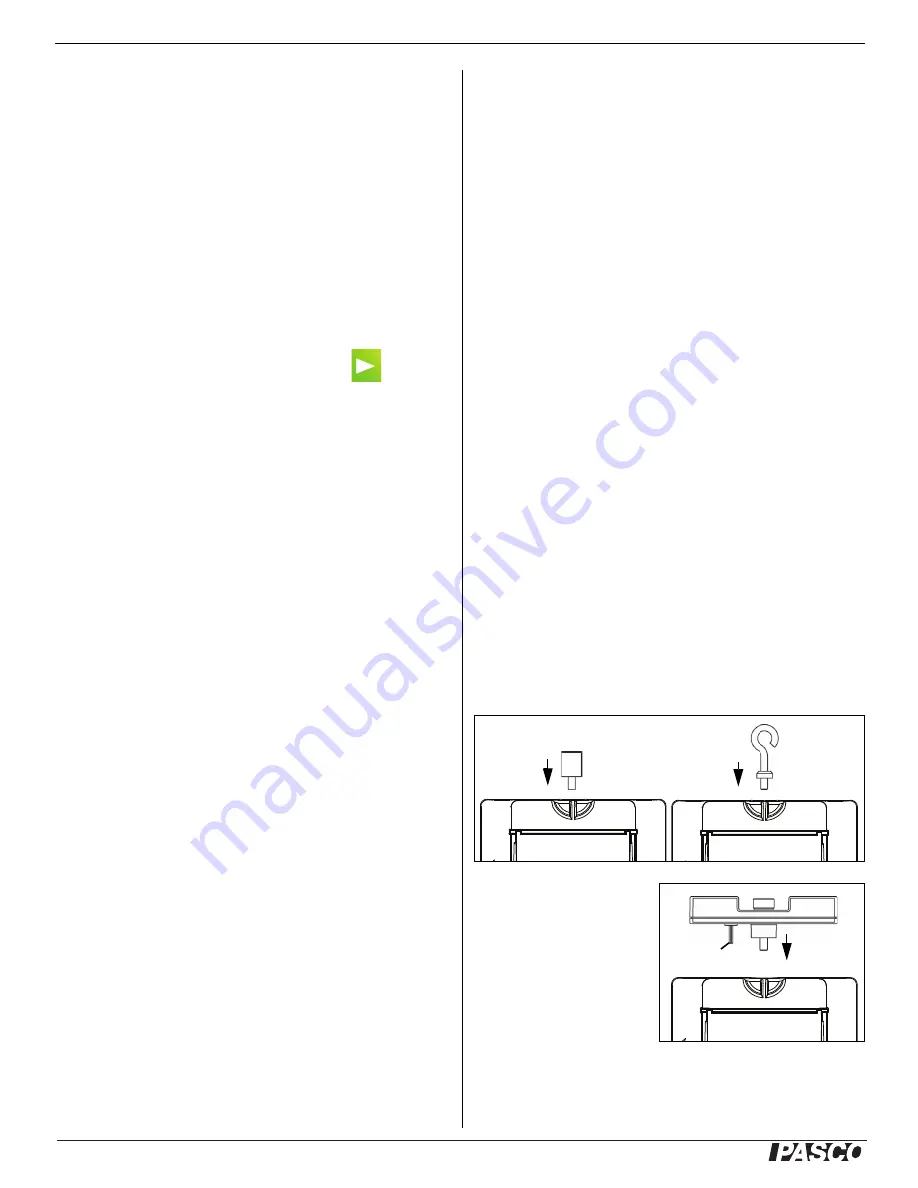
Connecting Bumper and Hook Attachments
Screw the bumper or hook attachment into the threaded
hole on the front end of the Smart Cart as shown.
The Magnetic Bumper
has a metal post that
fits in the small hole to
the side of the threaded
hole in the front end of
the Smart Cart. The
post ensures that the
Magnetic Bumper is
mounted in the correct
orientation.
Bumper
Attachment
Hook
Attachment
Magnetic
Bumper
Metal
Post