


29
MT
GB
Overview of the LED indicators on
the charger:
Green LED illuminated while battery not
inserted
: Charger is ready.
Green LED lights up:
Battery is charged.
Red LED lights up:
Battery charging.
Red LED fl ashes:
Battery overheated
Red + green LEDs fl ash:
Battery defective
Note the label on the device itself
for the LED display on the smart
charger.
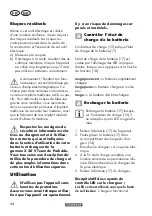
Removing/inserting the
battery
1. To
remove
the battery (17) from the
device, press the release button (16) on
the battery (17) and pull it out.
2. To
insert
the battery (17) into the de-
vice, push the battery along the guides
into the device. You will hear it click
into place.
Switching on and off
Remove the blade guard (1) before
switching on.
The device has a
start-up pro-
tection
to prevent unintentional
start-up and thus personal injury. Follow
the switch-on procedure described.
The device reacts like a convention-
al pair of secateurs. One cut is
made per start lever movement. As long as
you keep the start lever (10) pressed, the
blade remains closed.
Switching on
1. Ensure that the battery (17) is inserted
(see “Removing/inserting the battery”).
2. Press the on/off switch (8) to activate
the device.
The device beeps twice and the
green LED (9) lights up continu-
ously.
3. Before the fi rst cut and after changing
the battery, you must operate the start
handle (10) twice within 0.8 seconds.
As soon as the device is activat-
ed, it beeps again. The blade
opens if it was previously closed.
After 30 seconds of non-use, the
device switches to standby mode
for safety reasons. The green LED (9) is
still lit. To use it again, you must oper-
ate the start handle (10) twice again
within 0.8 seconds.
4. The blade closes when and as long as
you press the start lever (10).
Switching off
1. We recommend taking the device out
of operation when it is closed. Press
and hold the and start lever (10) for 5
seconds.
The device beeps twice and the
blade remains closed if you re-
lease the start lever (10) now.
2. Press the on/off switch (8) to deactivate
the device.
The device beeps once and the
green LED (9) goes out.
When not in use, the device auto-
matically switches off completely
after 5 minutes, and the green LED
(9) goes out.
Summary of Contents for PAAS 20-Li A1
Page 3: ...1 2 11 12 14 13 4 6 7 6 5 10 9 21 8 3 17 16 15 20 22 2 9 23 16 18 5 3 4 17 19 11 12 13...
Page 192: ...192 SI...
Page 224: ...224 BG 28 mm 15 mm 16 1 2 3 4 5 6 7 8 9 10 11 12 13 14 15 16 17 18 19 20 21 22 23...
Page 227: ...227 BG 1 a 2 a f...
Page 228: ...228 BG e 3 a 4 a...
Page 229: ...229 BG 5 a...
Page 230: ...230 BG 130 C 6 a...
Page 231: ...231 BG X 20 V Team Parkside...
Page 232: ...232 BG 15 17 17 18 17 15 1 17 2 17 14 3 4 5 17 Smart 1 17 16 17 2 17 1...
Page 234: ...234 BG 13 4 21 5 22 23 6 2 7 22 23 2 23 8 3 4 5 3 5 21 9 9 3 5 3 5 1 5 2 3 12 3 5...
Page 235: ...235 BG 5 20 3 6 1 1 19 2012 19 2006 66 EO...
Page 236: ...236 BG 17 17 8 10 8 10 8 10 2 2 2 2 2 2 3 5 9 3 5 17...
Page 237: ...237 BG www grizzlytools shop 239 2 11 12 13 20 22 91110232 3 II...
Page 238: ...238 BG IAN 404451_2204...
Page 239: ...239 BG BG 00800 111 4920 grizzly lidl bg IAN 404451_2204 20 63762 33 3 II III...
Page 244: ...244 GR 1 A 2...
Page 245: ...245 GR RCD Residual Current Device 30 mA RCD 3 4...
Page 246: ...246 GR 5...
Page 247: ...247 GR 130 C 6...
Page 248: ...248 GR X 20 V Team Parkside...
Page 250: ...250 GR 10 1 17 2 8 LED 9 3 10 0 8 30 LED 9 10 0 8 4 10 1 5 10 10 2 8 LED 9 5 LED 9 7 LED 9...
Page 252: ...252 GR 5 20 3 6 1 1 19 2012 19...
Page 253: ...253 GR 2006 66 www grizzlytools shop 256 2 11 12 13 20 22 91110232...
Page 254: ...254 GR 17 17 8 10 8 10 8 10 2 2 2 2 2 2 3 5 LED 9 3 5 17...
Page 255: ...255 GR 3 IAN 404451_2204...


