


Bulletin 100-50-9.1 –
Page 113
14. DUAL TEMPERATURE
CONFIGURATION
14.1 CHANGING TEMPERATURE MODE VIA
THE DISPLAY
The S3C Case Control supports dual temperature cases that
utilize an EEPR. Dual temperature mode may be activated
by a manual switch, through the Display Module, or by
communication from the BAS. If an external switch is used
then the digital input on the controller must be configured
along with wiring the switch into the controller as shown
below. The final step is to set-up the medium temperature
and low temperature alarm thresholds.
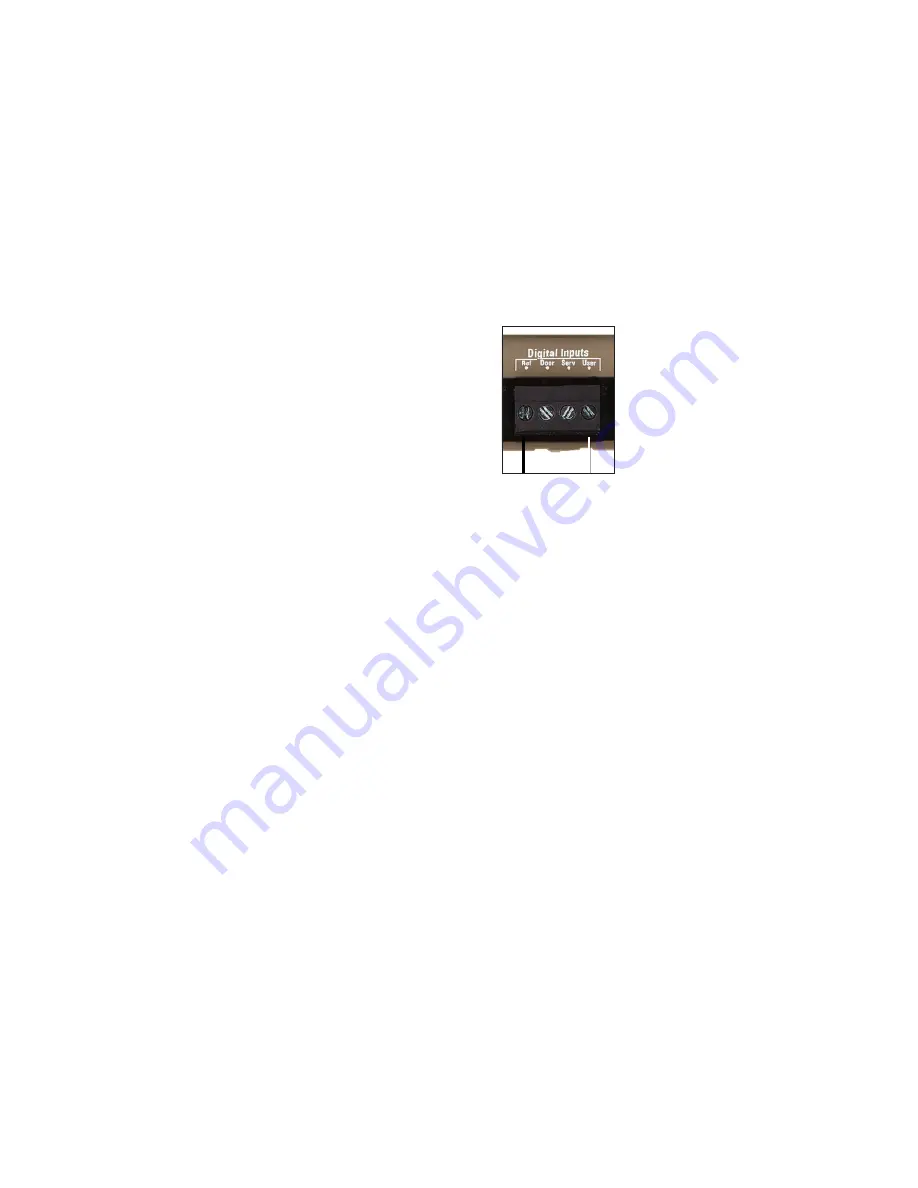
The dual temperature switch is wired
into the ‘Ref’ and ‘User’ input on the
S3C Case Control. See Section 5.
14.2 CONFIGURE THE USER INPUT
1. From the
default
display, press the
button. The
display will show
.
2. Use the
▲▼
buttons to enter the
administrator
password and press
SET.
3. The display will show
; press
SET.
4. Press the
▲
button to scroll to the
e
(sensor
configuration menu); press
SET.
5. Press the
▲
button to scroll to
d
(digital input);
press
SET.
6. Scroll to
du
; press
SET.
7. Press
ESC
button three times to return to
default
display.
14.3 CONFIGURE THE ALARM THRESHOLDS
1. From the
default
display, press the
button. The
display will show
.
2. Use the
▲▼
buttons to enter the
administrator
password and press
SET.
3. The display will show
; press
SET.
4. Press the
▲
button to scroll to the
(alarm
configuration menu); press
SET.
5. Press the
▲
button to scroll to the desired parameter as
shown in the below chart, change as needed; press
SET.
6. Press
ESC
button three times to return to
default
display.
13.4 OCCUPANCY SENSOR
The S3C supports the Sporlan OCC occupancy sensor.
This sensor is mounted on the top of the case and senses
when there is movement near the front of the case. This
sensor is used in conjunction with an LED driver to dim
or turn off the lights when there is no movement near the
case. To configure the sensor, there are three parameters;
Occupied Light Intensity, Unoccupied Light Intensity and
the Unoccupied Time Limit. If the cases are in a line-up, an
additional parameter
oh
(occupancy sensor sharing) may
be set to share the sensor information across the line-up.
1. From the
default
display, press the
button. The
display will show
.
2. Use the
▲▼
buttons to enter the
administrator
password and press
SET.
3. The display will show
; press
SET.
4. Press the
▲
button to scroll to the
(light
configuration menu); press
SET.
5. Press the
▼
button to scroll to the
uo
(unoccupied
light level); press
SET.
6. Use the
▲▼
buttons to adjust % Intensity (0% = Off,
100% = On); press
SET.
This is the light level when the area around the case is
unoccupied.
7. Press the
▼
button to scroll to the
u
(Unoccupied
time limit); press
SET.
8. Use the
▲▼
buttons to adjust the amount of time the
lights turn off after no motion is detected (in minutes);
press
SET.
9. Press the
▼
button to scroll to the
o
(occupied light
level); press
SET.
10. Use the
▲▼
buttons to adjust % Intensity (0% = Off,
100% = On); press
SET.
This is the light level when the area around the case is
occupied.
11. If sensor sharing across a line-up is required; press
the
▲
button to scroll to the
o
(occupancy sensor
sharing); press
SET.
12. Scroll to
o
; press
SET.
This will allow all case lighting to turn on and off
together based on a signal from any occupancy sensor
in the line-up.
13. Press the
ESC
button 3 times to revert to the
default
display.


