PAT1M / PAT1.5M OPERATION MANUAL
PAT1M/PAT1.5M: PA22222A01_03
Page: 11 of 36
Dec., 2007
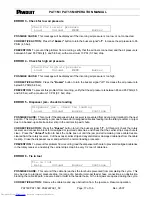
Press the
"Exit"
button to return to the last menu level (Level 2). See Step 2.
Remember!!
Once you "Escape" out of the Setup menus, you must repeat the sequence (Steps 3.a.
and 3.b.) to re-enter the higher menu levels (Level 3 thru Level 6).
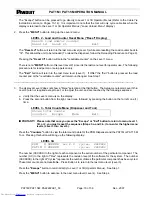
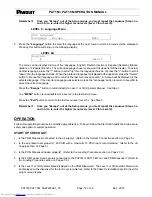
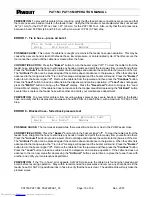
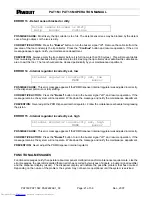
LEVEL 4 - Chopper Cut Cycle Menu
Turn chopper on/off
Chopper
Escape
Menu
Exit
4. Press
the
"Chopper"
button to view or to change the current status of the chopper (“on” or “off”). Pressing this
button will bring up the following display:
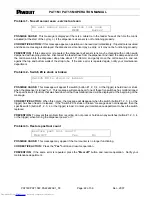
LEVEL 4A
Chopper is -
On
On
Off
Exit
The upper statement refers to the current status of the chopper – “Chopper is – on” or “Chopper is – off”. When
the “Chopper is – on”, the chopper will cut the carrier strip every 7 cable ties. When the “Chopper is – off”, the
chopper will not cut the carrier strip, and one continuous carrier strip will exit the dispenser. Press the “On”
button to turn the chopper “on”, or press the "off" button to turn the chopper “off”. When the desired status is
displayed, press the "Exit" button to select that choice and also return to the last menu level (Level 4).
Press the
"Escape"
button to return directly to Level 1 or 1B (Operator Menus). See Step 1.
Press the
"MENU"
button to advance to the next menu level (Level 5). See Step 5.
Press the
"Exit"
button to return to the last menu level (Level 3). See Step 3.
Remember!!
Once you "Escape" out of the Setup menus, you must repeat the sequence (Steps 3.a.
and 3.b.) to re-enter the higher menu levels (Level 3 thru Level 6).
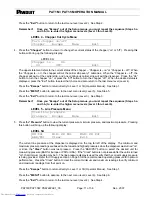
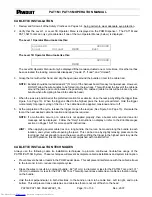
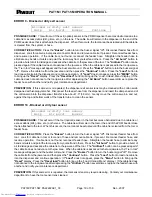
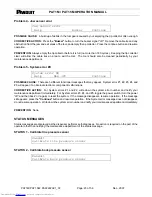
LEVEL 5 - Line Pressure Menu
View line pressure
Pressure
Escape
Menu
Exit
5. Press
the
"Pressure"
button to view the current pressure, minimum pressure, and maximum pressure. Pressing
this button will bring up the following display:
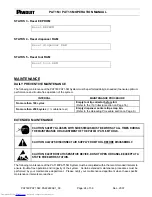
LEVEL 5A
XX PSI
MIN: XX PSI
MAX: XX PSI
BAR/PSI Clear
Exit
The current line pressure at the dispenser is displayed on the top, far left of the display. The minimum and
maximum pressure readings are based on the lowest and highest pressures since the dispenser was turned “on”,
or since the
"Clear"
button was last pressed. Press the “BAR/PSI” button to select the desired unit for
measuring pressure (BAR for Europe or PSI for USA). If the "Clear" button is not pressed after the unit is turned
"on", the minimum reading may be 0. The line pressure display is used to verify that the correct supply pressure
is being provided. Refer to
Air Supply
section on Page 5 for the recommended operating pressure for optimum
performance. Press the "Clear" button to clear the current minimum and maximum readings to verify minimum
and maximum readings from that point on.
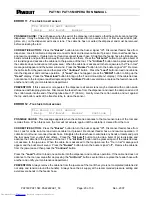
Press the
"Escape"
button to return directly to Level 1 or 1B (Operator Menus). See Step 1.
Press the
"MENU"
button to advance to the next menu level (Level 6). See Step 6.
Press the
"Exit"
button to return to the last menu level (Level 4). See Step 4.
electronic components distributor


