


© Panduit Corp. 2022
FS132D
7
Rev 05
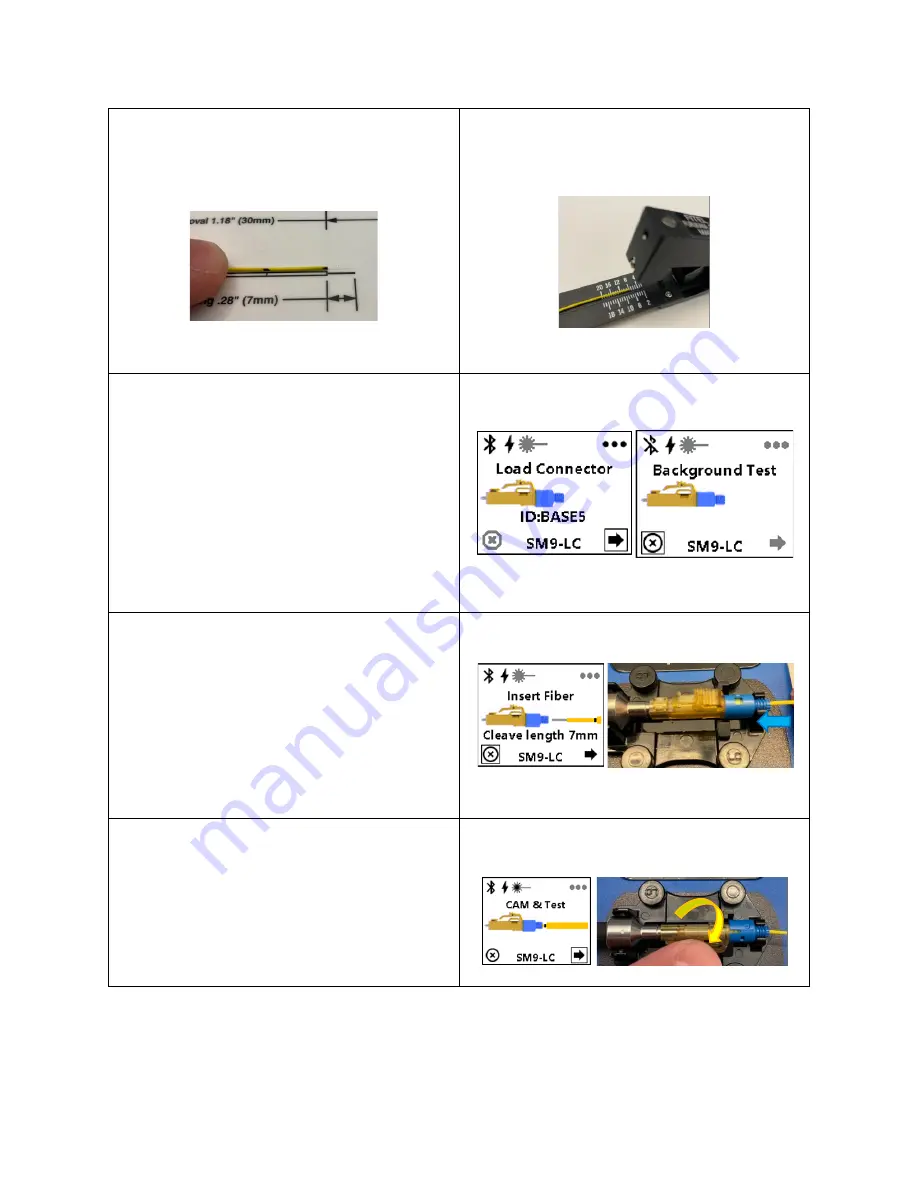
Step 7:
Cleave the bare fiber to 7mm.
Tip:
You can verify the cleave length using the stripping template.
Note:
Observe appropriate fiber safety precautions.
FJQCVR:
Align the end of the buffer with the 7mm mark on the
cleaver. Gently tap the blade down onto the fiber once (and only
once). Release the blade, then gently bend the the tongue on the
cleaver until the fiber snaps to complete the cleave.
Step 8:
On the OptiCam® 2 tool, click
the selector switch once to go from
the ‘Load Connector’ screen to the
‘Background Test’ screen.
Note:
If the tool presents a ‘Cleaning Required’ or ‘Check Failed’
message, follow the troubleshooting steps on the tool, or watch the
troubleshooting video on panduit.com.
Contact Panduit’s Technical
Support team if further support is needed.
Step 9:
Once the
screen reads ‘Insert
Fiber’
begin inserting the fiber into the
rear of the connector. Advance the
fiber until the insertion mark lines up
at the rear of the connector and the
screen changes to ‘Cam & Test’
.
Step 10 (LC):
While keeping forward
pressure on the field fiber, cam the
connector in the manner appropriate
to the connector style.
LC:
Rotate the entire connector to the stops.


