Settin
g
up the Rack
24
W
hen connecting multiple extension units (
W
J-HDE400) to the recorder, place the recorder in the center of the rack.
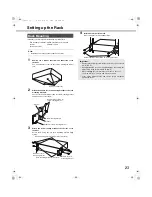
Connect the recorder and the extension unit
w
ith the connection ca
b
le (1 m {39.4 "}) included
w
ith the extension unit.
Note:
•
Install the recorder in the center of the rack, if using a rack. If you install the recorder at the top or
b
ottom of the rack, the ca
b
le may not
b
e
long enough.
•
W
hen installing the recorder in the rack, leave a space of 1 unit (44 mm {1.73 "}) a
b
ove and
b
elo
w
each unit.
•
Secure the connection ca
b
les to the extension unit using the ca
b
le clamp provided.
If the connection is poor, the system may
b
ecome unsta
b
le and una
b
le to record images.
•
Keep the ca
b
les as short as possi
b
le. Looped ca
b
les or large distances
b
et
w
een pieces of e
q
uipment may cause malfunctions. Also, do not
b
end the ca
b
les more than 90º,
w
ind the ca
b
les in a coil (10 cm {3.94 "} in diameter).
•
Refer to the Setup Instructions (PDF file) to check the unit num
b
ers of connected extension units.
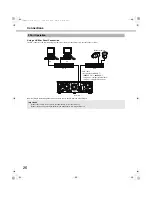
Rack mountin
g
positions
Extension
u
nit
(
u
nit n
u
mber 4)
Connection cable
(pro
v
ided with extension
u
nit)
Req
u
ires 1 Unit
Extension
u
nit
(
u
nit n
u
mber 5)
Extension
u
nit
(
u
nit n
u
mber 1)
Extension
u
nit
(
u
nit n
u
mber 3)
Req
u
ires 1 Unit
Req
u
ires 1 Unit
Req
u
ires 1 Unit
At least 10 cm
Cable coil example
Ro
u
nd cable coil
Req
u
ires 1 Unit
Extension
u
nit
(
u
nit n
u
mber 2)
N
etwork Disk
Recorder
ND400_Basic.book 24 ページ 2008年4月8日 火曜日 午後3時59分

