Auto Setup
15
4
3
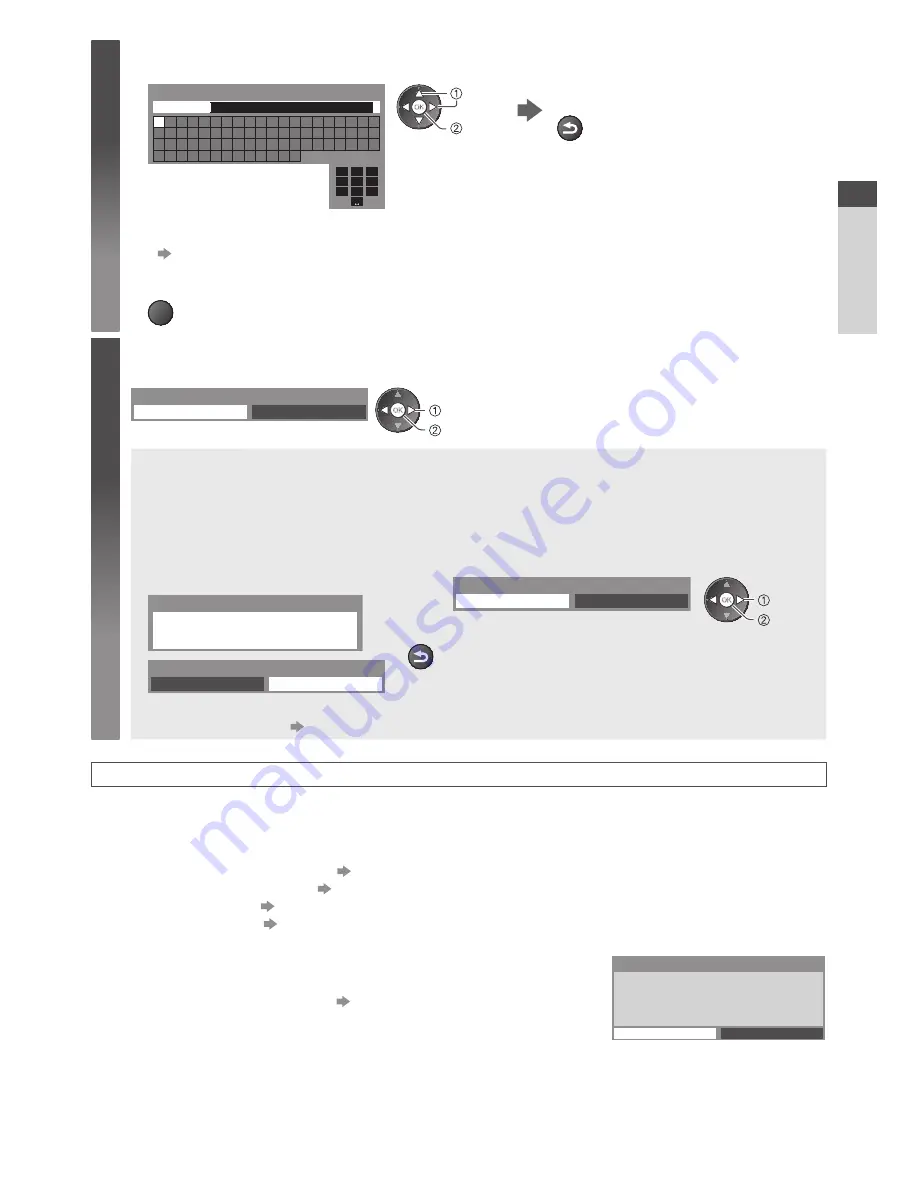
Enter your name, house number and postcode
Set characters
Return to select other items
1
.!:#
2
abc
3
def
4
ghi
5
jkl
6
mno
7
pqrs
8
tuv
9
wxyz
0
A B C D E F G H
I
J K L M N O P Q R S T
U V W X Y Z
0 1 2 3 4 5 6 7 8 9
!
:
#
a b c d e
f
g h
i
j
k
l m n o p q
r
s
t
u v w x
y
z
(
)
+
-
.
*
_
User input
NAME
select
set
BACK/
RETURN
•
Select the next item and repeat the
operations.
•
You can set characters by using numeric buttons.
“Characters table for numeric buttons” (p. 97)
4
Exit to go to next step
EXIT
5
Select [Home]
Select [Home] viewing environment (highlight [Home] in yellow) to use in your home environment.
Please select your viewing environment.
Home
Shop
set
select
■
[Shop] viewing environment (for shop display only)
[Shop] viewing environment is the demonstration mode to explain main features of this TV.
Select [Home] viewing environment to use in your home environment.
•
You can return to viewing environment selection screen at the stage of Shop confirmation
screen and Automatic Demo Off / On selection screen.
1
Return to viewing environment
selection screen
2
Select [Home]
Please select your viewing environment.
Home
Shop
set
select
Shop
You have selected shop mode
BACK/
RETURN
Automatic Demo
Off
On
To change viewing environment later on, you will need to initialise all settings by accessing
Shipping Condition.
[Shipping Condition] (p. 49)
Auto Setup is now complete and your TV is ready for viewing.
If tuning has failed, check the connection of the RF cable, and then, follow the on screen
instructions.
•
To check channel list at-a-glance
“Using TV Guide” (p. 21)
•
To edit or hide (skip) channels
“Tuning and Editing Channels” (p. 41 - 44)
•
To retune all channels
[Auto Setup] (p. 40)
•
To initialise all settings
[Shipping Condition] (p. 49)
If you connect the Wireless LAN Adaptor later on, the confirmation
screen will be displayed for the setup.
Wireless LAN adaptor connected, do you want to
set it up?
No - Exit
Current network type : Wireless
No
Wireless LAN adaptor connection
Yes
•
To setup the wireless connection
(p. 75 - 77)
Quick Start Guide


