
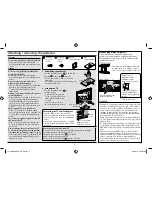
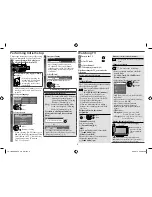
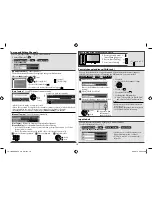

Performing Initial Setup
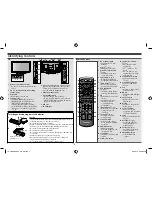
Watching TV
These steps are not necessary if the setup
has been completed by your local dealer.
1
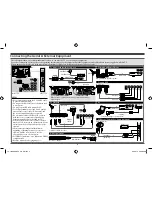
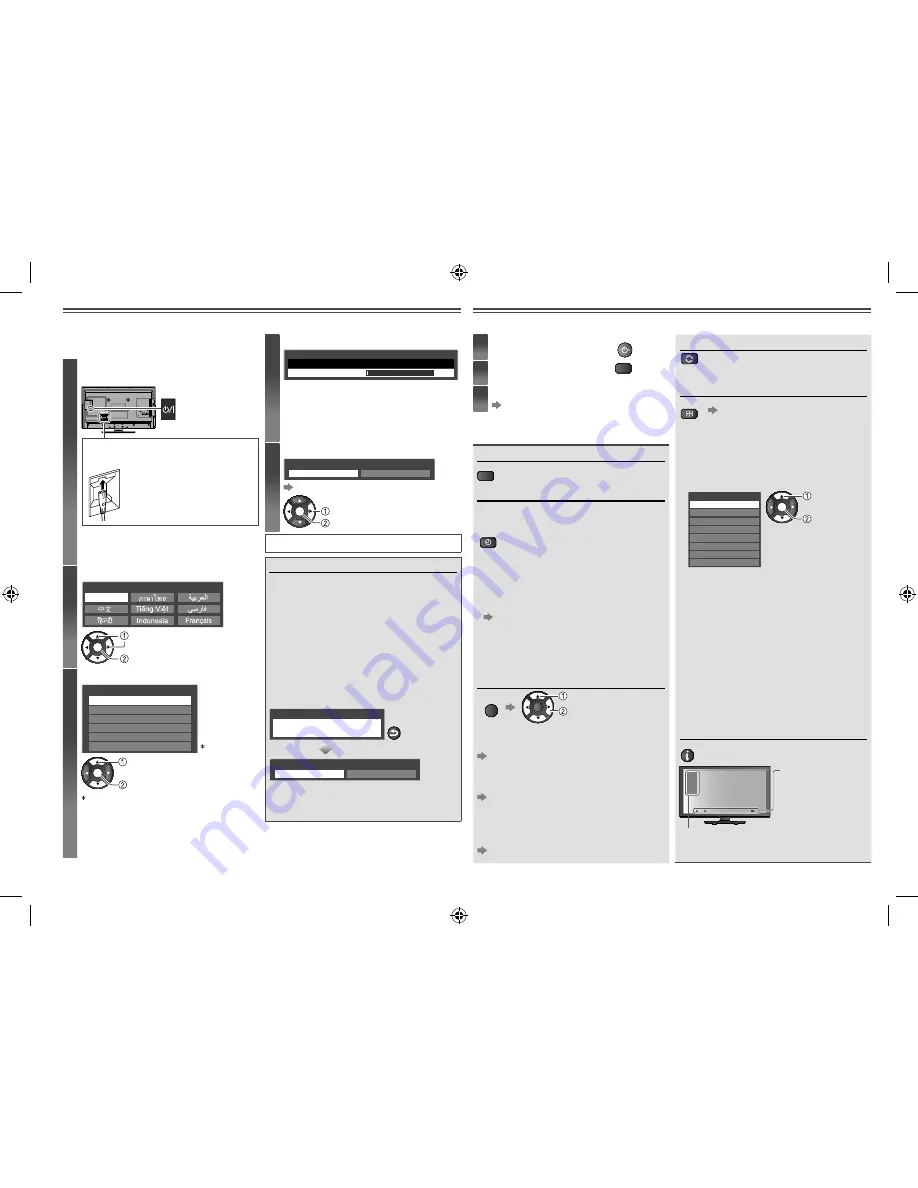
Connect the mains lead, plug into a
wall outlet and switch on the TV
Insert the mains plug (supplied) fi rmly
into place.
•
When disconnecting the
mains lead, be absolutely
sure to disconnect the
mains plug at the socket
outlet first.
•
After switching on the mains power, you
can also use the remote control to turn
on the TV.
2
Select your language
English
OSD Language
OK
Store
Select
3
Select your area
Channel Plan
Asia/W.Europe
CIS/E.Europe
China
Hong Kong
NZ/Indonesia
CATV/Other
1
OK
Start Auto Tuning
Select
1
When selecting [CATV/Other], press
OK
, and then select the Channel Plan
from [Indian CATV], [South Africa],
[American System], [American
CATV] or [Japan].
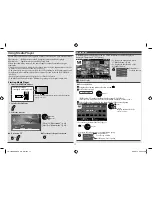
4
Start Auto Tuning
Auto Tuning
1
CH2
Scan
0%
100%
•
Auto Tuning searches and stores
TV channels. The sorted channel
order depends on the TV signal, the
broadcasting system and reception
conditions.
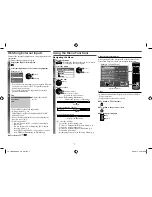
5
Select [Home]
Please select your viewing environment.
Home
Shop
Viewing Environment Mode
OK
Confirm
Select
Auto Tuning is completed.
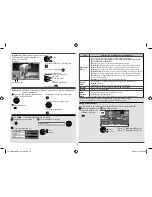
Viewing Environment Mode
[Home] : Recommended mode for home
viewing at optimal picture /
power consumption. [Viewing
Mode] is [Normal] (p. 8).
[Shop] : Features demonstration mode
for in-store display). [Viewing
Mode] is [Dynamic] (p. 8).
To return to viewing environment
selection mode if you have selected
[Shop]
Shop
You have selected shop mode
RETURN
Please select your viewing environment.
Home
Shop
•
To change the viewing environment
mode later, reset all settings by accessing
[Shipping Condition] (p. 9).
1
Turn on the TV
POWER
2
Select TV mode
TV
3
Select a channel
Identifying Controls (p. 5)
While watching the TV, you can do the
following:
Freeze / unfreeze the picture
STILL
Set the Off Timer
The TV automatically goes into Standby
after the selected period.
OFF TIMER
Press repeatedly until the desired
time appears.
[0/15/30/45/60/75/90](minutes)
•
Also possible to set the time from
[Off timer] in the Setup Menu (p. 9).
•
To cancel,
set to [0] or turn off the TV.
•
To display the remaining time
Information banner (below)
•
When the remaining time is within 3
minutes, the remaining time will flash
on screen.
Display options for the current
programme
OPTION
OK
Adjust
Select
[Channel Colour Set]
Sets colour density
[Picture Menu] (p. 8)
[MPX]
Selects multiplex sound (if available)
[Sound Menu] (p. 8)
[Volume Correction]
Adjusts the volume of an individual
channel or input mode
[Sound Menu] (p. 8)
Return to the last viewed channel
LAST VIEW
•
Press again to return to the present
view.
Change aspect ratio
ASPECT
Do one of the following:
•
Press repeatedly until you reach the
desired mode
[16:9/14:9/Just/4:3/4:3 Full/Zoom1/
Zoom2/Zoom3]
•
Select from [Aspect Selection] list
Aspect Selection
16:9
14:9
4:3 Full
Just
Zoom1
4:3
Zoom2
Zoom3
OK
Change
Select
–
Only [16:9] and [4:3] are available in PC
input mode.
–
Aspect is fixed to [16:9] when [Viewing
Mode] is set to [GAME].
–
Aspect mode can be memorised
separately for each SD (Standard
definition) and HD (High definition)
signals.
–
HDMI mode:
HD signals:
16:9, 14:9, 4:3, 4:3 Full,
Zoom1, Zoom2, Zoom3
SD signals:
16:9, 14:9, Just, 4:3, Zoom1,
Zoom2, Zoom3
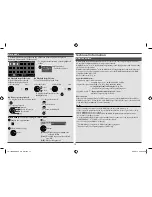
Display Information banner
INFO
•
Also appears when changing
channel
TV
1
CH7
5.5MHz
PAL
16:9
15
Sound mute On/
Audio mode/Off
Timer remaining
time
Input mode/Channel position/Channel
number/Sound system/Colour system (not
displayed if set to [Auto])/Aspect ratio
6
TH-L32XM5KMTX_fold_EN.indd 6
TH-L32XM5KMTX_fold_EN.indd 6
6/1/2012 8:26:09 AM
6/1/2012 8:26:09 AM


