Settings
ENGLISH
35
Menu operation (continued)
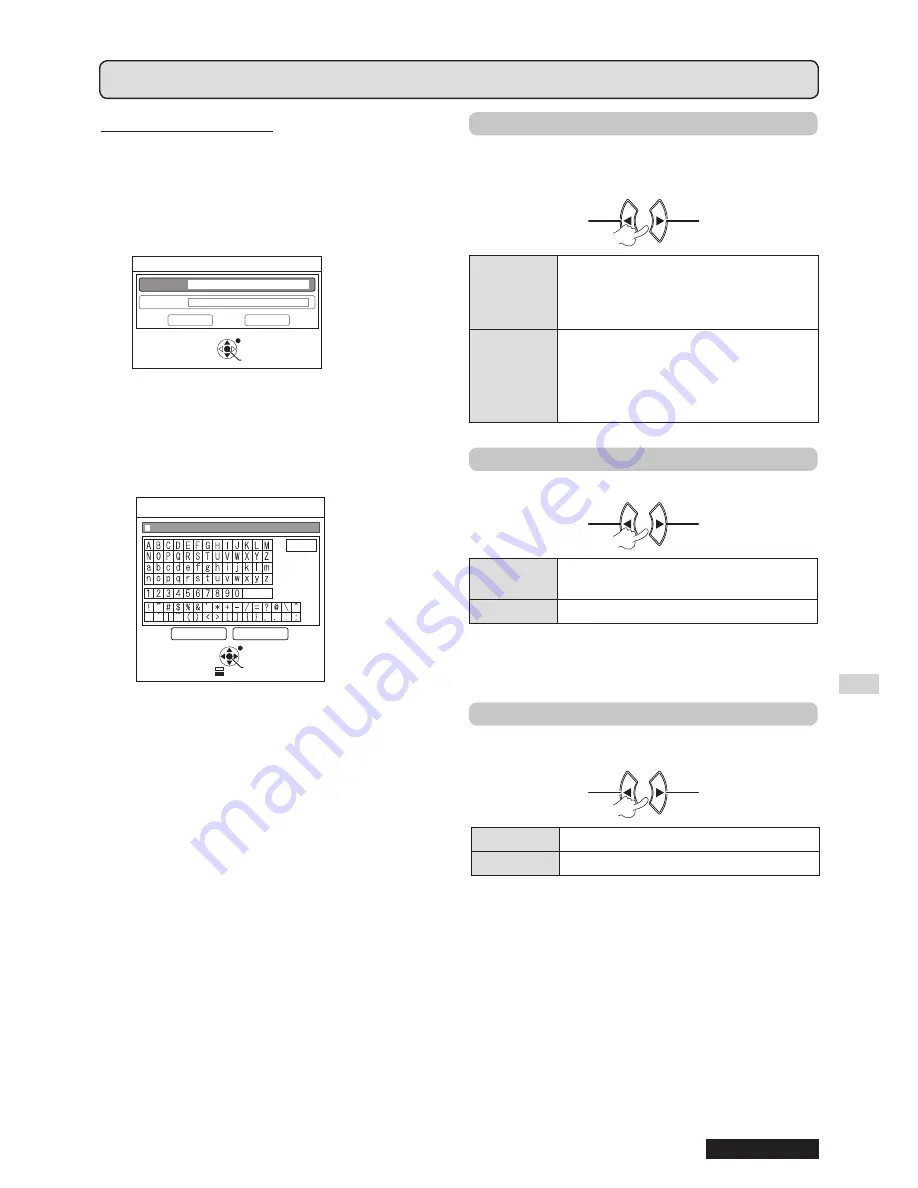
Editing the original text
1
Press [
] to select TEXT and then press
[ENTER].
2
Press [
] to select the desired line and then
press [ENTER].
You can input and edit the text for the first line in
TEXT1
and the text for the second line in
TEXT2
.
STARTUP LOGO
TEXT2
OK
CANCEL
TEXT1
RETURN
ENTER
SELECT
3
Press [
] to select the desired character
and then press [ENTER].
To delete all the input characters, move the cursor
to
ALL DELETE
and then press
[ENTER]
.
To delete a character, press
[DEFAULT]
or move
the cursor to select the character then press
[DEFAULT]
.
ALL DELETE
SPACE
OK
CANCEL
TEXT CHANGE
RETURN
ENTER
SELECT
DELETE
4
Select OK and then press [ENTER] to set the
input text in the box.
5
Select OK again and then press [ENTER].
Select
CANCEL
or press
[MENU/RETURN]
to
return to the previous menu without any setting.
▌
AUTO SETUP
AUTO
mode is selected by default.
If you do not need to perform automatic correction,
select “
BUTTON
”.
Change setting
Change
setting
Change
setting
Change setting
AUTO
When the projector detects
COMPUTER
signal,
SHIFT
,
DOT
CLOCK
and
CLOCK PHASE
in the
POSITION
menu is automatically set.
BUTTON
Only when
[AUTO SETUP]
is pressed,
SHIFT
,
DOT CLOCK
and
CLOCK
PHASE
in
POSITION
menu will be
automatically set for
COMPUTER
signals. (
page 23)
▌
SIGNAL SEARCH
You can turn off the auto signal detection.
Change setting
Change
setting
Change
setting
Change setting
ON
Detects the input signal from the
terminals and projects the image
OFF
Deactive
NOTE:
SIGNAL SEARCH
•
is not available during any input signal
projection.
▌
BACK COLOR
You can choose
BLUE
or
BLACK
screen for the
projector when it is idle.
Change setting
Change
setting
Change
setting
Change setting
BLUE
Display blue screen
BLACK
Display black screen


