Basic operations
20
ENGLISH
Turn the projector ON or OFF (continued)
TURN THE PROJECTOR ON
AUTO
SETUP
MENU
RETURN
ENTER
FREEZE
AV
MUTE
STANDBY
(
R
)
ON
(
G
)
2)
Before switching on the projector, make sure the mains lead and all the other devices are connected correctly.
(
page 16)
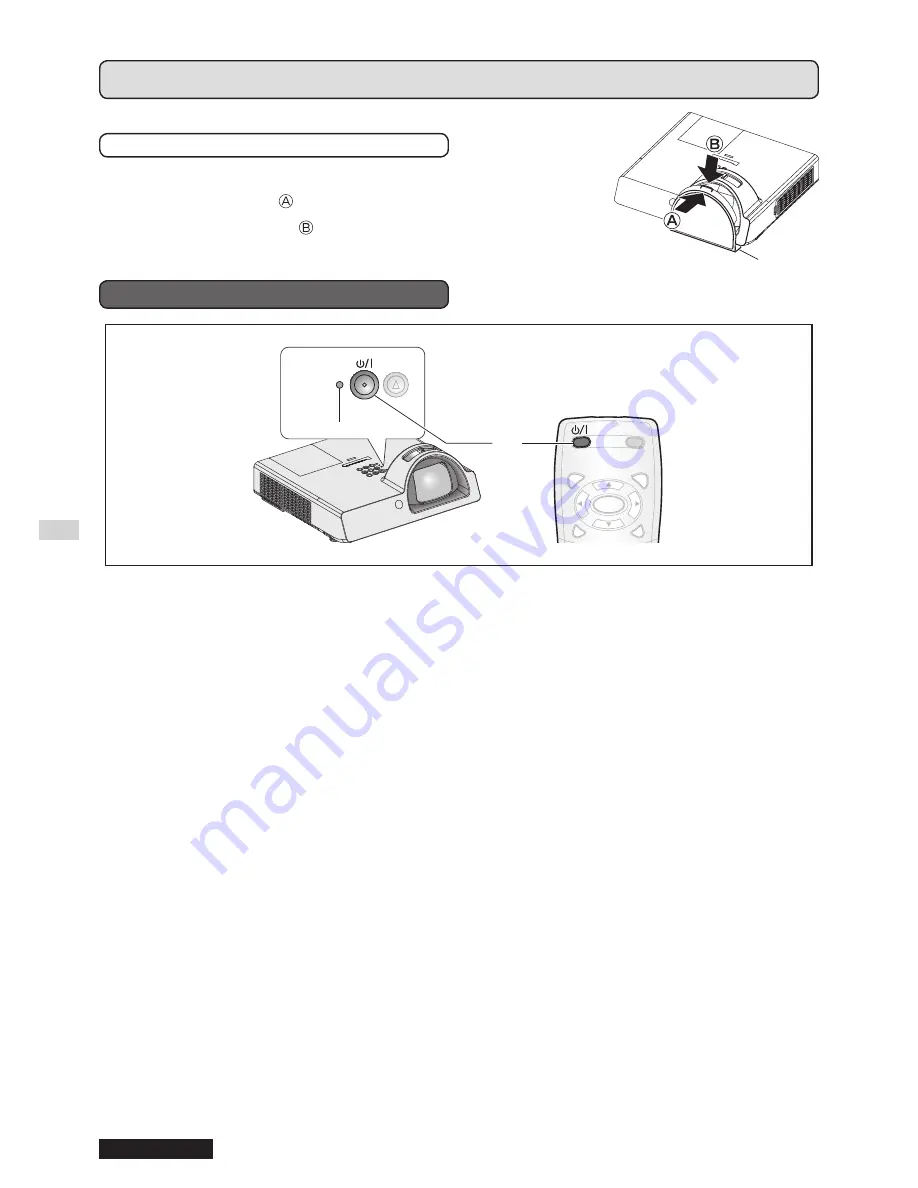
1
Connect the power cord.
(
page 18)
After a while the “power indicator” lights or
flashes in red.
2
Press the POWER button.
POWER
•
indicator flashes green several times
before it lights up and the
STARTUP LOGO
is
displayed. See STARTUP LOGO in DISPLAY
OPTION menu. (
page 34)
NOTE:
Confirm that
•
CONTROL PANEL
(when operating with
the projector body) or
REMOTE CONTROLLER
(when
operating with the remote control) under
CONTROL
DEVICE SETUP
in the
SECURITY
menu is set to
ENABLE
.
(
page 42)
When setting the
SECURITY
menu, you will be asked to
input the password. (
page 40)
When starting up the projector, some small rattling or
•
tinkling sound may be heard. These are normal and will not
affect the performance of the projector.
When the internal cooling fan is operating, some operational
•
sound may be heard. The loudness of the operational
sound depends on the external temperature.
If
•
INITIAL START UP
(
PROJECTOR SETUP
menu) is set
to
ON
, the projector starts projecting when the power cord is
connected to a wall outlet. (
page 37)
If the projector is turned on again while the internal cooling
•
fan is still operating by the internal power supply, the display
may flicker due to the specifications of the lamp. These are
normal and will not affect the performance of the projector.
POWER
indicator
Before switching on the projector, remove the lens cap.
How to install and remove lens cap
1
Match the lens cap with the lens from underside.
2
Push in the front part of the claw until it clicks.
3
To remove, pull the claw in the opposite direction to
installation.
1.


