[NETWORK] menu
90 - ENGLISH
Settings
▶
■
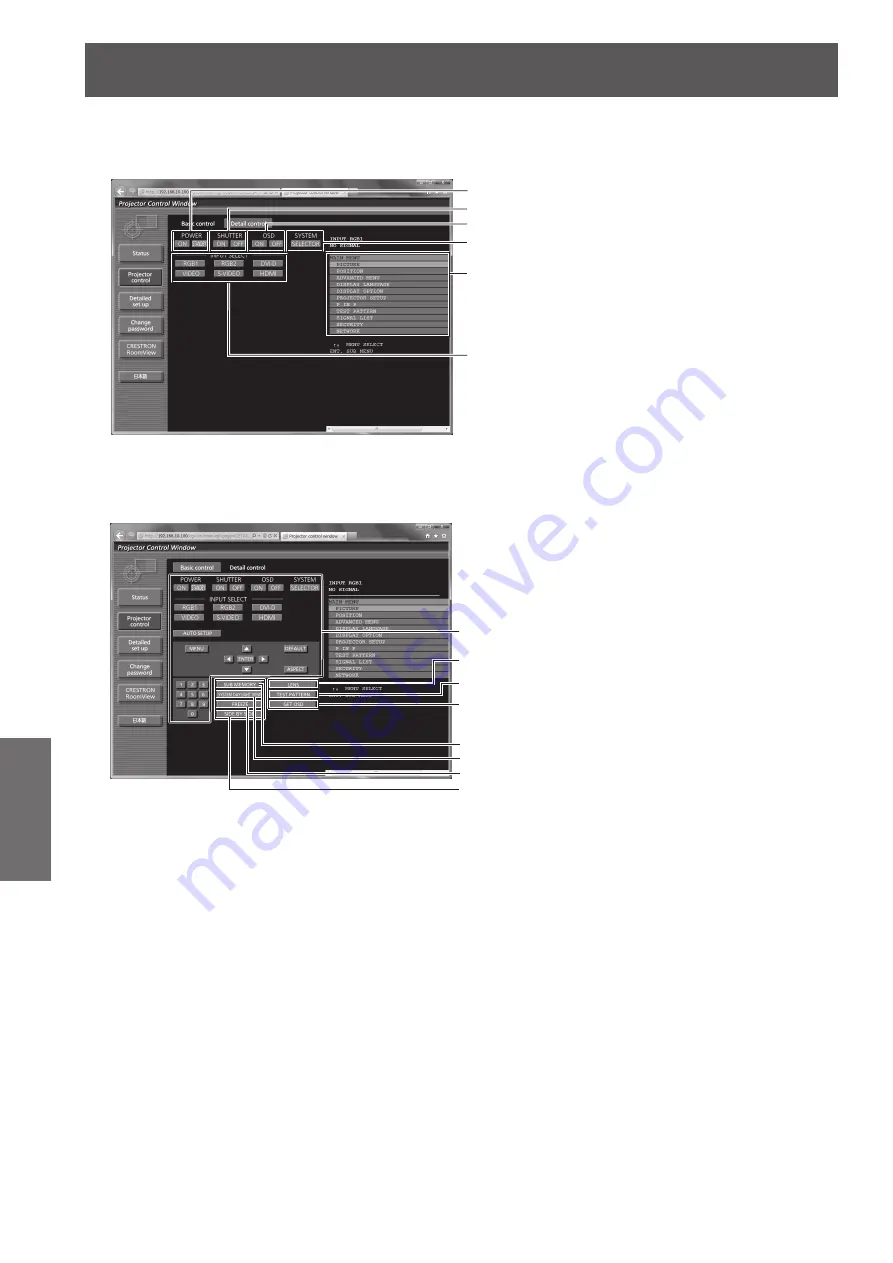
[Basic control] page
Click [Projector control] → [Basic control].
(1)
(2)
(4)
(6)
(3)
(5)
(1) [POWER]
Switches the power on/off.
(2) [SHUTTER]
Switches between use or not use of the shutter
function.
(3) [OSD]
Switches between on (display)/off (no display) of the
on-screen display function.
(4) [SYSTEM]
Switches the system method.
(5) On-screen display of the projector
Displays the same content as the on-screen display
of the projector. The settings of the menu can be
checked or changed. This is displayed even when
the on-screen display function is set to off (hide).
(6) [INPUT SELECT]
Switches the input signal.
▶
■
[Detail control] page
Click [Projector control] → [Detail control].
(2)
(3)
(4)
(5)
(6)
(7)
(8)
(1)
(1) Control of the projector
The projector is controlled by clicking the buttons in
the same way as the buttons on the remote control.
After the projector is controlled, the on-screen
display of the projector on the right side of the
control page is updated.
(2) [LENS]
Adjusts the projection lens.
(3) [TEST PATTERN]
Displays the test pattern.
(4) [GET OSD]
Updates the on-screen display of the projector at the
right of the control page.
(5) [SUB MEMORY]
Switches the sub memory.
(6) [SYSTEM DAYLIGHT VIEW]
Switches to system daylight view settings.
(7) [FREEZE]
Temporarily pauses the image.
(8) [SIDE BY SIDE]
Displays two different input signals simultaneously.


