– 113 –
Chapter 6 Thumbnail Operations for Clips — Thumbnail operations
4
Clip information
Displays detailed information about the clip.
[CLIP NAME]
Displays clip names.
[START TC]
Displays the time code value at the start of the
recording.
[START UB]
Displays the user bit value at the start of the recording.
[DATE]
Displays the date of the recording.
[TIME]
Displays the time at the start of recording.
[DURATION]
Displays the time length of the clip.
[V_FORMAT]
Displays recording format of the clip.
[FRAME RATE]
Displays the frame rate for playback.
[REC RATE]
Displays the recording frame rate. (Only displayed
when using the variable frame rate recording function
to record in native mode.)
5 Clip metadata
Displays more detailed data about the clip. Move the pointer using
the cursor buttons, and press the <SET> button to check the detailed
content.
For details, refer to “Setting clip metadata” (page 108).
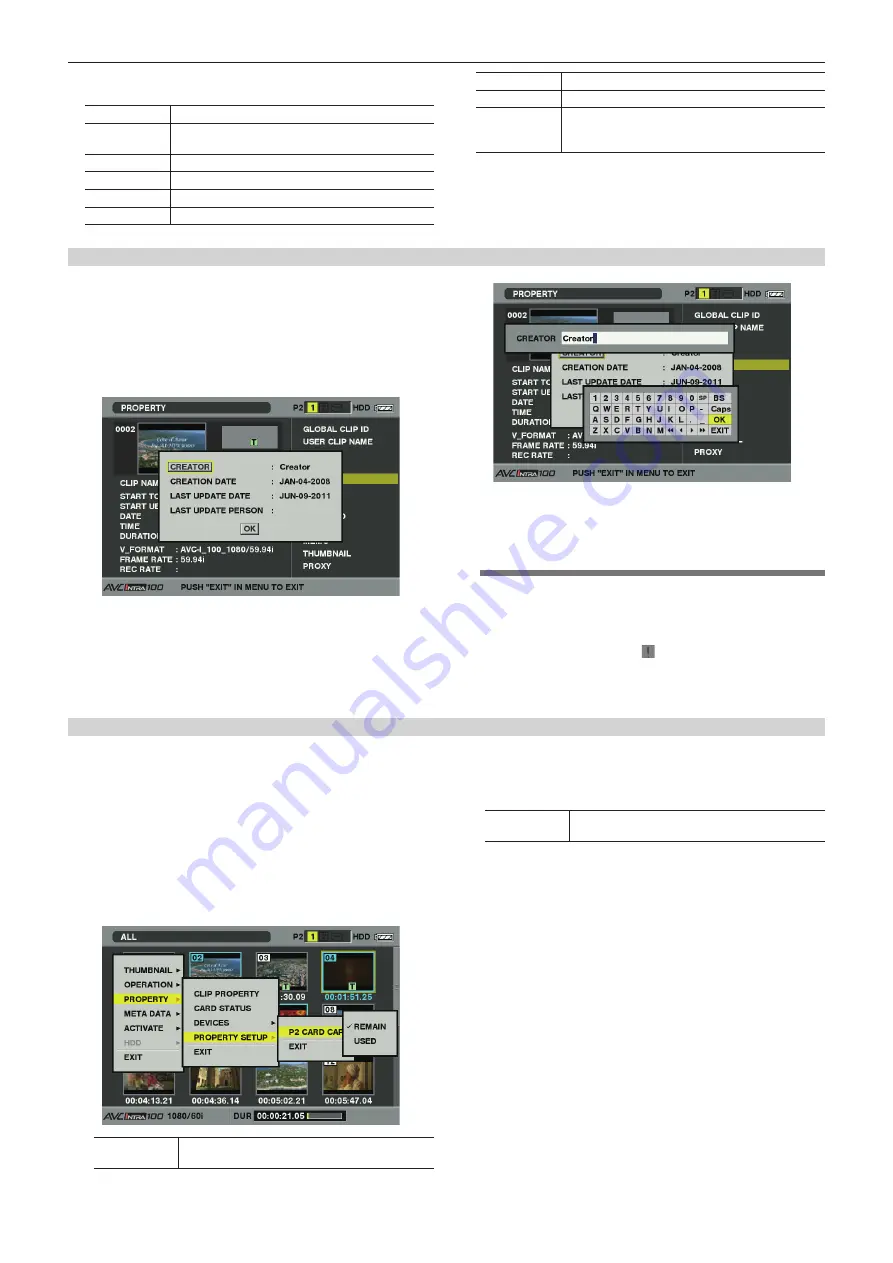
Modifying recorded clip metadata
1
Display the metadata details window for the clip to be
modified on the clip properties screen.
2
Place the cursor on the item to be modified using the cursor
buttons.
The metadata that can be modified is shown like [CREATOR] in the
following figure.
3
Press the <SET> button.
f
The input window (soft keyboard) for modifying metadata is
displayed.
f
Input characters from the keyboard to modify the metadata.
4
Press the [OK] button on the keyboard.
The modified metadata is written on the clip and the screen returns to
the metadata details window.
@
@
NOTE
t
To delete each item in [LOCATION] (shooting location data)
of [SHOOT], the item cannot be deleted alone. By setting the
[ALTITUDE] item to empty, other [LONGITUDE] and [LATITUDE]
items are collectively deleted.
t
The metadata for a clip with the [ ] incomplete clip indicator
cannot be modified. For the clips recorded on multiple P2 cards,
modify the metadata while all P2 cards are inserted.
t
Any [MEMO] with 101 characters or more cannot be modified.
P2 card status display
r
P2 card status display settings
For the P2 card status displayed by selecting [PROPERTY]
→
[CARD STATUS] from the thumbnail menu, you can select whether to display the status
with P2 card remaining capacity or used memory capacity.
1
Press the <THUMBNAIL> button.
The thumbnail screen appears on the viewfinder screen.
2
Select [PROPERTY]
→
[PROPERTY SETUP]
→
[P2 CARD
CAP] from the thumbnail menu.
When the following screen appears, select the P2 card status display
setting from the [P2 CARD CAP] item.
[REMAIN]
Displays remaining capacity on the P2 card as the
P2 card status display. (Factory setting)
[USED]
Displays used memory capacity on the P2 card as
the P2 card status display.


