


5.
Press
[G]
.
•
A dialogue box to confirm the saving of settings
is displayed.
6.
Use
[
][
]
to select
"Yes"
and press
[Enter]
.
•
The select local site screen is displayed.
7.
Press
[Home]
.
•
The Home screen is displayed.
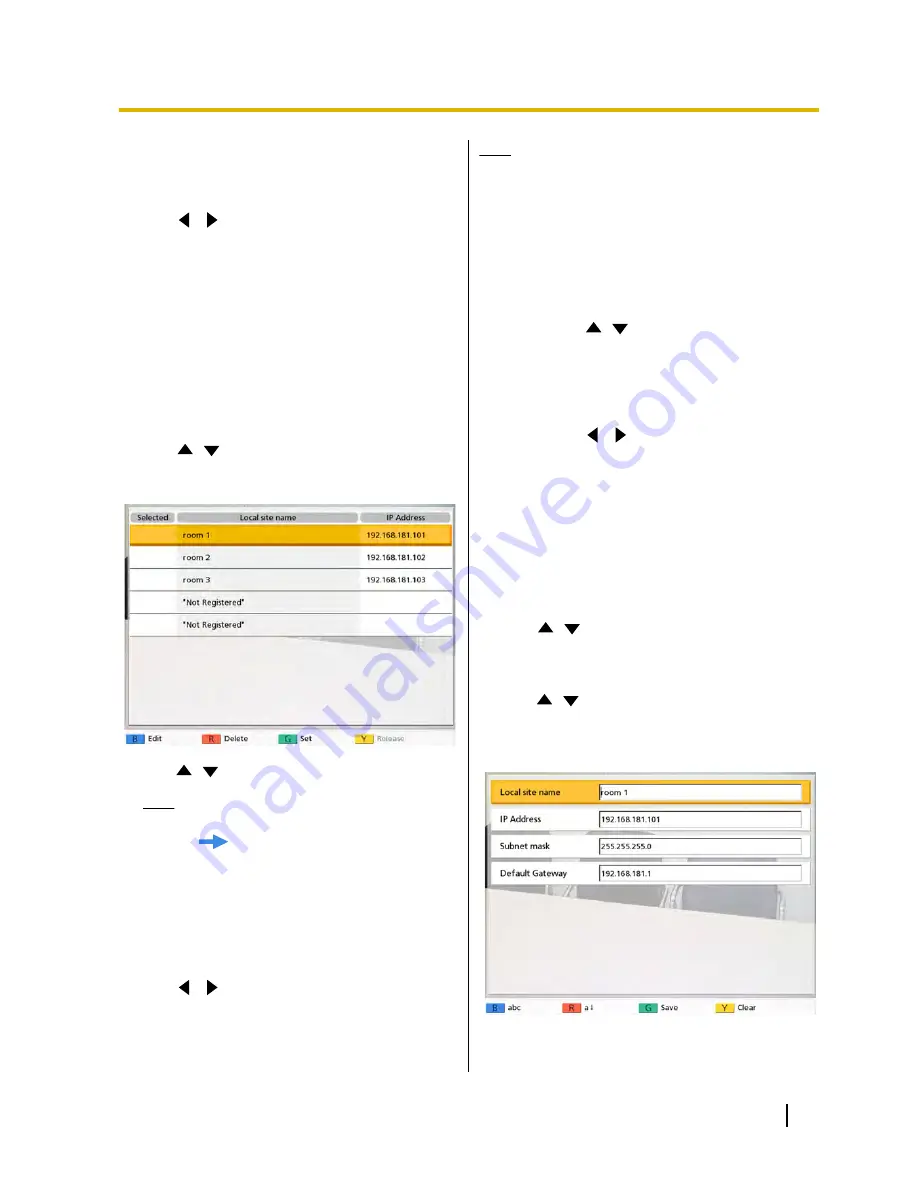
Selecting a Local Site
1.
Press
[Menu]
.
•
The Menu screen is displayed.
2.
Use
[
][
]
to select
"Select local site"
and
press
[Enter]
.
•
The select local site screen is displayed.
3.
Use
[
][
]
to select the local site you want to use.
Note
•
For the currently selected local site,
"
"
is displayed in
"Selected"
.
•
"Not Registered"
is displayed for sites that
have not been registered.
4.
Press
[G]
.
•
A dialogue box to confirm the saving of settings
is displayed.
5.
Use
[
][
]
to select
"Yes"
and press
[Enter]
.
•
The Home screen is displayed.
Note
•
When you select a local site, the name entered
in
"Local site name"
is displayed instead of the
unit name in the unit information.
•
If you turn the power off and then back on, the
local site is returned to the default site.
•
To return to the default site, turn off the power
and then turn it back on, or use the following
procedure:
1.
Repeat steps
1
–
2
.
2.
Use
[
][
]
to select the currently
selected local site.
3.
Press
[Y]
.
•
A dialogue box to confirm whether you
want to return to the default site is
displayed.
4.
Use
[
][
]
to select
"Yes"
and press
[Enter]
.
•
The Home screen is displayed.
Editing Local Site Information
1.
Press
[Menu]
.
•
The Menu screen is displayed.
2.
Use
[
][
]
to select
"Select local site"
and
press
[Enter]
.
•
The select local site screen is displayed.
3.
Use
[
][
]
to select the local site you want to edit.
4.
Press
[B]
.
•
The local site edit screen is displayed.
User Manual
77
Contacts and Settings
Summary of Contents for KX-VC500
Page 101: ...User Manual 101 Notes ...


