1.2 Installing and Starting KX-TVM Maintenance Console
10
Programming Guide
1.2.2
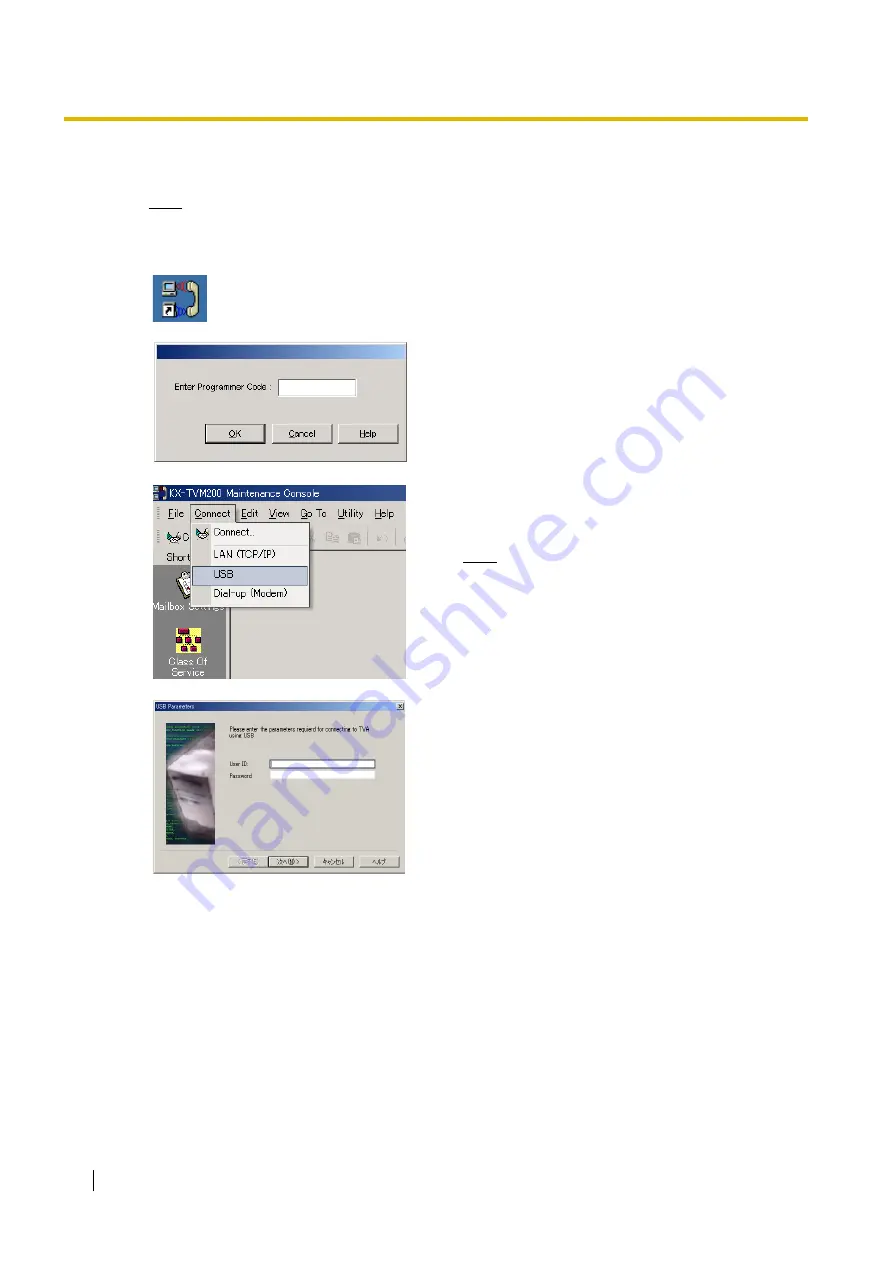
Starting KX-TVM Maintenance Console
Note
The screenshots shown here are for reference only, and may differ from the screens displayed
on your PC.
1. Click the KX-TVM Maintenance Console shortcut
icon.
2. Enter a valid programmer code, then click OK.
3. Click Connect
→
USB from the menu bar, or click
Connect on the shortcut bar, select USB in the
Connection Mode dialogue box and click Next.
Note
To connect to the VPS via USB, the KX-TVM
USB driver must be installed on the PC, as
explained above in "1.2.1 Installing KX-TVM
Maintenance Console".
4. Enter the password and click Next.
Summary of Contents for KX-TVM50
Page 98: ...2 4 Service Settings 98 Programming Guide Feature Guide References 2 3 15 Custom Service ...
Page 158: ...2 7 Reports 158 Programming Guide Feature Guide References 2 5 6 System Reports ...
Page 168: ...2 7 Reports 168 Programming Guide Feature Guide References 2 5 6 System Reports ...
Page 180: ...2 8 System Security 180 Programming Guide ...
Page 193: ...Programming Guide 193 Index ...
Page 199: ...Index Programming Guide 199 ...


