background image

24

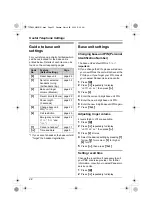
Useful Telephone Settings

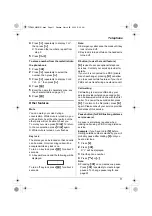
SETTING BS

”, then press 

{>}

.

3

Press 

{

6

}

.

4

Enter “

0000

” (default base unit PIN).

L

If you changed PIN, enter it (page 22).

5

Press 

{>}

 repeatedly to display the 

desired number.

6

Press 

{

C/

T

}

.

7

Press 

{>}

, then press 

{ih}

.

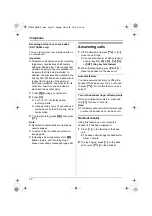
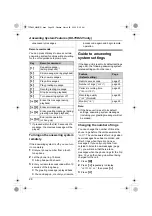
Storing emergency numbers

This feature determines which phone 
numbers may be dialled while the call bar 
feature is turned on. A total of 4 emergency 
numbers (memory locations 1–4) can be 
stored.

1

Press 

{j}

.

2

Press 

{v}

 repeatedly to display 

SETTING BS

”, then press 

{>}

.

3

Press 

{

6

}

.

4

Enter “

0000

” (default base unit PIN).

L

If you changed PIN, enter it (page 22).

5

Press 

{*}

.

6

Enter the emergency number (8 digits 
max.).

L

If you enter a number when an 
emergency number is already 
displayed, the new number will erase 
the old number.

L

To select a different memory location, 
press 

{>}

 repeatedly and enter a 

number.

7

Press 

{>}

.

8

Press 

{ih}

.

Note:

L

The default setting for emergency 
numbers are stored in the first 3 memory 
locations. It is recommended that you do 
not overwrite these numbers.

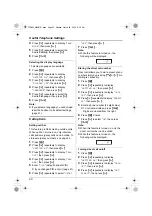
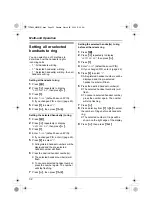
Changing stored emergency numbers

1

Press 

{j}

.

2

Press 

{v}

 repeatedly to display 

SETTING BS

”, then press 

{>}

.

3

Press 

{

6

}

.

4

Enter “

0000

” (default base unit PIN).

L

If you changed PIN, enter it (page 22).

5

Press 

{*}

.

6

Press 

{>}

 repeatedly to display the 

desired number.

7

Press 

{

C/

T

}

 and enter the new 

emergency number.

8

Press 

{>}

.

9

Press 

{ih}

.

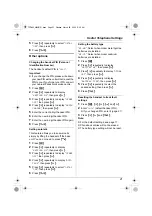
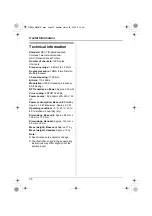
Resetting the base unit to its 
default settings

1

Press 

{j}

.

2

Press 

{v}

 repeatedly to display 

SETTING BS

”, then press 

{>}

.

3

Press 

{

0

}

.

4

Enter “

0000

” (default base unit PIN).

L

If you changed PIN, enter it (page 22).

5

Press 

{>}

, then press 

{ih}

.

Note:

L

For the default settings, see page 22.

L

The emergency number setting will not be 
reset.

TCD440̲445NZ(E).book  Page 24  Monday, March 29, 2004  9:02 AM

Summary of Contents for KX-TCD440NZ

Page 1: ... batteries for about 7 hours before initial use Please read these Operating Instructions before using the unit and save them for future reference Operating Instructions Model No KX TCD440NZ Digital Cordless Phone Model No KX TCD445NZ Digital Cordless Answering System TCD440 445NZ E book Page 1 Monday March 29 2004 9 02 AM ...

Page 2: ... unit settings 22 Base unit settings 22 Answering System Features KX TCD445 only Answering system 25 Turning the answering system on off 25 Greeting message 25 Listening to messages 26 Recording a voice memo 26 Memory capacity 27 Remote operation 27 Guide to answering system settings 28 Multi unit Operation Operating additional units 30 Registering a handset to a base unit 30 Setting all or select...

Page 3: ...It indicates no endorsement of the product by Telecom nor does it provide any sort of warranty Above all it provides no assurance that any item will work correctly in all respects with another item of Telepermitted equipment of a different make or model nor does it imply that any product is compatible with all of Telecom s network services Important Notice Under power failure conditions this telep...

Page 4: ...r is used as the main disconnect device Ensure that the AC outlet is located installed near the unit and is easily accessible Warning L To prevent the risk of electrical shock do not expose this product to rain or any other type of moisture Location For maximum distance and noise free operation place your base unit Away from electrical appliances such as TVs radios personal computers or other phon...

Page 5: ...iver J Display K R Redial Pause L j Menu OK M ih Off Power N C T Clear Mute O INT Intercom P Microphone Display descriptions R INT 2 1 3 4 5 6 7 8 9 0 C ALL ON OFF INT 2 1 3 4 5 6 7 8 9 0 B C A D E H G I L M N O G K J F P Icons Meaning w Within range of base unit 0w4 Out of range no registration or no power on base unit x Paging intercom mode or accessing base unit k Making or answering a call C P...

Page 6: ...e AC adaptor must remain connected at all times It is normal for the adaptor to feel warm during use L Use only the AC adaptor noted on page 3 Battery installation 1 Insert the batteries negative terminal first 2 Close the battery cover Note L Use only rechargeable batteries page 3 LINE B A LINE To telephone network 220 240 V 50 Hz Hooks TCD440 445NZ E book Page 6 Monday March 29 2004 9 02 AM ...

Page 7: ... on automatically when it is placed on the base unit Battery life After your Panasonic batteries are fully charged you can expect the following performance Ni MH batteries typical 700 mAh Ni Cd batteries typical 250 mAh Note L The included batteries are Ni MH batteries L Battery operating time may be shortened depending on usage conditions and ambient temperature Battery icons Battery strength 5 H...

Page 8: ...y 2 nickel metal hydride Ni MH batteries or 2 nickel cadmium Ni Cd batteries Do not mix battery types L Ensure that the correct battery type is selected page 21 1 Press the notch on the cover firmly and slide it in the direction of the arrow 2 Remove the batteries positive terminal first Replace both batteries See the battery installation on page 6 Turning the power on off Power on Press ih for ab...

Page 9: ...Press L SETTING BS will be displayed 6 Press then press 2 times 7 Enter the current day month and year by selecting 2 digits for each Example 17 May 2004 Press 1 7 0 5 0 4 L If you make a mistake press C T Digits will be cleared from the right 8 Press L SETTING BS will be displayed 9 Press ih Note L If a power failure occurs set the time and date again Wall mounting Note L Make sure the screws are...

Page 10: ...number again automatically if the other party s line is engaged The unit will redial up to 10 times While the unit is waiting to redial s will flash and mute is automatically turned on Note L Automatic redial is cancelled when the navigator or any button is pressed L If mute does not turn off after the line is connected press C T To make a call using the redial list The last 10 phone numbers diall...

Page 11: ...y lock is turned off L Key lock is turned off when the handset is turned off R button to use the recall feature R is used to access optional telephone services Contact your service provider for details If your unit is connected to a PBX private branch exchange pressing R can allow you to access certain features of your host PBX such as transferring an extension call Call waiting Call waiting is a ...

Page 12: ...en to the recorded conversation see page 26 L If message memory becomes full r flashes rapidly and recording stops Erase unnecessary messages page 26 Answering calls 1 Lift the handset and press C or s when the unit rings L You can also answer a call by pressing any dial key from 0 to 9 or INT Any key talk feature 2 When finished talking press ih or place the handset on the base unit Auto talk fea...

Page 13: ...cursor to the right of where you want to correct the number character 2 Press C T to erase a digit then enter the correct number character Editing a stored entry 1 Press k 2 Press e or v repeatedly to display the desired entry then press 3 Press v repeatedly to display EDIT then press L If you do not need to edit the phone number skip to step 5 4 Edit the phone number 5 Press j L If you do not nee...

Page 14: ...4 Press v repeatedly to select the desired dial key 1 to 9 then press L If the dial key is already assigned as a hot key the displayed number will flash 5 Press v repeatedly to display YES then press L To register other entries repeat from step 2 6 Press ih Erasing a hot key 1 Press and hold the desired hot key 1 to 9 then press L CLEAR will be displayed 2 Press 3 Press v repeatedly to display YES...

Page 15: ... of new calls Example 4 new calls have been received L The number of new calls will be cleared after viewing all caller information Note L When you receive a call from the same phone number you stored with a name in the phonebook the display will show the stored name L If the unit is connected to a PBX system you may not receive the caller information L When the caller dialled from an area which d...

Page 16: ...ired entry then press 2 Press v repeatedly to display EDIT CALL NO then press 3 Press or to move the cursor to the right of where you want to edit the number 4 Edit the phone number L To erase a digit press C T 5 Press C or s Note L The edited phone number will not be saved Erasing caller information 1 Press e or v repeatedly to display the desired entry then press 2 Press v repeatedly to display ...

Page 17: ...SET ALARM OFF page 18 RINGER OPT RINGER VOL Level 6 page 18 EXT RINGER RING TYPE 1 page 18 INT RINGER RING TYPE 1 page 18 PAGING RING TYPE 1 page 18 ALARM RING TYPE 1 page 18 TONE OPT KEY TONE ON page 19 CALL WAITING ON page 19 RANGE ALARM OFF page 19 BATTERY LOW ON page 19 DISPLAY OPT STANDBY MODE CLOCK page 19 TALK MODE TALK TIME page 19 LANGUAGE ENGLISH page 20 CALL OPT CALL BAR OFF page 20 DIR...

Page 18: ...alarm frequency 1 Press j 2 Press v repeatedly to display SETTING HS then press 3 Press v repeatedly to display TIME ALARM then press 4 Press v repeatedly to display SET ALARM then press 5 Press v repeatedly to select the desired setting then press 6 Press ih Ringer options Ringer volume 7 levels high to off are available 1 Press j 2 Press v repeatedly to display SETTING HS then press 3 Press v re...

Page 19: ...ess 5 Press v repeatedly to select ON or OFF then press 6 Press ih Display options Selecting the standby mode display CLOCK The time and date will be displayed Set the time and date beforehand page 9 OFF Turns this feature off BS NO The base unit number will be displayed HS NO The handset number will be displayed 1 Press j 2 Press v repeatedly to display SETTING HS then press 3 Press v repeatedly ...

Page 20: ...to display CALL BAR then press 5 Enter 0000 default handset PIN L If you changed PIN enter it page 21 6 Press v repeatedly to select ON or OFF then press 7 Press ih Note L While this feature is turned on the following will be displayed Storing the direct call number Direct call allows you to dial a preset phone number simply by pressing C or s No dialling is necessary 1 Press j 2 Press v repeatedl...

Page 21: ...u do not need to press C 1 Press j 2 Press v repeatedly to display SETTING HS then press 3 Press v repeatedly to display OTHER OPT then press 4 Press v repeatedly to display AUTO TALK then press 5 Press v repeatedly to select ON or OFF then press 6 Press ih Setting the battery type NI MH Select when nickel metal hydride batteries are installed NI CD Select when nickel cadmium batteries are install...

Page 22: ... the new 4 digit base unit PIN again 7 Press ih Adjusting ringer volume 4 levels high to off are available 1 Press j 2 Press v repeatedly to display SETTING BS then press 3 Press 2 2 times 4 Select the desired setting by pressing 1 for low 2 for medium 3 for high or 0 for off 5 Press then press ih Setting recall time Change the recall time if necessary to suit your PBX or service provider For furt...

Page 23: ...ss 6 4 Enter 0000 default base unit PIN L If you changed PIN enter it page 22 L All the registered handset numbers will be displayed L Flashing numbers indicate call restriction is turned on for the corresponding handset 5 Press the desired handset numbers L The selected handset numbers will flash L To cancel a selected handset number press the number again The number will stop flashing 6 Press 7 ...

Page 24: ... L To select a different memory location press repeatedly and enter a number 7 Press 8 Press ih Note L The default setting for emergency numbers are stored in the first 3 memory locations It is recommended that you do not overwrite these numbers Changing stored emergency numbers 1 Press j 2 Press v repeatedly to display SETTING BS then press 3 Press 6 4 Enter 0000 default base unit PIN L If you ch...

Page 25: ... are greeted by a greeting message You can record your own greeting message or use a prerecorded greeting message Recording a greeting message You can record your own greeting message 2 minutes and 30 seconds max 1 Press INT L The handset number will be displayed 2 Press 3 After the beep press 7 4 Press 6 L Hold the handset about 20 cm away and speak clearly into the microphone 5 Press 9 to stop r...

Page 26: ... s Repeating skipping stopping erasing a message during playback L To repeat a message during playback press 1 If pressed within the first 5 seconds of a message the previous message will be played L To skip a message during playback press 2 L To stop a message during playback press 9 L To erase a message during playback press then press 4 Erasing all messages 1 Press INT L The handset number will...

Page 27: ...messages remotely After you store your remote access code remote operation is possible 1 Press j 2 Press v repeatedly to display SETTING BS then press 3 Press 4 Press 1 5 To turn on remote operation enter a 3 digit remote access code L To turn off remote operation press 6 Press then press ih Using the answering system remotely 1 Dial your phone number from a touch tone phone L If the number of rin...

Page 28: ...g message will not be erased Changing the number of rings You can change the number of times the phone rings before the unit answers calls AUTO The unit answers after 2 rings when new messages have been recorded and after 5 rings when there are no new messages If you call your phone from outside to listen to new messages page 27 you will know that there are no messages when the phone rings for the...

Page 29: ...et to GREET ONLY the following will be displayed Turning the recording quality on off The unit can record messages in either high or normal quality mode In normal quality mode the total recording time is approximately 20 minutes In high quality mode recording quality is improved but the total recording time is reduced to approximately 10 minutes 1 Press j 2 Press v repeatedly to display SETTING BS...

Page 30: ...nd press ih 2 Press and hold x on the left side of the base unit for about 5 seconds until the registration tone sounds 3 Place the additional handset on the base unit The registration tone continues to sound With the handset still on the base unit wait until a confirmation tone sounds and w stops flashing Note L If an error tone sounds or if w is still flashing register the handset manually manua...

Page 31: ...set can cancel its own registration or the registration of another handset that is stored in the base unit This will allow the base unit to forget the handset 1 Press j 2 Press v repeatedly to display SETTING BS then press 3 Press 7 4 Enter 0000 default base unit PIN L If you changed PIN enter it page 22 5 Press the desired handset number L The selected handset number will flash 6 Press 7 Wait unt...

Page 32: ...ndset number will flash 6 Press the desired handset number s L The selected handset number s will flash L To cancel a selected handset number press the number again The number will stop flashing 7 Press then press ih Setting the selected handset s to ring before all handsets ring 1 Press j 2 Press v repeatedly to display SETTING BS then press 3 Press 1 4 Enter 0000 default base unit PIN L If you c...

Page 33: ...o cell 2 handsets in the same radio cell can have a conference call with an outside party Example When handset 1 transfers a call to handset 2 1 Handset 1 During an outside call press INT and 2 desired handset number L If there is no answer press INT to return to the outside call 2 Handset 2 Press C or s to answer the page L Handset 2 can talk with handset 1 L The outside call will be put on hold ...

Page 34: ...ndset ringer volume page 18 and the base unit ringer volume page 22 The handset display is blank L The handset is not turned on Turn the power on page 8 The handset will not turn on L Make sure that the batteries are installed correctly page 6 L Fully charge the batteries page 7 L Clean the charge contacts and charge again page 7 The battery should be charging but the battery icon does not change ...

Page 35: ...f you forget your PIN consult your nearest Panasonic service centre L Locate the handset and the base unit away from other electrical appliances Answering system KX TCD445 only The answering system is turned on but caller messages are not recorded L The recording time is set to GREET ONLY Select 1 MINUTE or UNLIMITED page 29 L Message memory is full Erase unnecessary messages page 26 I cannot oper...

Page 36: ...x 250 mW Voice coding ADPCM 32 kbit s Power source AC adaptor 220 240 V 50 Hz Power consumption Base unit Standby Approx 3 5 W Maximum Approx 9 2 W Operating conditions 5 C 40 C 20 80 relative air humidity dry Dimensions Base unit Approx 58 mm x 128 mm x 105 mm Dimensions Handset Approx 143 mm x 48 mm x 32 mm Mass weight Base unit Approx 170 g Mass weight Handset Approx 120 g Note L Specifications...

Page 37: ...iewing 15 Character table 13 Conference call 33 Connections 6 D Direct call 20 Display Icons 5 Language 20 Standby mode 19 Talk mode 19 E Emergency call 24 H Handset Cancelling 31 Guide to settings 17 Locator 12 PIN 21 Power on off 8 Resetting 21 Hot key quick dial 14 I Intercom 33 K Key lock 11 Key tone 19 L Listening to messages 26 M Making calls 10 Mute 11 P Pause 11 Pause length 23 Phonebook 1...

Page 38: ...38 Index V Volume Receiver 10 Ringer Base unit 22 Ringer Handset 18 Speaker 10 W Wall mounting 9 TCD440 445NZ E book Page 38 Monday March 29 2004 9 02 AM ...

Page 39: ...TCD440 445NZ E book Page 39 Monday March 29 2004 9 02 AM ...

Page 40: ...ications Co Ltd 1 62 4 chome Minoshima Hakata ku Fukuoka 812 8531 Japan 2004 Panasonic Communications Co Ltd All Rights Reserved Serial No found on the bottom of the unit Date of purchase Name and address of dealer Customer Support Centre Tel No 09 272 0178 Panasonic New Zealand Ltd 350 Te Irirangi Drive East Tamaki Private Bag 14911 Panmure Auckland NEW ZEALAND PQQX14164ZA FT0504FD0 TCD440 445NZ ...

Reviews: