- 43 -
2
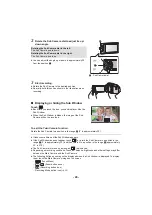
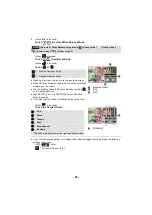
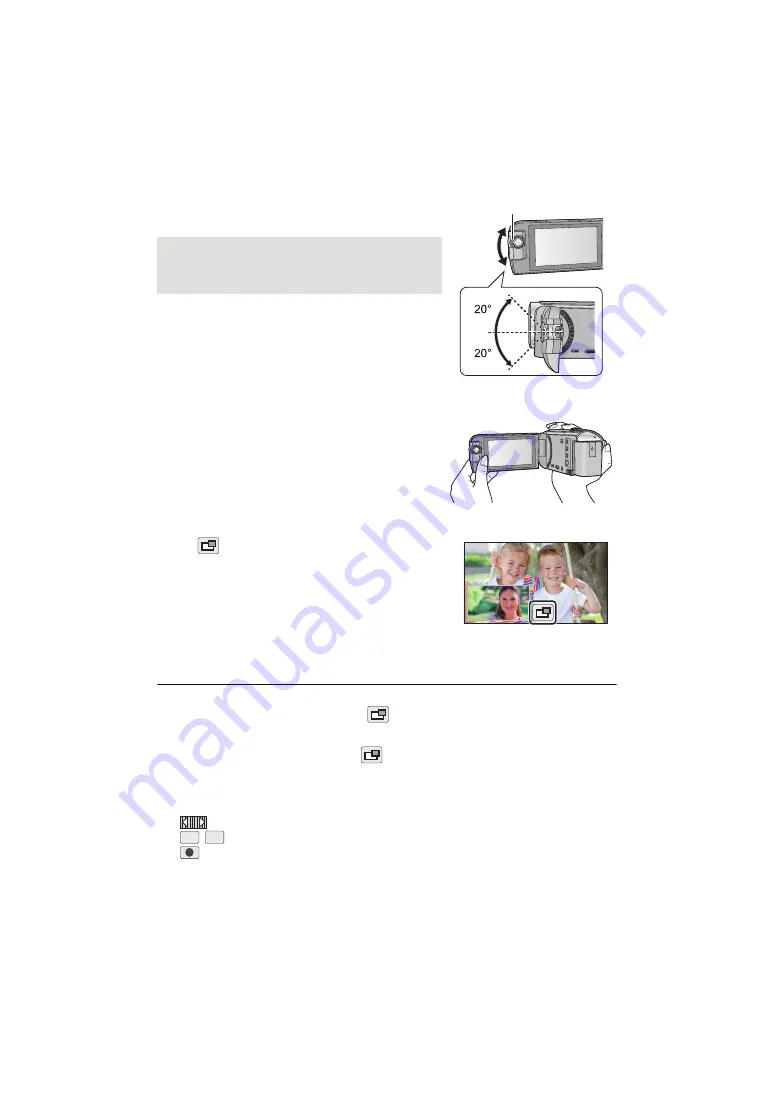
Rotate the Sub Camera dial to adjust its up/
down angle.
≥
You can adjust the angle up or down to approximately 20
e
from the position
F
.
3
Start recording.
≥
Rotate the Sub Camera to the desired position.
≥
Normally, hold this unit as shown in the illustration when
recording.
∫
Displaying or hiding the Sub Window
Touch
.
≥
Each time you touch the icon, you can display or hide the
Sub Window.
≥
When the Sub Window is hidden, the image of the Sub
Camera will not be recorded.
To exit the Twin Camera function
Rotate the Sub Camera to a position in the range
C
(
0
e
to approximately
30
e
).
≥
It takes some time until the Sub Window appears.
≥
If the Sub Window does not appear, touch
or return the Sub Camera to a position in the
range
C
(0
e
to approximately 30
e
) and then rotate it to a position in the range
D
(approximately
30
e
to 270
e
).
≥
The Sub Camera is turned on as long as
is displayed.
≥
Depending on recording conditions, the colour balance, brightness and other settings may differ
between the Main Camera and the Sub Camera.
≥
The following button icons may not be displayed when the Sub Window is displayed. To display
them, touch the Main Camera’s image on the screen.
j
(Touch Menu)
j
/
(Zoom button icons)
j
(Recording button icon)
j
Recording Mode button icon (
)
Rotating the Sub Camera dial to the left :
The Sub Camera points down.
Rotating the Sub Camera dial to the right :
The Sub Camera points up.
E
Sub Camera dial
T
W

