background image

© Panasonic Corporation 2013.


Order No: PAPAMY1307111CE 


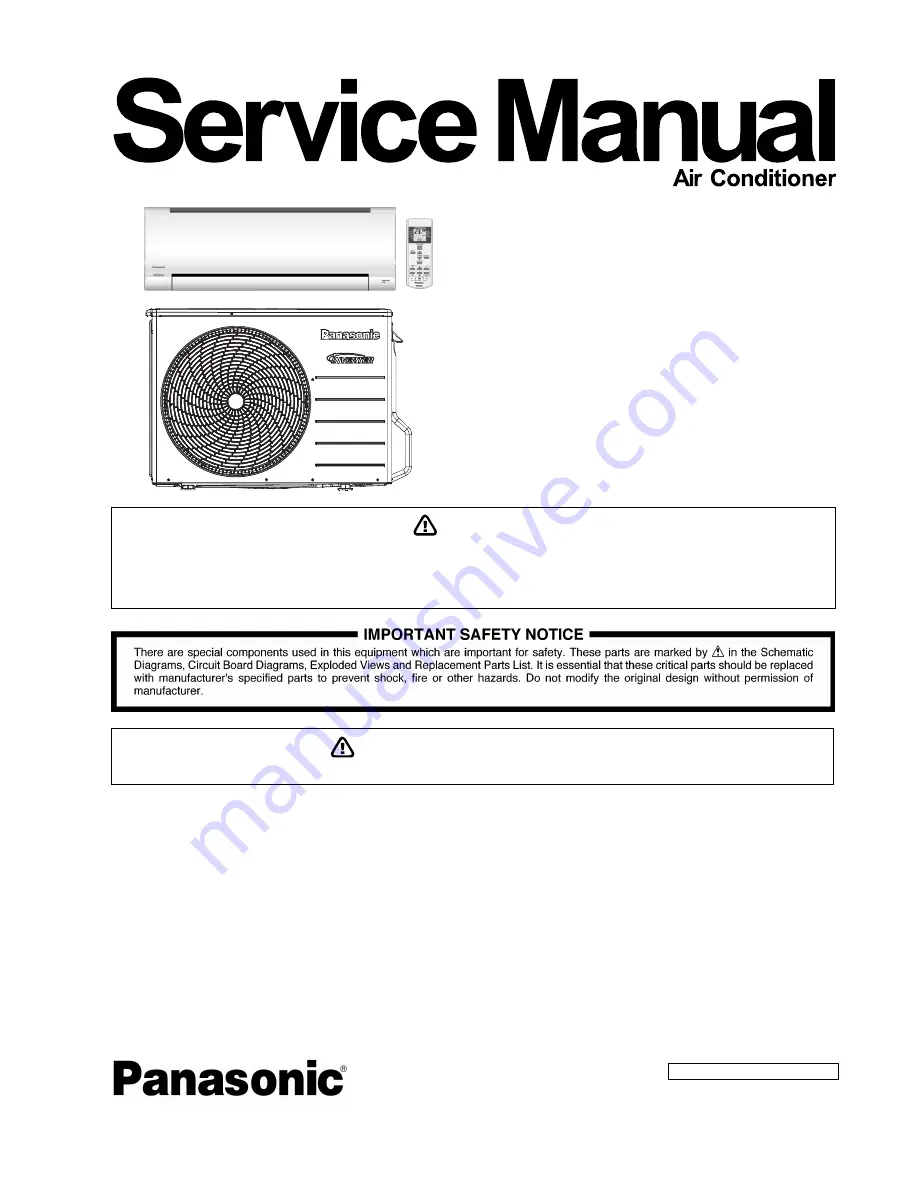
Indoor Unit 

Outdoor Unit


CS-CE9PKE 

CS-CE12PKE 

CU-CE9PKE

CU-CE12PKE

Destination

North Europe


TABLE OF CONTENTS 

1.


Safety Precautions.............................................3


2.


Specifications .....................................................5


3.


Features ............................................................11


4.


Location of Controls and Components .........12


4.1


Indoor Unit..................................................12


4.2


Outdoor Unit ...............................................12


4.3


Remote Control ..........................................12


5.


Dimensions .......................................................13


5.1


Indoor Unit..................................................13


5.2


Outdoor Unit ...............................................14


6.


Refrigeration Cycle Diagram...........................15


6.1


CS-CE9PKE CU-CE9PKE .........................15


6.2


CS-CE12PKE CU-CE12PKE .....................16


7.


Block Diagram ..................................................17


8.


Wiring Connection Diagram............................18


8.1


Indoor Unit..................................................18


8.2


Outdoor Unit ...............................................19


9.


Electronic Circuit Diagram ..............................21


PRECAUTION OF LOW TEMPERATURE 

In order to avoid frostbite, be assured of no refrigerant leakage during the installation or repairing of refrigerant circuit.


This service information is designed for experienced repair technicians only and is not designed for use by the general public. 
It does not contain warnings or cautions to advise non-technical individuals of potential dangers in attempting to service a product. 
Products powered by electricity should be serviced or repaired only by experienced professional technicians. Any attempt to service 
or repair the product or products dealt with in this service information by anyone else could result in serious injury or death. 

WARNING

Summary of Contents for CS-CE12PKE

Page 1: ... 8 2 Outdoor Unit 19 9 Electronic Circuit Diagram 21 PRECAUTION OF LOW TEMPERATURE In order to avoid frostbite be assured of no refrigerant leakage during the installation or repairing of refrigerant circuit This service information is designed for experienced repair technicians only and is not designed for use by the general public It does not contain warnings or cautions to advise non technical ...

Page 2: ...ting Operation 43 14 Servicing Mode 45 14 1 Auto OFF ON Button 45 14 2 Remote Control Button 46 15 Troubleshooting Guide 47 15 1 Refrigeration Cycle System 47 15 2 Breakdown Self Diagnosis Function 49 15 3 Error Code Table 50 15 4 Self diagnosis Method 52 16 Disassembly and Assembly Instructions 80 16 1 Indoor Electronic Controllers Cross Flow Fan and Indoor Fan Motor Removal Procedures 80 16 2 Ou...

Page 3: ...recommended to be installed with Earth Leakage Circuit Breaker ELCB or Residual Current Device RCD Otherwise it may cause electrical shock and fire in case equipment breakdown or insulation breakdown 10 Do not use joint cable for indoor outdoor connection cable Use the specified indoor outdoor connection cable refer to installation instruction CONNECT THE CABLE TO THE INDOOR UNIT and connect tight...

Page 4: ...ir inlet and aluminium fin It may cause injury 5 Select an installation location which is easy for maintenance 6 Pb free solder has a higher melting point than standard solder typically the melting point is 50 F 70 F 30 C 40 C higher Please use a high temperature solder iron In case of the soldering iron with temperature control please set it to 700 20 F 370 10 C Pb free solder will tend to splash...

Page 5: ...9 25 Indoor Noise H L Power Level dB 55 dB A 46 Cooling Outdoor Noise H L Power Level dB 61 kW 0 85 3 40 5 10 BTU h 2900 11600 17400 Capacity kcal h 730 2920 4390 Running Current A 3 55 Input Power W 185 740 1 35k W W 4 59 4 59 3 78 BTU hW 15 68 15 68 12 89 COP kcal hW 3 95 3 95 3 25 Pdesign kW 2 8 Tbivalent C 10 SCOP W W 3 9 Annual Consumption kWh 1005 ErP Class A Power Factor 91 dB A 40 27 Indoo...

Page 6: ...min 8 88 310 Me Heat m 3 min ft 3 min 9 91 350 Cool Fan m 3 min ft 3 min 11 3 400 Indoor Airflow Hi Heat m 3 min ft 3 min 11 9 420 Cool m 3 min ft 3 min 31 3 1105 Outdoor Airflow Hi Heat m 3 min ft 3 min 31 3 1105 Control Device Check Valve Capillary Tube Refrigerant Oil cm 3 FV50S 450 Refrigeration Cycle Refrigerant Type g oz R410A 1 00k 35 3 Height I D O D mm inch 290 11 7 16 622 24 1 2 Width I ...

Page 7: ...et Bulb 75 2 F Wet Bulb 2 Heating capacities are based on indoor temperature of 20 C Dry Bulb 68 F Dry Bulb and outdoor air temperature of 7 C Dry Bulb 44 6 F Dry Bulb 6 C Wet Bulb 42 8 F Wet Bulb 3 Heating low temperature capacity Input Power and COP measured at 230 V indoor temperature 20 C outdoor 2 1 C 4 Heating extreme low temperature capacity Input Power and COP measured at 230 V indoor temp...

Page 8: ...ndoor Noise H L Power Level dB 58 dB A 48 Cooling Outdoor Noise H L Power Level dB 63 kW 0 85 4 00 6 60 BTU h 2900 13600 22500 Capacity kcal h 730 3440 5680 Running Current A 4 60 Input Power W 190 990 1 99k W W 4 47 4 04 3 32 BTU hW 15 26 13 74 11 31 COP kcal hW 3 84 3 47 2 85 Pdesign kW 3 6 Tbivalent C 10 SCOP W W 3 8 Annual Consumption kWh 1326 ErP Class A Power Factor 94 dB A 42 33 Indoor Nois...

Page 9: ... min 10 06 360 Me Heat m 3 min ft 3 min 11 40 400 Cool Fan m 3 min ft 3 min 12 5 440 Indoor Airflow Hi Heat m 3 min ft 3 min 12 8 450 Cool m 3 min ft 3 min 33 3 1175 Outdoor Airflow Hi Heat m 3 min ft 3 min 33 3 1175 Control Device Check Valve Capillary Tube Refrigerant Oil cm 3 FV50S 450 Refrigeration Cycle Refrigerant Type g oz R410A 1 06k 37 4 Height I D O D mm inch 290 11 7 16 622 24 1 2 Width...

Page 10: ...Wet Bulb 75 2 F Wet Bulb 2 Heating capacities are based on indoor temperature of 20 C Dry Bulb 68 F Dry Bulb and outdoor air temperature of 7 C Dry Bulb 44 6 F Dry Bulb 6 C Wet Bulb 42 8 F Wet Bulb 3 Heating low temperature capacity Input Power and COP measured at 230 V indoor temperature 20 C outdoor 2 1 C 4 Heating extreme low temperature capacity Input Power and COP measured at 230 V indoor tem...

Page 11: ...g up to 15 meters during single split connection only Easy to use remote control Quality Improvement o Random auto restart after power failure for safety restart operation o Gas leakage protection o Prevent compressor reverse cycle o Inner protector to protect Compressor o Noise prevention during soft dry operation Operation Improvement o 24 hour timer setting Serviceability Improvement o Breakdow...

Page 12: ...E Green Blue TIMER Orange Front panel Air Filters Vertical airflow direction louver Do not adjust by hand Auto OFF ON button Use when remote control is misplaced or a malfunction occurs 4 2 Outdoor Unit Air inlet rear Air outlet Air inlet side 4 3 Remote Control LCD display Off On Airflow direction adjustment Fan speed selection Temperature setting Operation mode Transmitter Clock setting Check Ti...

Page 13: ... 1 2 214 61 1 45 Right piping hole 290 214 125 115 60 60 410 41 61 Gas side Liquid side Relative position between the indoor unit and the installation plate Front View Unit mm 16 4 264 1 Right piping hole 497 2 Indoor unit external dimensions line Installation plate 128 438 127 88 128 432 DISTANCE TO PIPE HOLE CENTER 128 mm DISTANCE TO PIPE HOLE CENTER 128 mm PIPEHOLECENTER PIPE HOLE CENTER 128 24...

Page 14: ...de View Side View Anchor Bolt Pitch 330 x 540 Space necessary for installation 10cm 10cm 100cm Unit mm 3 way valve at Gas side Low Pressure 2 way valve at Liquid side High Pressure 22 124 53 4 330 622 167 97 69 23 61 32 540 160 824 68 5 37 299 ...

Page 15: ...D N I INTAKE TEMP SENSOR PIPE TEMP SENSOR INTAKE TEMP SENSOR PIPE TEMP SENSOR LIQUID SIDE 2 WAY VALVE 3 WAY VALVE GAS SIDE COOLING HEAT EXCHANGER EVAPORATOR HEAT EXCHANGER CONDENSER HEATING CHECK VALVE CAPILLARY TUBE COMPRESSOR TANK TEMP SENSOR 4 WAY VALVE MUFFLER CAPILLARY TUBE ...

Page 16: ...KE TEMP SENSOR PIPE TEMP SENSOR INTAKE TEMP SENSOR PIPE TEMP SENSOR LIQUID SIDE 2 WAY VALVE 3 WAY VALVE GAS SIDE COOLING HEAT EXCHANGER EVAPORATOR HEAT EXCHANGER CONDENSER HEATING COMPRESSOR TANK TEMP SENSOR 4 WAY VALVE MUFFLER MUFFLER STRAINER EXPANSION VALVE ...

Page 17: ...POWER SUPPLY RY PWR TEMP FUSE TEMP FUSE FUSE301 SC M INDOOR UNIT NOISE FILTER OUTDOOR UNIT FUSE103 1 3 2 N L CT101 FUSE104 MS 3 C103 PTC1 PTC 4 WAYS VALVE RY PWR RY PWR RY PWR2 RY FM C FM FAN CR1 M 1 REACTOR NTC TH1 U U RY AC SC MOTOR ...

Page 18: ... W R 2 3 BL L N BR AC303 WHT AC304 RED G301 GRN RY PWR RY PWR2 FUSE301 T3 15A L250V NOISE FILTER CIRCUIT CN STM1 WHT UP DOWN LOUVER MOTOR 1 BR R O Y P 5 5 4 1 M CN CNT WHT 5 1 TEMP FUSE 102 C 3A TEMP FUSE 102 C 3A TO OUTDOOR UNIT TERMINAL BOARD GROUNDING TERMINAL SINGLE PHASE POWER SUPPLY 1ø 230V 50Hz G Y G Y G 1 4 7 1 1 6 1 6 CN DISP WHT CN FM WHT CN TH RED REMOTE CONTROLLER t t REMARKS B BLUE P ...

Page 19: ...15A L250V 3 RED 2 WHITE 1 BLACK RED WHITE BLACK PFC CIRCUIT COMMUNICATION CIRCUIT RECTIFICATION CIRCUIT ELECTRONIC CONTROLLER 1 3 BLU BLU HT2 BLU RY HT2 ACN2 BLU FM1 BLU FM2 RED FM3 YLW 1 BLU 2 RED 3 YLW CN HOT WHT ELECTRO MAGNETIC COIL 4 WAY VALVE 1 3 Q1 NOISE FILTER CIRCUIT THE PARENTHESIZED LETTERS IS INDICATED ON TERMINAL COVER RED RED TRADEMARK BLUE BLU YELLOW YLW COMPRESSOR TERMINAL FAN MOTO...

Page 20: ... WHITE BLACK PFC CIRCUIT COMMUNICATION CIRCUIT RECTIFICATION CIRCUIT ELECTRONIC CONTROLLER 1 3 BLU BLU HT2 BLU RY HT2 ACN2 BLU FM1 BLU FM2 RED FM3 YLW 1 BLU 2 RED 3 YLW CN HOT WHT CN STM WHT ELECTRO MAGNETIC COIL 4 WAY VALVE ELECTRO MAGNETIC COIL EXPANSION VALVE 1 3 1 6 M Q1 NOISE FILTER CIRCUIT THE PARENTHESIZED LETTERS IS INDICATED ON TERMINAL COVER RED RED TRADEMARK BLUE BLU YELLOW YLW COMPRESS...

Page 21: ... FM WHT 5V_ 3 2 1 GND Vcc Vout IC201 TIMER orange R202 LED202 Q204 4 7k R203 DEICE BLU POWER GREEN LED201 3 1 2 R201 10k c b e 5V_ C202 GND A C201 4 5 GND GND Q203 4 7k 10k c b e 5V_ 5V_ R204 5V_ 5V C3 5V C3 CN STM1 WHT UP DOWN LOUVER MOTOR 1 2 3 4 5 BR R O Y P 5 1 M 1 VCC GND 2 3 4 5 6 7 16 15 14 13 12 11 10 9 8 12V 12V Sensor Thermistor Characteristics 70 60 50 40 30 20 10 0 10 0 10 Temperature ...

Page 22: ...T FUSE 103 20A 250V FUSE 104 T3 15A L250V 3 RED 2 WHITE 1 BLACK RED WHITE BLACK COMMUNICATION CIRCUIT RECTIFICATION CIRCUIT ELECTRONIC CONTROLLER 1 3 BLU BLU HT2 BLU RY HT2 ACN2 BLU 1 2 1 3 ELECTRO MAGNETIC COIL 4 WAY VALVE NOISE FILTER CIRCUIT 5V R12 15 0k G2 G2 G2 5V G2 R1 4 99k G2 3 1 G2 5V R14 R240 G2 C68 G2 The unit turn to the Rated Frequency cooling Operation by short circuiting CN S after ...

Page 23: ...ELECTRONIC CONTROLLER 1 3 BLU BLU HT2 BLU RY HT2 ACN2 BLU 1 2 1 3 NOISE FILTER CIRCUIT 5V R12 15 0k G2 G2 G2 5V G2 R1 4 99k G2 5V R14 R240 G2 C68 G2 The unit turn to the Rated Frequency cooling Operation by short circuiting CN S after applying power between the terminal 1 and 2 Operation of the compressor and the outdoor fan motor can be checked by applying power after short circuiting CN S FAN MO...

Page 24: ...d Circuit Board 10 1 Indoor Unit 10 1 1 Main Printed Circuit Board CN FM CN STM1 CN CNT CN TH CN DISP JP1 Random Auto Restart enable disable 10 1 2 Indicator and Receiver Printed Circuit Board CN DISP LED201 LED202 ...

Page 25: ...25 10 2 Outdoor Unit CN TANK CN S CN HOT CN STM CE12PKE only DATA AC BLK AC WHT CN TH1 CURRENT TRANSFORMER CT POWER TRANSISTOR IPM ...

Page 26: ...igerant g m Piping Length for add gas m Gas Liquid CE9 1 0HP 9 52mm 3 8 6 35mm 1 4 5 5 3 15 20 7 5 5 7 0 2 5 1 3 5 P H 5 1 2 1 E C Example For CE9 If the unit is installed at 10 m distance the quantity of additional refrigerant should be 50 g 10 7 5 m 20 g m 50 g 11 1 3 Indoor Outdoor Unit Installation Diagram 50 mm or more 65 mm or more Left andright are identical Vinyl tape Remote control holder...

Page 27: ...hor bolts o Always mount the installation plate horizontally by aligning the marking off line with the thread and using a level gauge 2 Drill the piping plate hole with ø70 mm hole core drill o Line according to the left and right side of the installation plate The meeting point of the extended line is the center of the hole Another method is by putting measuring tape at position as shown in the d...

Page 28: ... unit installation Cover for piping In case of the cover is cut keep the cover at the rear of chassis as shown in the illustration for future reinstallation Left right and 2 bottom covers for piping How to keep the cover Guide surface Connection cable About 70 80 m m Connection cable Gas side piping Liquid side piping Drain hose Insert the connection ca ble Install the indoor unit Hook the indoor ...

Page 29: ...le connection to the power supply through Isolating Devices Disconnecting means o Connect the approved polychloroprene sheathed power supply cord 3 1 5 mm2 type designation 245 IEC 57 or heavier cord to the terminal board and connect the other end of the cable to Isolating Devices Disconnecting means o Do not use joint power supply cord Replace the wire if the existing wire from concealed wiring o...

Page 30: ...50 40 35 60 Terminal Board Control Board Earth wire longer than others AC wires for safety reason Holder Holder Indoor outdoor connection cable Isolating Devices Outdoor unit Power supply cord Note Isolating Devices Disconnecting means should have minimum 3 0 mm contact gap Ensure the colour of wires of outdoor unit and the terminal Nos are the same to the indoor s respectively Earth wire shall be...

Page 31: ...E JOINING OF WIRES MAY CAUSE OVERHE ATING AND FIRE Do not joint wires OR OR OR Use complete wire without joining Use approved socket and plug with ea rth pin Wire connection in this area must follow to national wiring rules ...

Page 32: ...per pipe In case of using long piping Connect the piping Align the center of piping and sufficiently tighten the flare nut with fingers Further tighten the flare nut with torque wrench in specified torque as stated in the table Connecting the Piping to Outdoor Decide piping length and then cut by using pipe cutter Remove burrs from cut edge Make flare after inserting the flare nut locate at valve ...

Page 33: ... that the needle in the gauge does not move after approximately five minutes Note BE SURE TO TAKE THIS PROCEDURE IN ORDER TO AVOID REFRIGERENT GAS LEAKAGE 5 Disconnect the charging hose from the vacuum pump and from the service port of the 3 way valve 6 Tighten the service port caps of the 3 way valve at a torque of 18 N m with a torque wrench 7 Remove the valve caps of both of the 2 way valve and...

Page 34: ...Indoor and outdoor cable connection Indoor Unit Earth wire shall be Yellow Green Y G in colour and longer than the other AC wires for safety reason 11 3 5 Piping Insulation 1 Please carry out insulation at pipe connection portion as mentioned in Indoor Outdoor Unit Installation Diagram Please wrap the insulated piping end to prevent water from going inside the piping 2 If drain hose or connecting ...

Page 35: ...ated continuously whenever the electrical power is supplied to the unit Remote Control Setting Temperature 16 C 30 C Setting Temperature Limit Checking Min 16 C Max 33 C Internal Setting Temperature Auto Operation Mode Shifting Powerful Mode Shifting Indoor Air Temperature Shifting Outdoor Air Temperature Shifting 12 1 2 Cooling Operation 12 1 2 1 Thermostat control Compressor is OFF when Intake A...

Page 36: ...o If indoor intake temperature remote control setting temperature 3 C if previous operate in DRY mode then continue in DRY mode otherwise COOL mode is decided o If 2 C indoor intake temperature remote control setting temperature 3 C maintain with previous mode o If indoor intake temperature remote control setting temperature 2 C HEAT mode is decided Heat Maintain current mode Cool Dry 6 5 4 3 2 1 ...

Page 37: ...0 rpm or 50 rpm continue for 10 seconds then fan motor error counter increase fan motor is then stop and restart If the fan motor counter becomes 7 times then H19 fan motor error is detected Operation stops and cannot on back 12 3 Outdoor Fan Motor Operation Outdoor fan motor is operated with one fan speed only It starts when compressor starts operation and it stops 30 seconds after compressor sto...

Page 38: ... A IndoorHeat ExchangerTemperature Figure1 36 C 0 1 2 3 4 5 12 4 2 Horizontal Airflow The horizontal airflow direction louvers can be adjusted manually by hand 12 5 Timer Control There are 2 sets of ON and OFF timer available to turn the unit ON or OFF at different preset time If more than one timer had been set the upcoming timer will be displayed and will activate in sequence 12 5 1 ON Timer Con...

Page 39: ...econds to be selected randomly after power supply resumes 2 This type of control is not applicable during ON OFF Timer setting 3 This control can be omitted by open the circuit of JP1 at indoor unit printed circuit board 12 7 Indication Panel LED POWER DEICE TIMER Color Green Blue Orange Light ON Operation ON Deice Operation Time Setting ON Light OFF Operation OFF Time Setting OFF Note If POWER LE...

Page 40: ...oling Soft Dry B 3 95 14 76 5 64 14 76 Cooling Soft Dry C 3 95 14 76 5 64 14 76 Heating 5 34 14 76 8 18 14 76 The first 30 minutes of cooling operation A will be applied 40 C 39 C Outdoor air temperature 39 C 38 C C A B 13 1 3 IPM Power transistor Prevention Control Overheating Prevention Control o When the IPM temperature rises to 100 C compressor operation will stop immediately o Compressor oper...

Page 41: ... 15A o During Cooling and Soft Dry operations Indoor suction temperature indoor piping temperature is below 4 C o During Heating operations Indoor piping temperature indoor suction is under 5 C Control contents o Compressor stops and restart after 3 minutes o If the conditions above happen 2 times within 20 minutes the unit will Stop operation Timer LED blinks and F91 indicated 13 1 6 Low Frequenc...

Page 42: ...indoor heat exchanger is higher than 5 C At the same time indoor fan speed will be higher than during its normal operation If indoor heat exchanger temperature is higher than 5 C for 5 minutes the fan speed will return to its normal operation 13 2 4 Freeze Prevention Control 2 Control start conditions o During Cooling operation and soft dry operation During thermo OFF condition indoor intake tempe...

Page 43: ...ON The indoor unit fan stops temporarily and then starts to blow at minimum airflow for 30 seconds Compressor ON Compressor OFF The indoor unit fan stops for 90 seconds and then blows at minimum airflow for 20 seconds 13 3 Protection Control For Heating Operation 13 3 1 Intake Air Temperature Control Compressor will operate at limited freq if indoor intake air temperature is 30 C or above 13 3 2 O...

Page 44: ...tion Control When indoor pipe temperature is low cold draught operation starts where indoor fan speed will be reduced 13 3 6 Deice Operation When outdoor pipe temperature and outdoor air temperature is low deice operation start where indoor fan motor and outdoor fan motor stop and the operation LED deice indicator ON during this operation ...

Page 45: ...g Operation Beep x 2 Main unit always continue Test Run forced cooling operation 8 sec Remote Control Number Switch Mode Beep x 3 11 sec Remote Control Receiving Sound OFF ON Beep x 4 16 sec Auto OFF ON button pressed Press AC RESET at remote control Press AC RESET then any key at remote control Press AC RESET at remote control 3 REMOTE CONTROL NUMBER SWITCH MODE The Remote Control Number Switch M...

Page 46: ...Remote Control Receiving Sound OFF ON Mode is restarted 14 2 Remote Control Button 14 2 1 SET BUTTON To check remote control transmission code and store the transmission code to EEPROM o Press SET button for more than 10 seconds by using pointer o Press TIMER SET button until a beep sound is heard as confirmation of transmission code changed 14 2 2 RESET RC To clear and restore the remote control ...

Page 47: ...or and a fan The normal outlet air temperature and pressure of the refrigeration cycle depends on various conditions the standard values for them are shown in the table on the right Normal Pressure and Outlet Air Temperature Standard Gas pressure MPa kg cm 2 G Outlet air temperature C Cooling Mode 0 9 1 2 9 12 12 16 Heating Mode 2 3 2 9 23 29 36 45 Condition Indoor fan speed High Outdoor temperatu...

Page 48: ...ation Low Pressure High Pressure Electric current during operation Insufficient refrigerant gas leakage Ô Ô Ô Ô Ô Ô Clogged capillary tube or strainer Ô Ô Ô Ò Ò Ò Short circuit in the indoor unit Ô Ô Ô Ò Ò Ò Heat radiation deficiency of the outdoor unit Ò Ò Ò Ô Ô Ô Inefficient compression Ò Ô Ô Ò Ô Ô Carry out the measurement of pressure electric current and temperature fifteen minutes after an op...

Page 49: ...y Memorized Error Protective Operation status 1 Turn power on 2 Press the CHECK button on the remote controller continuously for 5 seconds 3 will be displayed on the remote controller display Note Display only for No transmitting signal no receiving sound and no Power LED blinking 4 Press the TIMER or button on the remote controller The code H00 no abnormality will be displayed and signal will be ...

Page 50: ...ality Port is ON for 10s during ion device off ion device PCB H27 Outdoor air temperature sensor abnormality Continuous for 5s Outdoor air temperature sensor open or short circuit Outdoor air temperature sensor lead wire and connector H28 Outdoor heat exchanger temperature sensor 1 abnormality Continuous for 5s Outdoor heat exchanger temperature sensor 1 open or short circuit Outdoor heat exchange...

Page 51: ...xpansion valve leakage indoor heat exchanger sensor open circuit Check indoor outdoor connection wire and pipe Indoor heat exchanger sensor lead wire and connector Expansion valve lead wire and connector F90 Power factor correction PFC circuit protection 4 times happen within 10 minutes Power factor correction circuit abnormal Outdoor PCB faulty F91 Refrigeration cycle abnormality 2 times happen w...

Page 52: ...230 240V AC power supply abnormal fluctuation NO Defect in communication circuitry Improper connection at terminals Measure the DC voltage at terminal 2 3 communication terminals of outdoor unit terminal board Is the measured DC voltage fluctuate between 18 25V NO Improper connection at terminals NO Measure the AC voltage at terminal 1 2 of indoor unit terminal board Is the measured voltage 230 24...

Page 53: ... the indoor and outdoor units Troubleshooting When abnormality indication starts again Is there any wiring error YES Matched compatibility Correct the indoor outdoor unit connection wires Check the indoor and outdoor unit connection wires Check the spare part numbers of the indoor and outdoor unit PCBs and compare with their Part Lists NO YES NO For safety reason and to prevent component breakdown...

Page 54: ...in Check the indoor intake air temperature sensor Plug out connector from the indoor unit PCB Measure the resistance of the indoor intake air temperature sensor For safety reason and to prevent component breakdown always switch off the power before remove and connect the component Is the measured resistance of the indoor intake air temperature sensor matches the value specified in its characterist...

Page 55: ...compressor temperature sensor Plug out connector from the outdoor unit PCB Measure the resistance of the outdoor compressor temperature sensor For safety reason and to prevent component breakdown always switch off the power before remove and connect the component Is the measured resistance of the outdoor compressor temperature sensor matches the value specified in its characteristic chart Check th...

Page 56: ...ical Graph In forced cooling check suction ressure Running current and suction pressure is Compressor Lack Compression Replace Compressor Check replace defected CT Running current is much too low and Check for gas leaking source Repair For safety reason and to prevent component breakdown always switch off the power before remove and connect the component normal Suction pressure and running current...

Page 57: ...urn off power supply and rotate fan by hand Replace fan motor Does fan rotate smoothly Turn power supply on and operate fan Replace indoor PCB Replace fan motor For safety reason and to prevent component breakdown always switch off the power before remove and connect the component Turn off power supply and disconnect fan motor connector then turn power on NO YES YES NO Does it rotate Stop fan moto...

Page 58: ...erature sensor Plug out connector from the outdoor unit PCB Measure the resistance of the outdoor intake air temperature sensor Defect in outdoor intake air temperature sensor Replace the outdoor intake air temperature sensor Detect in outdoor unit PCB Replace the outdoor unit PCB For safety reason and to prevent component breakdown always switch off the power before remove and connect the compone...

Page 59: ...on starts again Check the outdoor air temperature sensor Plug out connector from the outdoor unit PCB Measure the resistance of the outdoor air temperature sensor Is the measured resistance of the outdoor airtemperature sensor matches the value specified in its characteristic chart Defect in outdoor air temperature sensor Replace the outdoor air temperature sensor Defect in outdoor unit PCB Replac...

Page 60: ...exchanger temperature sensor matches the value specified in its characteristic chart YES Whenabnormality indicationstarts again Check the outdoor heat exchanger temperature sensor Plug out connector from the outdoor unit PCB Measure the resistance of the outdoor heat exchanger temperature sensor Defectin outdoor heat exchanger temperaturesensor Replace the outdoor heat exchanger temperaturesensor ...

Page 61: ...door unit PCB Measure the resistance of the outdoor discharge pipe temperature sensor For safety reason and to prevent component breakdown always switch off the power before remove and connect the component Is the measured resistance of the outdoor discharge pipe temperature sensor matches the value specified in its characteristic chart Defect in outdoor discharge pipe Replace the outdoor discharg...

Page 62: ...utdoor unit PCB Measure the resistance of the outdoor discharge pipe temperature sensor For safety reason and to prevent component breakdown always switch off the power before remove and connect the component Is the measured resistance of the outdoor heat exchanger temperature sensor matches the value specified in its characteristic chart Defect in outdoor discharge pipe Replace the outdoor discha...

Page 63: ...ve Troubleshooting When abnormality indication starts again Is indoor unit and outdoor unit model numbers matched NO Match the compatible model follow specification Check indoor and outdoor units model number Check the indoor and outdoor PCB part number and compare if they matched part list For safety reason and to prevent component breakdown always switch off the power before remove and connect t...

Page 64: ...oor unit PCB Measure the resistance of the outdoor discharge pipe temperature sensor For safety reason and to prevent component breakdown always switch off the power before remove and connect the component Is the measured resistance of the outdoor gas pipe temperature sensor matches the value specified in its characteristic chart Defect in outdoor discharge pipe Replace the outdoor discharge pipe ...

Page 65: ...t PCB Measure the resistance of the outdoor discharge pipe temperature sensor For safety reason and to prevent component breakdown always switch off the power before remove and connect the component Is the measured resistance of the outdoor gas pipe temperature sensor matches the value specified in its characteristic chart Defect in outdoor discharge pipe Replace the outdoor discharge pipe tempera...

Page 66: ...oor unit PCB Measure the resistance of the outdoor discharge pipe temperature sensor For safety reason and to prevent component breakdown always switch off the power before remove and connect the component Is the measured resistance of the outdoor liquid pipe temperature sensor matches the value specified in its characteristic chart Defect in outdoor discharge pipe Replace the outdoor discharge pi...

Page 67: ...ly and rotate fan by hand Replace fan motor Does fan rotate smoothly Turn power supply on and operate fan Replace outdoor PCB Replace fan motor For safety reason and to prevent component breakdown always switch off the power before remove and connect the component Turn off power supply and disconnect fan motor connector then turn power on NO YES YES NO Does it rotate Stop fan motor Check the rotat...

Page 68: ...ter dirty Clean the air filter Clean the indoor unit heat exchanger YES Check the dust accumulation on the indoor unit heat exchanger Is the indoor unit heat exchanger dirty Defect in indoor pipe temperature NO Check the indoor pipe temperature thermistor Check the piping installation condition YES Is the measured resistance of the indoor pipe temperature For safety reason and to prevent component...

Page 69: ... heat exchanger dirty Clean the indoor unit heat exchanger Check the dust accumulation on the indoor unit heat exchanger Does it conform to the sensor characteristic chart Check the indoor pipe temperature sensor Replace the indoor pipe temperature sensor Reclaim and recharge with correct amount of refrigerant Replace the indoor unit PCB YES NO NO NO NO YES YES NO YES Check if 2 3 way valve is clo...

Page 70: ...emperature Is 4 way solenoid valve being energised 4 way valve not working Check CN HOT Check V coil attach to Check valve v coil Measure voltage For safety reason and to prevent component breakdown always switch off the power before remove and connect the component OK Depending on 4 way valve model YELLOW 2 1 COIL COMPLETE CN HOT WHT YELLOW 4 WAYS VALVE CN HOT VH9 2 4 WAYS VALVE 3 2 1 thermistor ...

Page 71: ...y sensor Faulty expansion valve Troubleshooting YES YES NO When F17 indication happens Check the system wiring connection Is the wiring connection ok Perform Auto Wiring to correct the Replace the indoor intake air or indoor NO Replace the solenoid coil or expansion YES Check the indoor intake air and indoor pipe temperature sensors Does it conform to the sensor characteristic chart Check the expa...

Page 72: ... fluctuation AC power supply abnormal surge Defect in PFC circuitry Replace the outdoor unit PCB YES 280Vdc Defect in outdoor fan motor Replace outdoor fan motor NO Defect in compressor Replace compressor NO Defect in reactor Replace reactor YES YES Verify PFC abnormality by measuring DC voltage between Is the DC voltage between DCP and DCN normal Confirm the DC voltage between CN FM 1 and 4 when ...

Page 73: ...S NO gas amount is OK NO closed When F91 indication happens Check 3 way valve 3 way valve opened Open 3 way valve YES Check for gas leaking source Check for gas leaking source Refer to H16 Gas leaking Check other parts in refrigeration cycles For safety reason and to prevent component breakdown always switch off the power before remove and connect the component Repair or replace defected part s Re...

Page 74: ...e remove and connect the component Check the U V and W conector connection Turn OFF the power Check the U V and W conector connection at outdoor PCB and compressor terminal Is the connector connection normal From thw disconnected harnesses U V and Disconnect the harnesses U V and W from the compressor terminal Is the blinking of the 6 LEDs in same sequence condition IPM defective Replace outdoor u...

Page 75: ...t radiation Reset the error code and turn on the unit Reinstall the outdoor unit Remove the obstacle s Clean the outdoor heat exchanger Is the outdoor fan motor operating Measure the AC DC voltage between pins of connector CN FM outdoor unit PCB Is the voltage supplied to the outdoor NO Defect in outdoor heat exchanger thermistor Replace the outdoor heat exchanger thermistor NO 0V Defect in outdoo...

Page 76: ...M overheats due to defective of outdoor fan motor IPM overheats due to defective of internal circuitry of IPM IPM overheats due to defective IPM temperature sensor Multi Models Only o Compressor OL connector poor contact o Compressor OL faulty Troubleshooting Is outdoor fan motor operating When F96 indication happens For safety reason and to prevent component breakdown always switch off the power ...

Page 77: ... breakdown always switch off the power before remove and connect the component Check the compressor tank temperature sensor Open the 2 3 way valve YES NO Does it conform to the sensor characteristic chart Replace the compressor tank temperature sensor NO YES Check for gas leakage Oil oozing out from the 2 3way valve Repair the pipe flare or union nuts Reclaim and recharge refrigerant Replace the c...

Page 78: ...shooting Turn off power supply Check the main circuit electrolytic capacitor When F98 indication happens For safety reason and to prevent component breakdown always switch off the power before remove and connect the component Get restarted and measure the input current NO Input current limit Replace the outdoor unit PCB NO YES Normal Check refrigerant amount Repair the pipe flare or union nuts Rec...

Page 79: ... there a sound when compressor starts NO Compressor stops YES Outdoor electronic circuit defect due to power transistor short Replace the outdoor unit PCB Amplification IC defect Diode defect Defect in microcontroller Replace the outdoor unit PCB Is compressor vibration even NO Quite a lot of vibration at start operation YES Excessive amount of refrigerant Check the compressor winding resistance T...

Page 80: ...r Ensure that the capacitor has discharged sufficiently before proceeding with repair work Failure to heed this caution may result in electric shocks 16 1 Indoor Electronic Controllers Cross Flow Fan and Indoor Fan Motor Removal Procedures 16 1 1 To remove front grille Figure 1 16 1 2 To remove electronic controller Figure 2 ...

Page 81: ...81 Figure 3 Figure 4 16 1 3 To remove discharge grille Figure 5 10 Pull out to remove the drain hose from the discharge grille 11 Then pull the discharge grille downward gently to dismantle it ...

Page 82: ...n and indoor fan motor Figure 7 Figure 8 12 Remove 4 screws holding the control board then pull out the control board 15 Remove the bearing by pulling it out gently 14 Remove the screw from the evaporator 13 Remove the screw that holding the cross flow fan and fan motor axis ...

Page 83: ...oval of cross flow fan Reminder To reinstall the fan motor adjust the fan motor connector to 45 towards you before fixing control board 17 Remove the cross flow fan from the unit by pulling it to the left and downward Evaporator Reminder To reinstall the cross flow fan ensure cross flow fan is in line as shown in figure 10 ...

Page 84: ...ler be careful of electrostatic discharge 1 Remove the 5 screws of the Top Panel Fig 1 2 Remove the 8 screws of the Front Panel Fig 2 3 Remove the screw of the Terminal Board Cover 4 Remove the Top Cover of the Control Board by 4 hooks Fig 3 5 Remove the Control Board as follows Fig 4 Fig 5 Fig 6 ...

Page 85: ...2 0 4559 2548 555 4042 2793 745 3745 2314 955 15 7 3896 3249 588 3288 2979 741 3170 2926 948 23 18 4 4062 2494 578 3706 2198 744 3263 2196 940 13 3 3546 3121 596 3128 2815 752 2767 2621 932 20 15 8 3717 2413 587 3322 2232 748 2893 2132 948 Dry bulb value based on 46 humidity 17 2 Heat Mode Performance Data Unit setting Standard piping length Hi Fan Heat mode at 30 C Voltage 230V 17 2 1 CS CE9PKE C...

Page 86: ... piping length forced cooling at 16 C Hi fan Compressor frequency Rated for cooling operation Voltage 230V 18 1 1 CS CE9PKE CU CE9PKE Current A Low Pressure Mpa Outdoor Air Temperature ºC Outdoor Air Temperature ºC Outlet Air ºC Outdoor Air Temperature ºC 2 00 2 30 2 60 2 90 3 20 3 50 30 31 32 33 34 35 36 37 38 39 40 41 42 43 1 020 1 040 1 060 1 080 1 100 1 120 30 31 32 33 34 35 36 37 38 39 40 41 ...

Page 87: ...oor Air Temperature ºC Outlet Air ºC Outdoor Air Temperature ºC 3 50 4 00 4 50 5 00 5 50 6 00 30 31 32 33 34 35 36 37 38 39 40 41 42 43 0 800 0 850 0 900 0 950 1 000 1 050 30 31 32 33 34 35 36 37 38 39 40 41 42 43 14 50 15 00 15 50 16 00 16 50 17 00 30 31 32 33 34 35 36 37 38 39 40 41 42 43 ...

Page 88: ...uency Rated for Heating operation Voltage 230V 18 2 1 CS CE9PKE CU CE9PKE Current A High Pressure Mpa Outdoor Air Temperature ºC Outdoor Air Temperature ºC Outlet Air ºC Outdoor Air Temperature ºC 2 00 2 50 3 00 3 50 4 00 4 50 5 4 3 2 1 0 1 2 3 4 5 6 7 8 9 10 1 600 1 800 2 000 2 200 2 400 2 600 5 4 3 2 1 0 1 2 3 4 5 6 7 8 9 10 27 00 29 00 31 00 33 00 35 00 37 00 5 4 3 2 1 0 1 2 3 4 5 6 7 8 9 10 ...

Page 89: ...rature ºC Outdoor Air Temperature ºC Outlet Air ºC Outdoor Air Temperature ºC 3 50 4 00 4 50 5 00 5 50 6 00 5 4 3 2 1 0 1 2 3 4 5 6 7 8 9 10 2 000 2 200 2 400 2 600 2 800 3 000 5 4 3 2 1 0 1 2 3 4 5 6 7 8 9 10 30 00 32 00 34 00 36 00 38 00 40 00 5 4 3 2 1 0 1 2 3 4 5 6 7 8 9 10 ...

Page 90: ...ty correction factor 0 89 0 91 0 93 0 95 0 97 0 99 1 01 1 03 2 3 4 5 6 7 8 9 10 11 12 13 14 15 16 Range of additional refrigerant charge 18 3 1 2 Heating Capacity Piping Length m Capacity correction factor 0 95 0 96 0 97 0 98 0 99 1 00 1 01 1 02 2 3 4 5 6 7 8 9 10 11 12 13 14 15 16 Range of additional refrigerant charge Note The graphs show the factor after added right amount of additional refrige...

Page 91: ...1 01 1 02 2 3 4 5 6 7 8 9 10 11 12 13 14 15 16 Range of additional refrigerant charge 18 3 2 2 Heating Capacity 0 90 0 95 1 00 1 05 1 10 2 3 4 5 6 7 8 9 10 11 12 13 14 15 16 Range of additional refrigerant charge Piping Length m Capacity correction factor Note The graphs show the factor after added right amount of additional refrigerant ...

Page 92: ...I I I I I O I 12 24 15 36 33 45 46 47 48 54 55 56 40 3 4 2 5 1 27 23 11 16 26 34 28 29 30 39 9 37 35 10 7 38 8 41 42 43 50 53 52 51 44 Note The above exploded view is for the purpose of parts disassembly and replacement The non numbered parts are not kept as standard service parts ...

Page 93: ...AL VANE 8 CWE241374 30 CONNECTING BAR 2 CWE261251 33 A S MOTOR DC SINGLE 12V 300OHM 1 CWA981264 O 34 CAP DRAIN TRAY 1 CWH521259 35 HORIZONTAL VANE 1 CWE24C1385 36 REMOTE CONTROL COMPLETE 1 CWA75C4412 O 37 FRONT GRILLE COMPLETE 1 CWE11C5439 CWE11C5759 O 38 INTAKE GRILLE COMPLETE 1 CWE22C1723 CWE22C1861 39 GRILLE DOOR 1 CWE14C1090 40 AIR FILTER 2 CWD001279 O 41 SCREW FRONT GRILLE 2 XTT4 16CFJ 42 CAP...

Page 94: ...34 38 19 39 21 20 9 31 14 11 10 15 1 16 17 4 23A 23B 22 2 3 8 7 5 30 12 24 29 6 36 47 46 48 49 50 42 35 23D 23C 41 Note The above exploded view is for the purpose of parts disassembly and replacement The non numbered parts are not kept as standard service parts ...

Page 95: ...TERIAL 1 CWG302856 23B SOUND PROOF MATERIAL 1 CWG302858 23C SOUND PROOF MATERIAL 1 CWG302857 23D SOUND PROOF MATERIAL 1 CWG302855 24 SENSOR COMPLETE 1 CWA50C2894 O 26 ELECTRONIC CONTROLLER MAIN 1 CWA73C7966R O 27 TERMINAL BOARD ASS Y 1 CWA28K1036J 28 CABINET SIDE PLATE CO 1 CWE04C1482 29 SENSOR COMPLETE 1 CWA50C2893 O 30 CABINET SIDE PLATE L 1 CWE041617A 31 CABINET FRONT PLATE CO 1 CWE06C1441 32 C...

Page 96: ...9 31 11 10 15 1 16 17 4 23A 23B 22 2 3 8 7 5 30 12 24 29 6 36 47 46 48 49 50 42 35 23D 23C 45 44 14 41 41 13 Note The above exploded view is for the purpose of parts disassembly and replacement The non numbered parts are not kept as standard service parts ...

Page 97: ...VER 1 CWH7080300J 22 SOUND PROOF BOARD 1 CWH151364 23A SOUND PROOF MATERIAL 1 CWG302856 23B SOUND PROOF MATERIAL 1 CWG302858 23C SOUND PROOF MATERIAL 1 CWG302857 23D SOUND PROOF MATERIAL 1 CWG302855 24 SENSOR COMPLETE 1 CWA50C2894 O 26 ELECTRONIC CONTROLLER MAIN 1 CWA73C7961R O 27 TERMINAL BOARD ASS Y 1 CWA28K1036J 28 CABINET SIDE PLATE CO 1 CWE04C1482 29 SENSOR COMPLETE 1 CWA50C2893 O 30 CABINET ...

Page 98: ...E REMARK 48 SHOCK ABSORBER RIGHT 1 CWG713415 49 SHOCK ABSORBER LEFT 1 CWG713416 50 C C CASE 1 CWG566848 Note All parts are supplied from PAPAMY Malaysia Vendor Code 00029488 O marked parts are recommended to be kept in stock Printed in Malaysia SB0713 0 ...

Reviews: