VM-Series
Deployment
Guide
15
Set Up a VM-Series Firewall on an ESXi Server
Install a VM-Series firewall on VMware vSphere Hypervisor (ESXi)
Step 3
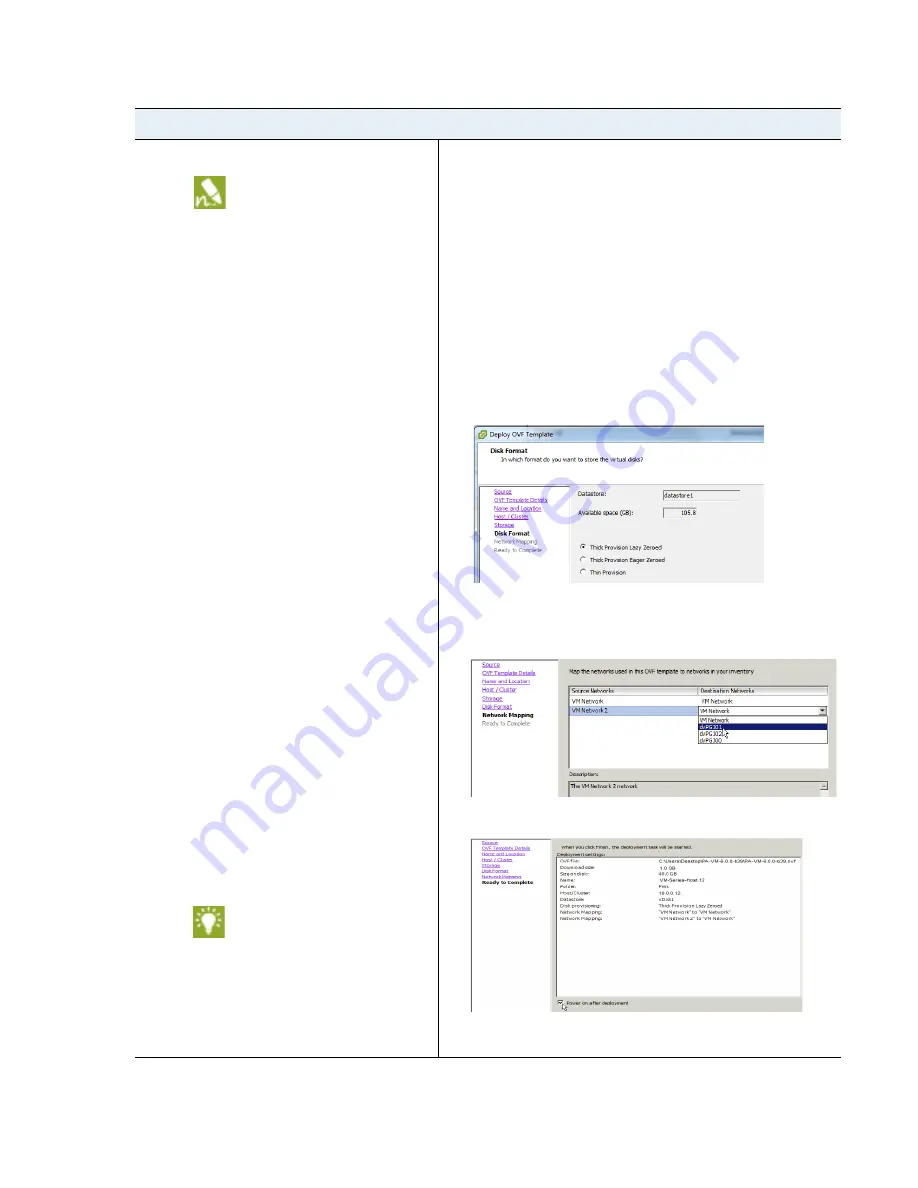
Deploy the OVF template.
If you add additional interfaces
(vmNICs) to the VM-Series
firewall, a reboot is required
because new interfaces are
detected during the boot cycle. To
avoid the need to reboot the
firewall, make sure to add the
interfaces at initial deployment or
during a maintenance window so
that you can reboot the firewall.
To view the progress of the
installation, monitor the
Recent
Tasks
list.
1.
Log in to vCenter using the vSphere client. You can also go
directly to the target ESXi host if needed.
2.
From the vSphere client, select
File > Deploy OVF Template
.
3.
Browse to the OVF template that you downloaded in
Step 1
,
select the file and then click
Next
. Review the templates details
window and then click
Next
again.
4.
Name the VM-Series firewall instance and in the
I
nventory
Location
window, select a Data Center and Folder and click
Next
5.
Select an ESXi host for the VM-Series firewall and click
Next
.
6.
Select the datastore to use for the VM-Series firewall and click
Next
.
7.
Leave the default settings for the datastore provisioning and
click
Next
. The default is
Thick Provision Lazy Zeroed
.
8.
Select the networks to use for the two initial vmNICs. The first
vmNIC will be used for the management interface and the
second vmNIC for the first data port. Make sure that the
Source Networks
maps to the correct
Destination Networks
.
9.
Review the details window, select the
Power on after
deployment
check box and then click
Next
.
10.
When the deployment is complete, click the
Summary
tab to
review the current status.
Provision a VM-Series Firewall (Continued)


