VM-Series
Deployment
Guide
15
About the VM-Series Firewall
Monitor Changes in the Virtual Environment
Step 2
Create dynamic address groups on the
firewall.
View the
tutorial
to see a big
picture view of the feature.
1.
Log in to the web interface of the firewall.
2.
Select
Object > Address Groups
.
3.
Click
Add
and enter a
Name
and a
Description
for the address
group.
4.
Select
Type
as
Dynamic
.
5.
Define the match criteria. You can select dynamic and static tags
as the match criteria to populate the members of the group.
Click
Add Match Criteria
, and select the
And
or
Or
operator and
select the attributes that you would like to filter for or match
against. and then click
OK
.
6.
Click
Commit
.
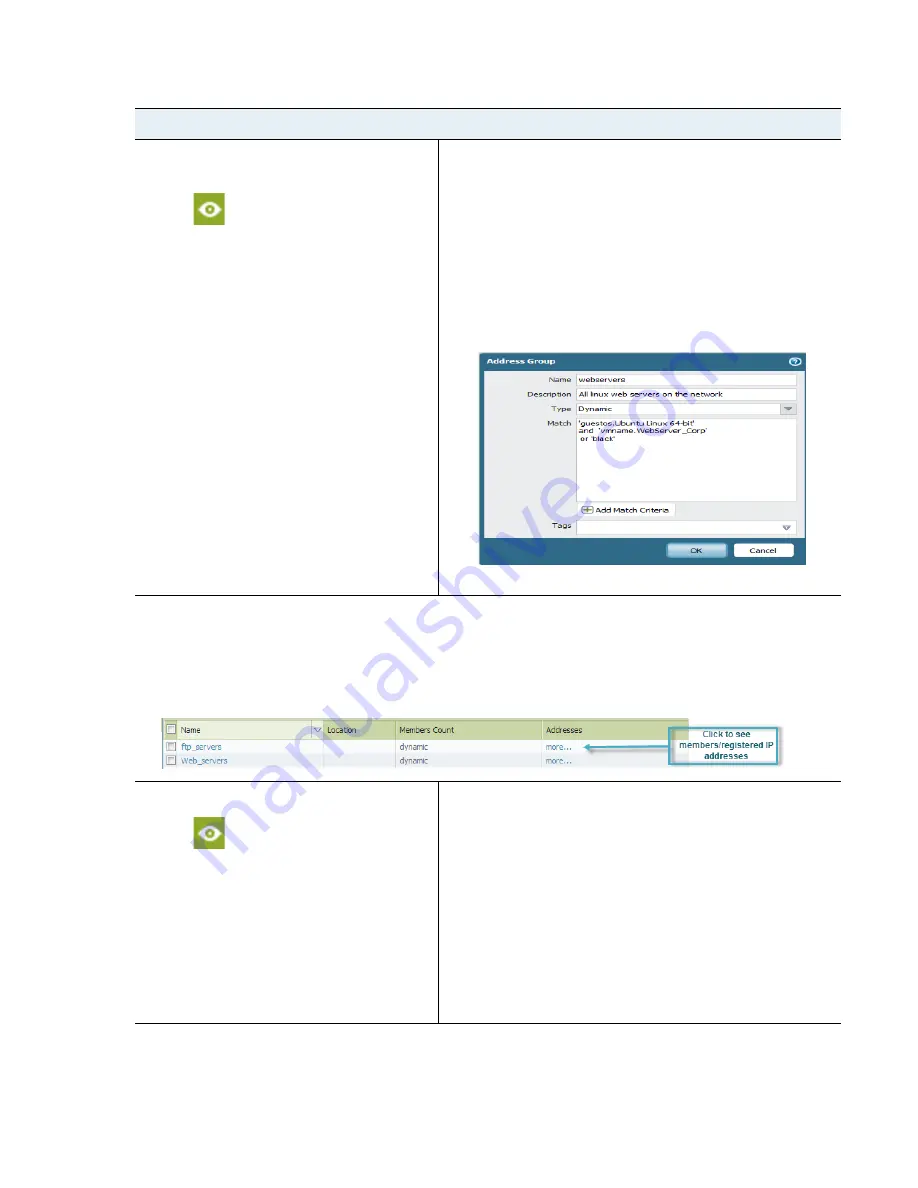
The match criteria for each dynamic address group in this example is as follows:
ftp_server: matches on the guest operating system “Linux 64-bit” and annotated as “ftp” ('guestos.Ubuntu Linux 64-bit'
and 'annotation.ftp').
web-servers: matches on two criteria—the tag black or if the guest operating system is Linux 64-bit and the name of the
server us Web_server_Corp. ('guestos.Ubuntu Linux 64-bit' and 'vmname.WebServer_Corp' or 'black')
Step 3
Use dynamic address groups in policy.
View the
tutorial
.
1.
Select
Policies > Security
.
2.
Click
Add
and enter a
Name
and a
Description
for the policy.
3.
Add the
Source Zone
to specify the zone from which the traffic
originates.
4.
Add the
Destination Zone
at which the traffic is terminating.
5.
For the
Destination Address
, select the Dynamic address group
you created in
Step 2
above.
6.
Specify the action—
Allow
or
Deny
—for the traffic, and
optionally attach the default security profiles to the rule.
7.
Repeats Steps 1 through 6 above to create another policy rule.
8.
Click
Commit
.
Use Dynamic Address Groups in Policy (Continued)


