User’s Manual
12
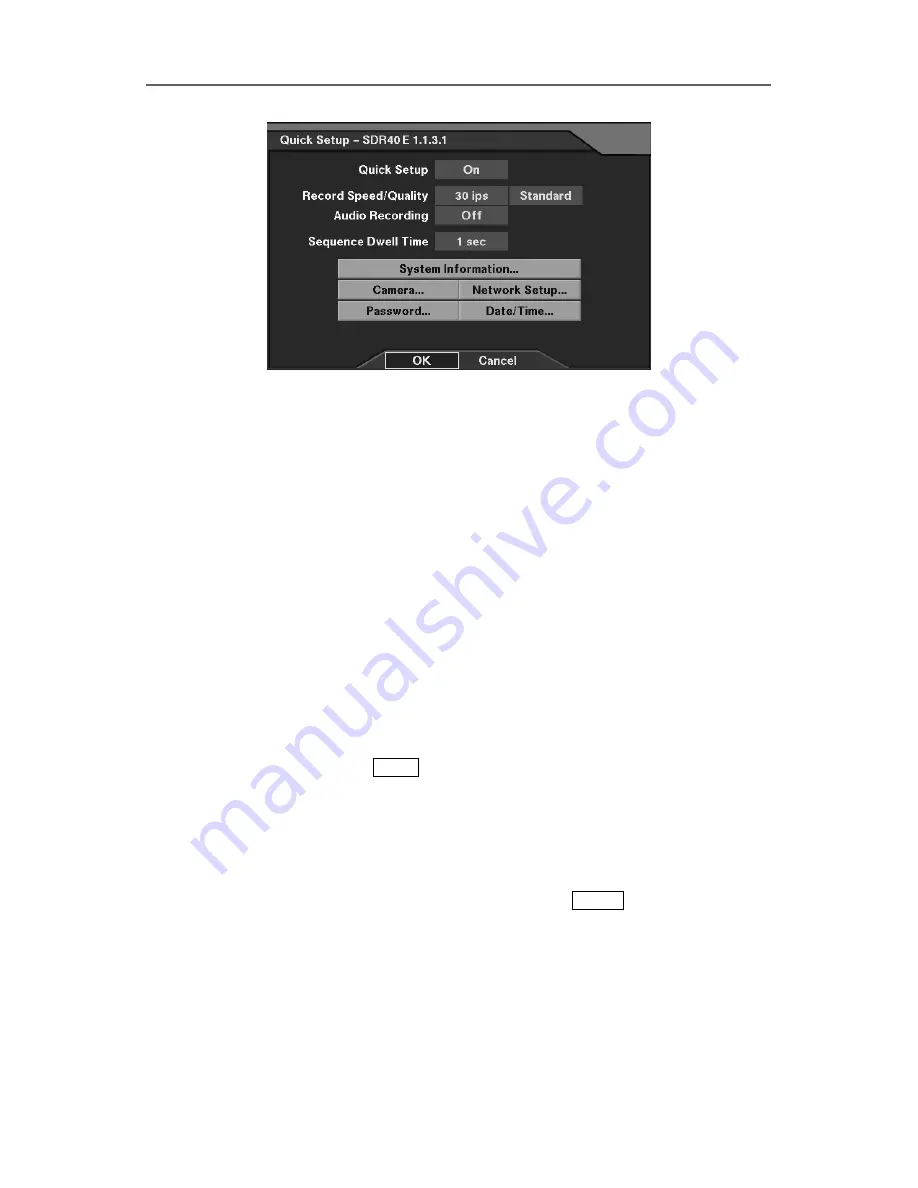
Figure 4 Quick Setup Dialog
Quick Setup
•
Quick Setup:
Enable or disable Quick Setup.
•
Record Speed:
Set the recording speed (1/30ips~30ips).
•
Record Quality:
Set the recording image quality (Very High, High, Standard and Low).
•
Audio Recording:
Enable or disable audio recording (On/Off).
•
Sequence Dwell Time:
Set the camera sequencing dwell time (1 sec~6 sec).
•
System Information:
Set up the system information (Refer to Figure 8 System Information
Dialog.).
•
Camera:
Set up camera information (Refer to Figure 10 Camera Setup Dialog.).
•
Network Setup:
Set up network information (Refer to Figure 35 Network Setup Dialog.
Network-supported premium model only).
•
Password:
Set up the password (Refer to Figure 46 Password Setup Dialog.).
•
Date/Time:
Set up the date/time (Refer to Figure 6 Date/Time Setup Dialog.)
3.2.2 Normal Setup
To select the Normal Setup, press
MENU
on the front panel to display the
Quick Setup
screen first. Select
Off
in the
Quick Setup
field, and exit from the menu by pressing
OK
.
The DVR will reload default settings if
Yes
is selected. The
Normal Setup
screen is then
displayed. To go back to the Quick Setup, select
Quick Setup
in the
Configuration
menu.
In the Normal Setup mode, the user can program each of eight menu options in detail. Refer
to the
Appendix A. Quick Reference
─
Reference Dialog Map
for the setup menu
configuration. The menu icons (buttons) at the bottom of the
Normal Setup
screen can be
scrolled through by arrow buttons on the front panel. Pressing
ENTER
after selecting the
setup menu displays the setup dialog box. Section 3.3~3.8 describes the detailed instructions
to configure programming functions. The programming operation is described in each
section using the
PATH
description, screen dialog and explanation text.
Summary of Contents for PDR-4L
Page 1: ......
Page 2: ...User s Manual ii ...
Page 3: ...Four Channel Digital Video Recorder iii ...
Page 9: ...Four Channel Digital Video Recorder ix ...
Page 10: ......
Page 12: ...User s Manual 2 ...
Page 20: ...User s Manual 10 ...


