RVSG-4014 User’s Manual
3
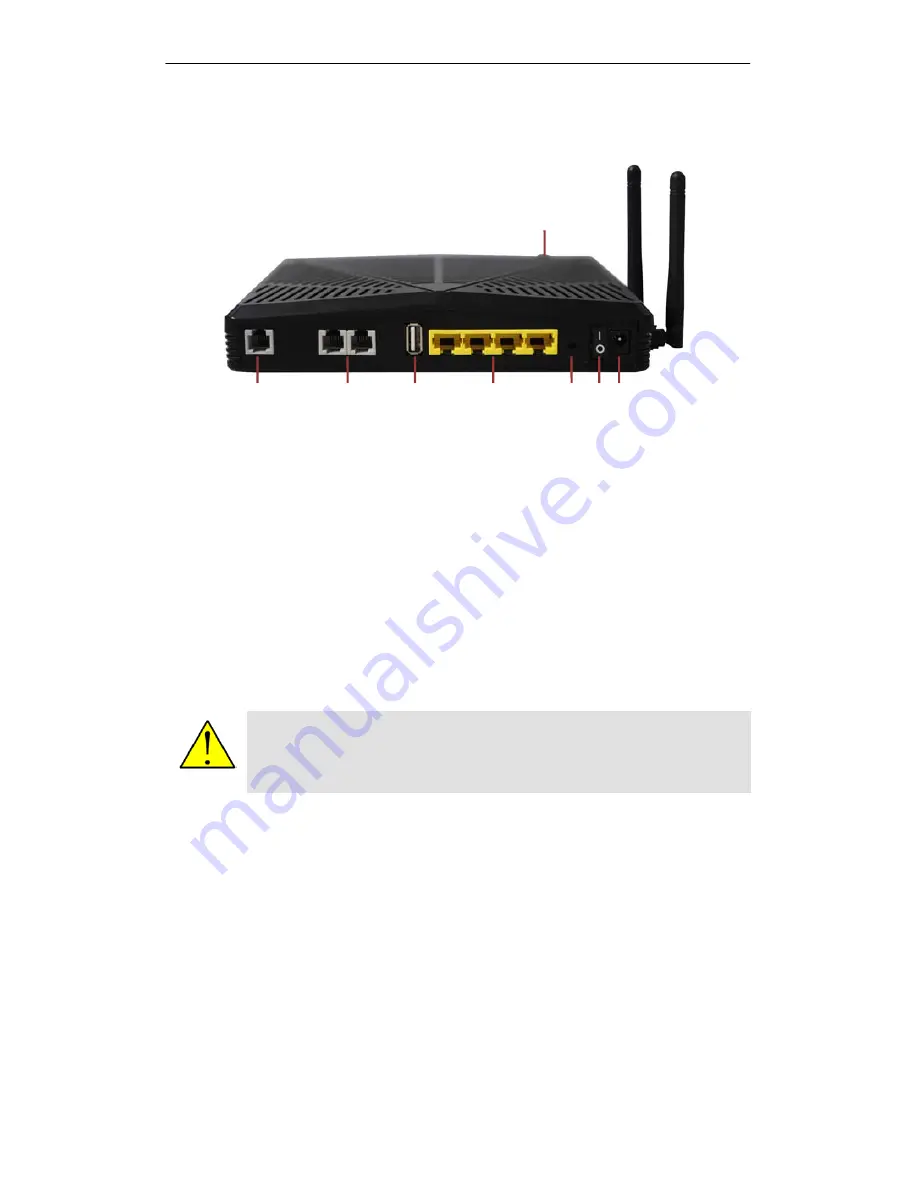
2.2 Ports and Buttons
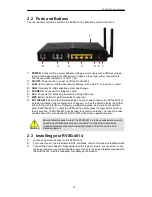
The rear panel contains the ports for the RVSG-4014's data and power connections.
1.
POWER:
Connecter for a power adapter. Using a power supply with a different voltage
rating will damage this product. Make sure to observe the proper power requirements.
The requirement of adapter is 12VDC/ 1.5A.
2.
ON/OFF:
Power switch to power on/off the RVSG-4014.
3.
LAN1-4:
Connectors for Ethernet network devices, such as a PC, hub, switch or router.
4.
USB:
Connects for USB supported printer and storage.
5.
PHONE1-2:
Connectors for telephone sets.
6.
DSL:
Connecter for accessing the Internet through DSL line.
7.
WPS
Button
:
Button for perform wireless connection.
8.
RST (RESET):
Restore the default settings. You may need to restore the RVSG-4014 to
its factory defaults if the configuration is changed, you lose the ability to enter the RVSG-
4014 via the web interface, or following a software upgrade, and you lose the ability to
enter the RVSG-4014. To reset the RVSG-4014, simply press the reset button for more
than 8 seconds. The RVSG-4014 will be reset to its factory defaults. The reboot process
will take about 30 seconds and the RVSG-4014 will become operational again.
Warning
Be sure that all devices to which the RVSG-4014 is to be connected are properly
grounded (earthed) before making a connection. Connecting to improperly
grounded equipment can result in electrical shock to the device, users and
related equipment.
2.3 Installing your RVSG-4014
1.
Locate an optimum location for the RVSG-4014.
2.
For connections to the Ethernet and DSL interfaces, refer to the Quick Installation Guide.
3.
Connect the Power Adapter. Depending upon the type of network, you may want to put
the power supply on an uninterruptible supply. Use only the power adapter supplied with
the RVSG-4014. A different adapter may damage the product.
6
5
4
3
8
7
2 1
Summary of Contents for RVSG-4014
Page 24: ...RVSG 4014 User s Manual 21 ...
Page 44: ...RVSG 4014 User s Manual 41 ...


