


User Manual of Ozaas Network Camera V8.1.4.3
10
Specific steps are as follows:
Step 1
:
Connect the Ozaas Network Camera to the router.
Step 2
:
Assign a LAN IP address, the sub net mask and the gateway. For details, please
refer to 7.3.1.
Step 3
:
In the router, set the PPPoE user name, password and confirm the password.
Step 4
:
Set port mapping, e.g., 80, 8000, and 554 ports. The steps for port mapping vary
according to the different routers. Please call the router manufacturer for assistance with port
mapping.
Step 5
:
Apply a domain name from a domain name provider.
Step 6
:
Configure the DDNS settings in the setting interface of the router.
Step 7
:
Visit the camera via the applied domain name.
Note:
The obtained IP address is dynamically assigned via PPPoE, so the IP address always
changes after rebooting the camera. To solve the inconvenience of the dynamic IP, you
need to get a domain name from the DDNS provider (E.g. DynDns.com). Please follow
the steps below for normal domain name resolution and private domain name resolution
to solve the problem.
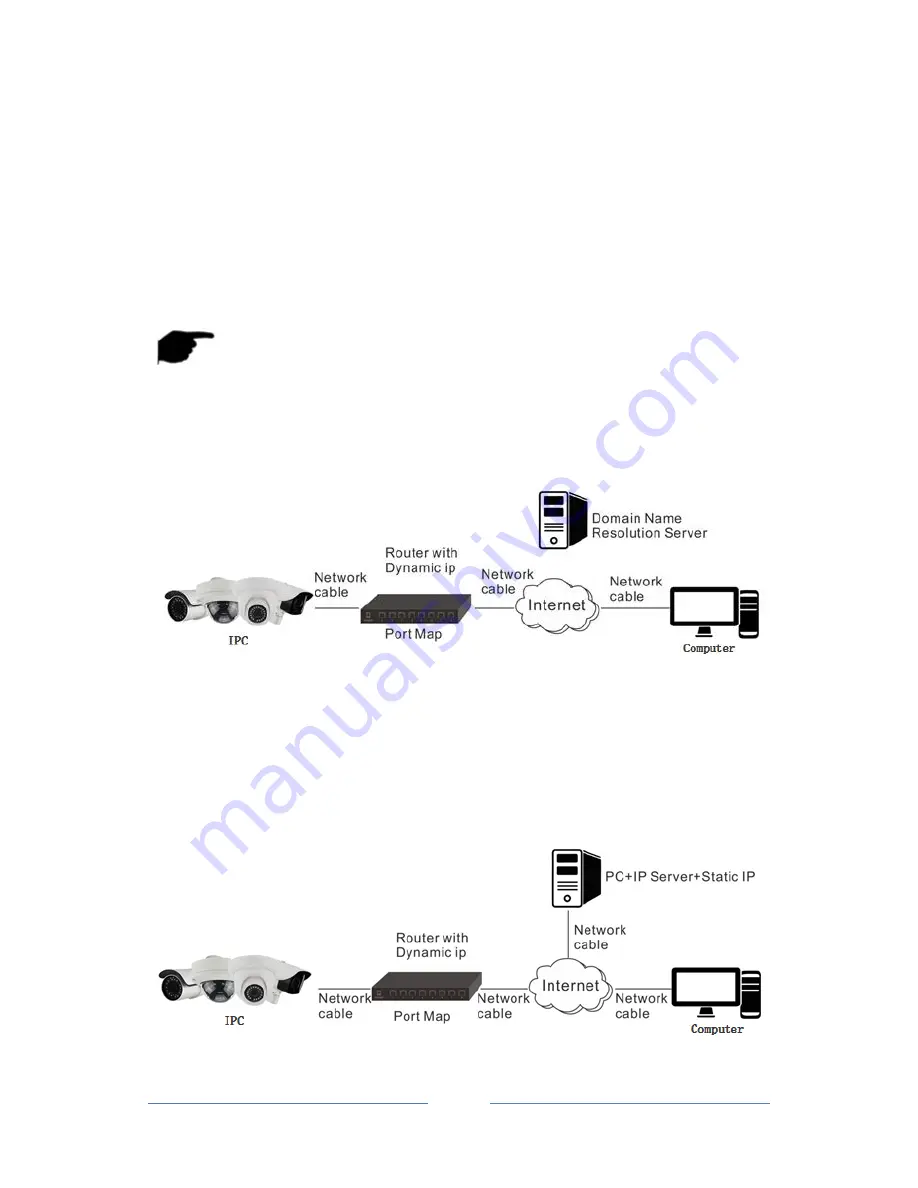
➢
Normal Domain Name Resolution as shown in Figure 2-7:
Figure 2-7
Specific steps are as follows:
Step 1:
Apply a domain name from a domain name provider.
Step 2:
Configure the DDNS settings in the DDNS Settings interface of the Ozaas Network
Camera. For details, please refer to
7.3.2.
Step 3:
Visit the camera via the applied domain name.
➢
Private Domain Name Resolution, as shown in Figure 2-8:
Figure 2-8