Overland Tandberg NEOxl 80 Replacement Instructions Manual Download Page 8

http://support.overlandstorage.com

You can get additional technical support on the Internet at the 

Overland Storage Support web page

, or by contacting Overland Storage using 

the information found on the 

Contact Us

 page on our web site.

NEOxl 80 Spare Chassis Replacement Instructions

10400904

©2019 Overland-Tandberg

Page 8 of 8


Power On the Library

CAUTION:  

After the other components have been moved, the 

library must be turned on and off before replacing an old 
controller card with a new one. Replacing the controller before 
power cycling the library leads to library operation failure.

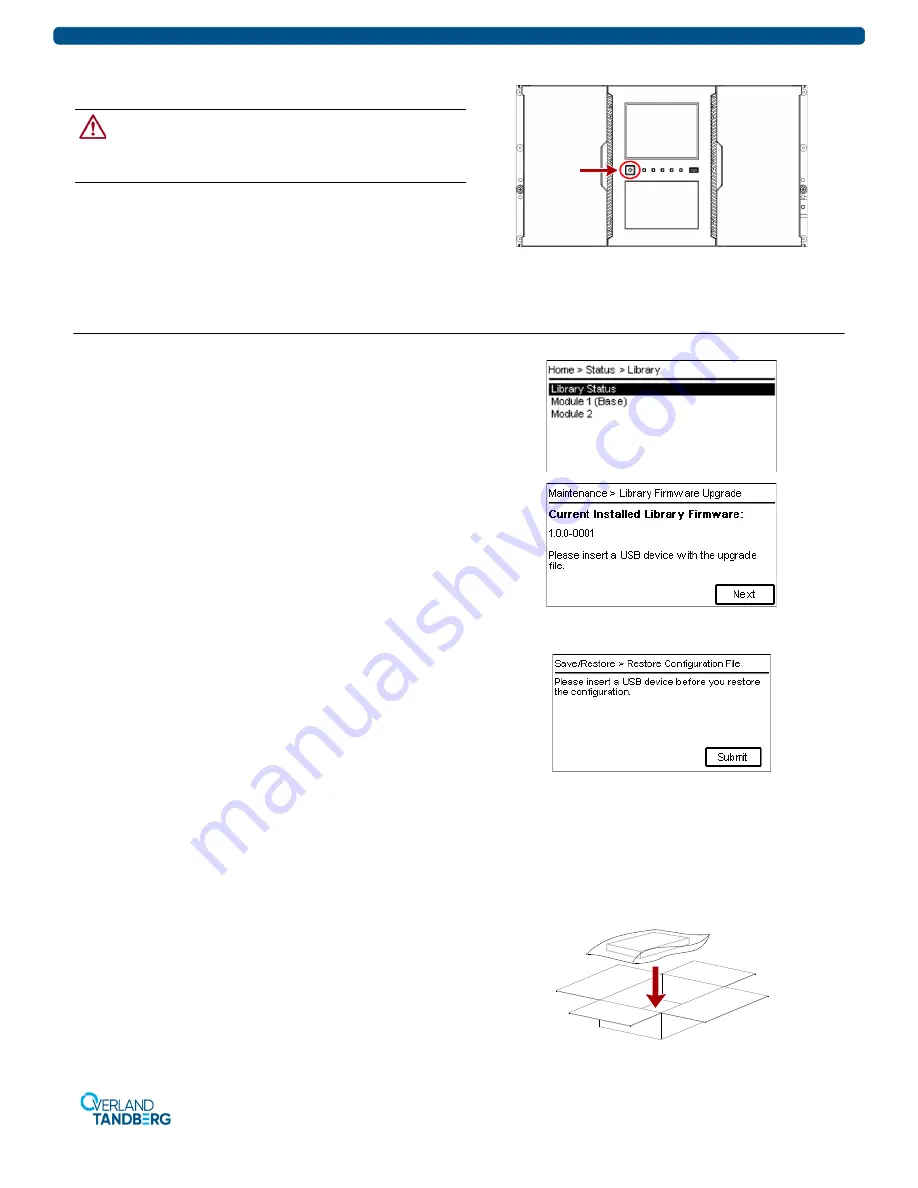
Power on the library from the Base Module front panel by 
pressing and holding down the power button for three (3) 
seconds until the green light on the front panel illuminates 
indicating the status is 

Ready

.

Complete the Procedure

Verifying the Installation & Firmware (Base)

From the OCP or RMI, use the 

Status

 option to verify that the 

new Base Module with all tape drives and magazines is visible. 
Before using your library, it is highly recommended that you 
verify it is running the latest library firmware version:

1.

At the 

Startup Screen

, note the firmware version.

2.

Go to 

http://ftp.overlandstorage.com/Firmware/

Neo_Series/Neo-XL/NEOxl80/

 and check if newer 

firmware is available.

3.

If newer firmware is found, download the 

firmware

 and 

Release Notes

.

4.

Update the firmware from the OCP or RMU using 

Maintenance > Software Upgrades > System Firmware

.

Verify/Restore the Library Configuration

If necessary, restore the configuration to return the Base 
Module to the state it was in before this procedure.

NOTE: Using the RMI is the faster recommended process.

1.

If using the OCP to restore the configuration file, insert 
the 

USB drive

 with the saved configuration into one of 

the USB ports on the Base Module.

2.

Navigate to the

 restore configuration 

screen.

If using the RMI, go to 

Configuration > Restore Defaults 

> Save/Restore Config to file

 and click 

Save

.

If using the OCP, go to 

Configuration > Save/Restore > 

Restore Configuration File

 and press 

Submit

.

3.

If using the OCP, remove the 

USB device

.

Warranty Part Returns to Overland

1.

Place the 

old module 

in the anti-static bag and put it in 

the replacement part’s box.

2.

Use the existing 

packing material

 to secure it in the box.

3.

Use an RMA to return the part to 

Overland Storage

.

For return shipping details and RMA number, go to:

http://docs.overlandstorage.com/return-instructions

.

Summary of Contents for NEOxl 80

Page 1: ...ifting the Base Module remove all tape drives and tapes to reduce the weight see below Overview CAUTION In the NEOxl 80 Tape Library do not replace both the library controller and the Base Module chassis at the same time as the serial numbers for both cannot be updated when both are replaced simultaneously If you receive a new library controller and chassis for the Base Module first install the ne...

Page 2: ...ridges to reduce the unit s weight prior to removal 1 Open the left door 2 Using a small flat head screwdriver or Torx driver gently push in the release tab located in the middle next to the door CAUTION Do not exert force once you encounter resistance Doing so can damage the device 3 Slowly pull the magazine free of the latch 4 Remove cartridges from the magazine noting the slot from which each c...

Page 3: ...the old module is connected NOTE Completely remove the expansion interconnect cables from the modules to prevent damaging the cables during module removal and replacement 3 On a Base Module a Label and remove any Ethernet management cables 3 from the controller b Label and remove any SAS FC cables 4 from the tape drives c If present remove the optional USB device 5 Remove Tape Drives NOTE Because ...

Page 4: ...lfe oder mindestens zwei Personen Seien Sie vorsichtig bei der Rack Installation oder Entnahme um ein versehentliches Kippen des Racks zu vermeiden und das Rack nicht zu beschädigen bzw sich selbst zu verletzen AVERTISSEMENT Afin d éviter des blessures pendant l installation il est recommande d utiliser un monte charge ou au moins deux personnes pour élever ou aligner l module Faites attention lor...

Page 5: ...Torx screwdriver into the front hole 1 to retract the spring lock slide the cover forward 2 until it reaches the tool remove the tool and then continue sliding the cover to the front of the module until all the tabs are released 3 Remove the cover 3 from the existing module 4 At the new module install the cover Align all cover tabs with the slots gently push it down and then slide the cover toward...

Page 6: ...s slide it in until it is flush with the rear panel and finger tighten the thumbscrews to secure it Move Covers If any tape drives were removed from the old module the same drive bay covers from the new module need to be removed and installed on the old module covering all the now empty tape drive bays NOTE The bottom bay of a Base Module doesn t have a cover If a second power supply was present a...

Page 7: ...ll Tape Drives 1 Holding a tape drive by the handle and supporting it from the bottom position it on the alignment rails in front of the appropriate bay 2 Slowly slide the tape drive into the drive bay until it is flush with the rear of the library 3 Finger tighten the blue thumbscrews to secure it 4 Repeat Steps 1 3 for any additional tape drives Reattach Cables and Cords 1 Reconnect the expansio...

Page 8: ...n 1 At the Startup Screen note the firmware version 2 Go to http ftp overlandstorage com Firmware Neo_Series Neo XL NEOxl80 and check if newer firmware is available 3 If newer firmware is found download the firmware and Release Notes 4 Update the firmware from the OCP or RMU using Maintenance Software Upgrades System Firmware Verify Restore the Library Configuration If necessary restore the config...

Reviews: