PAGE 8
#3
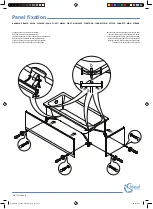
A. Remove the tape from the back of the wall panel (A), take out the 2 pieces of shelf support foam (C) from the wall panel (A).
B. Apply tub surround adhesive at the rounded edge of each piece of shelf support foam (C), firmly push the shelf support foam (C) back into the wall panel until
they are flush with the back of the wall panel.
C. Apply tub surround adhesive at the back of the shelf support foam (C).
A. Enlevez le ruban adhésif à l’arrière du panneau mural (A), retirez les 2 pièces de mousse de support d’étagère (C) de ce panneau mural (A).
B. Appliquez de l’adhésif pour contour de baignoire sur le bord arrondi de chaque pièce de mousse de support d’étagère (C), repoussez fermement la mousse
de support d’étagère (C) dans le panneau mural jusqu’à ce qu’elle soit à fleur avec l’arrière du panneau mural.
C. Appliquez de l’adhésif autour de la baignoire à l’arrière de la mousse de support d’étagère (C).
A. Retire la cinta de la parte posterior del panel de pared (A), saque las 2 piezas de espuma de soporte de estante (C) del panel de pared (A).
B. Aplique el adhesivo para el borde redondeado de cada pieza de espuma de soporte de estante (C), empuje firmemente la espuma de soporte de estante
(C) hacia atrás en el panel de pared hasta que estén al ras con la parte posterior del panel de pared.
C. Aplique adhesivo para el borde de la bañera en la parte posterior de la espuma de soporte de estante (C).
WALL PANELS INSTALLATION
INSTALLATION DE PANNEAUX MURAUX
INSTALACION DE PANELES MURALES
A
B
C
CONSTRUCTION ADHESIVE MUST BE USED, DO NOT USE SILICONE! APPLY GENEROUSLY, UP TO 5
TUBE MAY BE NEEDED.
UTILISER UN ADHÉSIF DE CONSTRUCTION, NE PAS UTILISER DE SILICONE! APPLIQUER
GÉNÉREUSEMENT, JUSQU’À 5 TUBES PEUVENT ÊTRE NÉCESSAIRES.
USE UN ADHESIVO DE CONSTRUCCIÓN, NO USE SILICONA! APLICAR GENEROSAMENTE, SE PUEDEN
NECESITAR HASTA 5 TUBOS.


