Outbound GR-B100 Runner Series Instruction Manual Download Page 10


GPS NE PRO PC software  


Your GPS watch comes with PC software. This software is compatible with the following operating system:  
 

 Windows 

  Windows XP SP 1, 2, 3 

  Windows Vista SP 1, 2 

  Windows 2000 SP 4 

 Windows 

98 


You can use the software to view and analyze your data. 
 

A) 

Software installation: 


1)  Install the GPS NE PRO PC software to your computer. The installer is bundled in the box with your GPS watch. 
2)  Follow the installation guide of the software. This is just a simple installation procedure. You will be prompt on what 

drive you want to install the software. Default location is Program files\GPS NE PRO. You may change the location 
if you wish. 

3)  Click FINISH to complete the installation. 
4)  You may need to re-start your PC after installation. 
5)  GPS NE PRO icon will be placed in your desktop after installation. 


B) 

How to use the software: 


1)  Run the software by double clicking the icon on your desktop. The welcome screen will appear on your desktop. 
2)  Clip the USB cable to your watch. This is the same cable used to charge the battery of the GPS watch. Make sure 

the four pins of the clip have a good connection to the four electrical contacts at the back of the watch.  

3)  Connect the USB cable to the USB port of your PC. The first time you do this, the PC will automatically install the 

drivers for the device.  

4)  The Software will prompt you to download the data. 


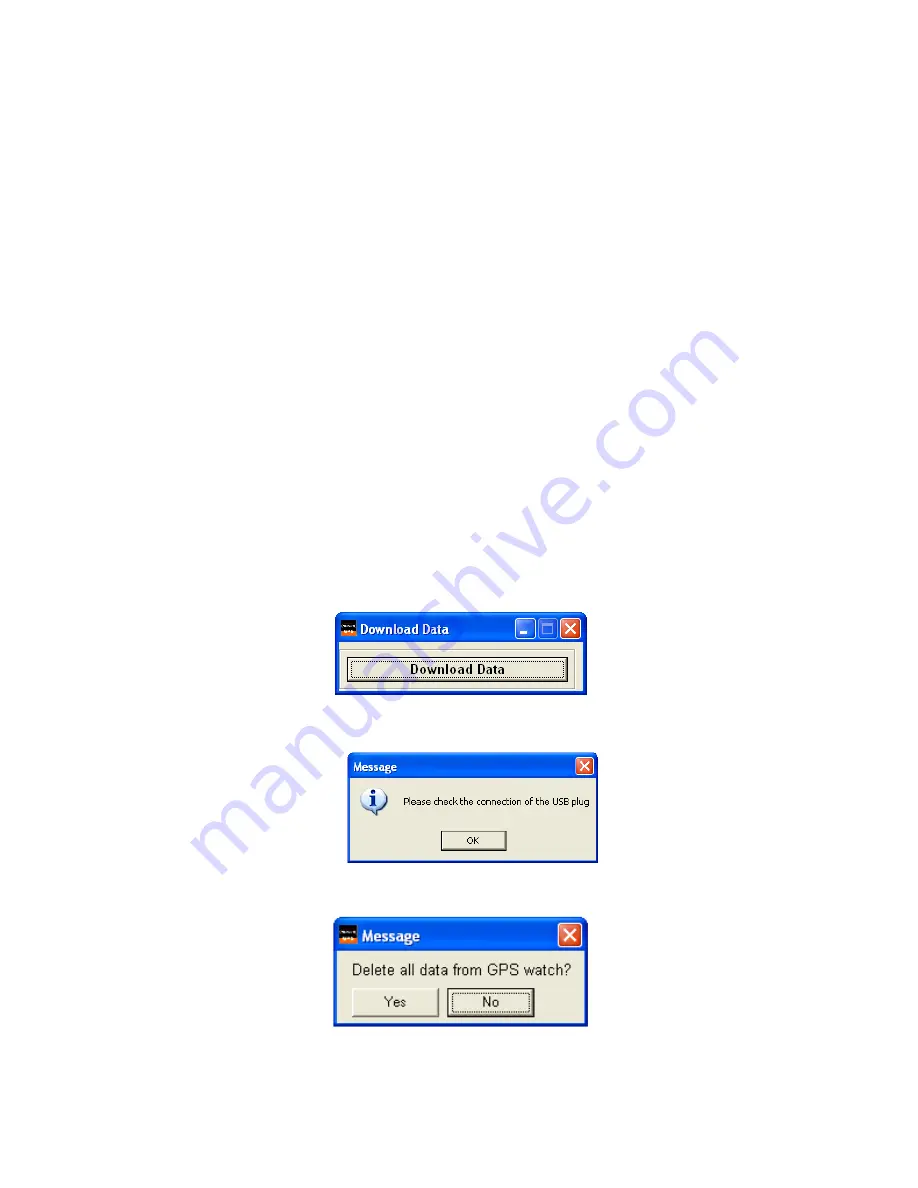
5)  Click on the Download Data tab. Data will be automatically downloaded to your PC. If there no proper contact 

between the USB clip and the watch, an error may occur and the software will prompt you to check the cable. 
Repeat the downloading after checking the cable. 


6)  After downloading the data, the software will prompt you to delete all data in the GPS watch. Default option is NO. 

WARNING!  If you select yes, all data in the watch will be deleted. 


7)  Click the ENTER tab to open Home page  below 


Summary of Contents for GR-B100 Runner Series

Page 1: ...to your unit About GPS Global Positioning System GPS is a satellite based navigation system made up of a network of 24 or more satellites GPS works best in clear weather condition anywhere in the world 24 hours a day Tall buildings may interfere with GPS accuracy When 3 satellite signals are received the watch will have 2D GPS fixed Latitude and Longitude When 4 or more satellite signals are recei...

Page 2: ... television reception which can be determined by turning the equipment off and on the user is encouraged to try to correct the interference by one or more of the following measures Reorient or relocate the receiving antenna Increase the separation between the equipment and receiver Connect the equipment into an outlet on a circuit different from that to which the receiver is connected Consult the ...

Page 3: ...1 Go to SET mode to set the following parameters AUTO LAP TIME UNIT USER details NIGHT CONTRAST CHIME and ALARM Step 4 Acquire Satellite signals To get the correct time of day and begin using your GPS watch you have to acquire GPS signals It may take few minutes to acquire the satellite signals 4 1 Go outside to an open area away from tall buildings and trees Orient the GPS antenna towards the sky...

Page 4: ...if no key operation the GPS will automatically turn OFF and return to time mode 5 2 Using Chronograph mode RUN mode and CHRONOGRAPH mode has the same timer counter When the chronograph is started or stopped in RUN mode the same thing happens in Chronograph mode They just differ in the views This mode is dedicated to chronograph lap time exercise time and distance travelled 5 2 1 Press S7 from RUN ...

Page 5: ...ed Time 1 or Time2 Month Date City code Weekday and battery level indicator TIME NIGHT CONTRAST CHIME setting in Time mode While in Time mode press and hold S11 until the TIME blinks Press S1 or S5 to select any of the sub views TIME NIGHT CONTRAST and CHIME setting Press S3 to enter selected sub views Press S1 or S5 to select Press S3 to confirm Press S7 to exit setting TIME 1 setting in SET mode...

Page 6: ...mode Press S1 or S5 to select 12H or 24H format Press S3 to confirm and exit EXERCISE MODES The watch has the following major exercise modes RUN and CHRONOGRAPH modes RUN mode Press S1 or S7 from TIME mode to enter RUN mode The watch will display the following in succession RUN SEARCH GPS BATTERY level DATA TRACK MEMORY view 1 of RUN mode Also note that if the GPS is already ON when you enter the ...

Page 7: ... you can see how many files are saved in RUN data The watch will show the list of data files with newest on the top of the list 1 Press S1 S5 to scroll thru the list 2 Press S3 to enter the selected data file 3 Press S1 S3 to view the details of the data file Following are the details available Start Time End Time Distance CHRONO Distance Calorie CHRONO Ave Pace Max Pace CHRONO Ave Speed Max Speed...

Page 8: ...time data from GPS satellites Select TIME by pressing S1 S5 and then press S3 to enter Select GPS or MANUAL setting by pressing S1 S5 and then press S3 to enter GPS setting Select TIME ZONE by pressing S1 S5 and press S3 to enter Select DST ON or OFF by pressing S1 S5 and press S3 to enter Select 12H 24H format setting by pressing S1 S5 Press S3 to enter Select M D D M format by pressing S1 S5 and...

Page 9: ... 8 hrs typical continues run with GPS ON and CHRONO ON GPS watch troubleshooting guide PROBLEM QUESTION SOLUTION ANSWER How to turn off the GPS Press and hold S9 for about 5 seconds from any view to turn OFF the GPS I cannot get a GPS signal Take your GPS watch outdoors and away from tress and tall buildings Remain stationary and try acquiring GPS signal again Be sure that the antenna is pointing ...

Page 10: ...the software 1 Run the software by double clicking the icon on your desktop The welcome screen will appear on your desktop 2 Clip the USB cable to your watch This is the same cable used to charge the battery of the GPS watch Make sure the four pins of the clip have a good connection to the four electrical contacts at the back of the watch 3 Connect the USB cable to the USB port of your PC The firs...

Page 11: ...8 Click on any of the tabs to open up the desired window A new window will open with the various tabs Click any of the tabs to view your activity ...

Reviews: